Mazda CX-5 Service & Repair Manual: Condenser Removal/Installation
1. Disconnect the negative battery cable..
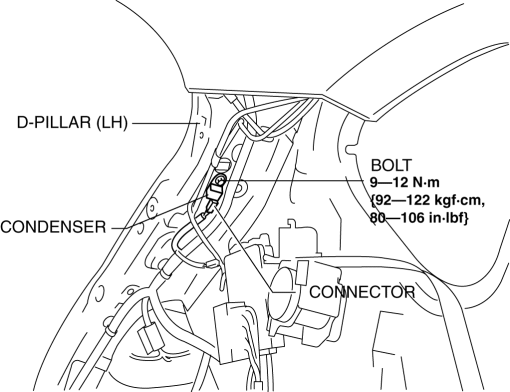
2. Remove the following parts:
a. Trunk board.
b. Trunk end trim (LH).
c. Rear scuff plate (LH).
d. Trunk side trim (LH).
e. D-pillar trim (LH).
3. Disconnect the connector.

4. Remove the bolts.
5. Remove the condenser.
6. Install in the reverse order of removal..
Condenser Installation Note
-
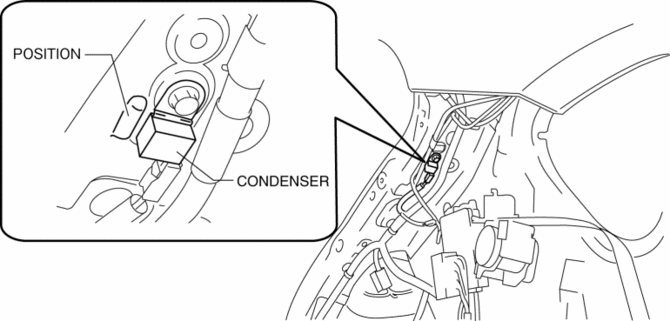
Align with the D-pillar position and install the condenser.

 Condenser Removal/Installation
1. Disconnect the negative battery cable..
2. Discharge the refrigerant..
3. Remove the front under cover No.1..
4. Drain the engine coolant..
5. Remove the following parts:
a. Plug hole pla ...
 Control System [Full Auto Air Conditioner]
Outline
Refrigerant pressure sensor adopted in which refrigerant pressure is changed
into a linear electric signal and precise information is transmitted.
MS-CAN for communicatio ...
Other materials:
Fuel Filler Cap
Purpose, Function
Releases evaporative gas from the fuel tank if there is a malfunction in
the evaporative gas passage between the fuel tank and the intake manifold. As
a result, deformation of the fuel tank caused by evaporative gas pressure is
prevented.
Construction
T ...
Units
Electric current
A (ampere)
Electric power
W (watt)
Electric resistance
ohm
Electric voltage
V (volt)
Length
mm (millimeter)
in (inch)
...
Oil Seal (Side Gear) Replacement
1. Remove the drain plug and the drain differential oil into a container.
2. Install a new washer and the drain plug, and tighten.
3. Remove the rear drive shaft..
4. Remove the clip from the drive shaft.
CAUTION:
Wrap the end of a screwdriver with cloth to prevent scratches to the i ...
