Mazda CX-5 Service & Repair Manual: Blower Unit Removal/Installation
1. Disconnect the negative battery cable..
2. Remove the following parts:
a. Front scuff plate (passenger-side).
b. Front side trim (passenger-side).
c. Dashboard under cover.
d. Glove compartment.
e. Decoration panel.
f. Lower panel (passenger-side).
3. Disconnect the blower motor connector.
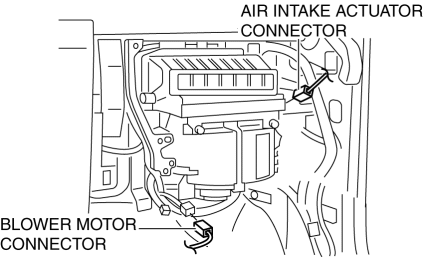
4. Disconnect the air intake actuator connector.
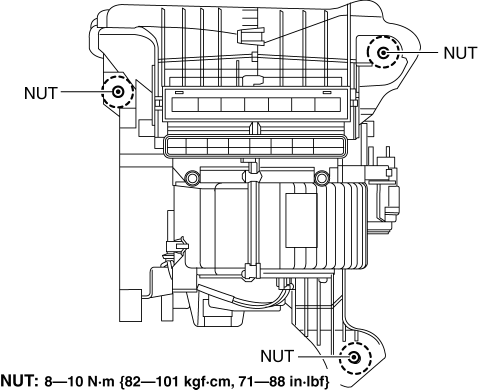
5. Remove the blower unit installation nuts.
6. Pass the blower unit projection between the brackets shown in the figure (1) and rotate the blower unit (2).
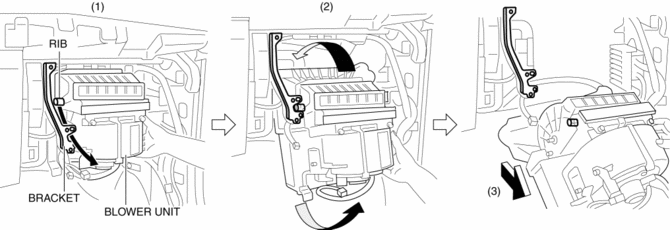
7. Pull out the blower unit in the direction of the arrow (3).
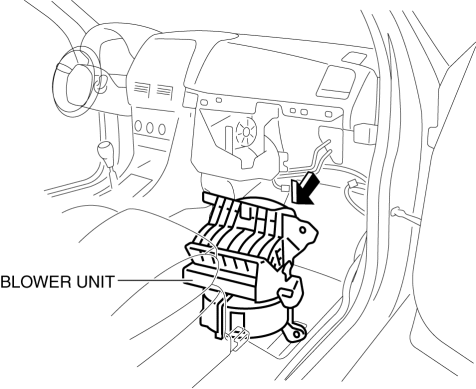
8. Remove the blower unit.
9. Install in the reverse order of removal.
 Blower Unit Disassembly/Assembly
CAUTION:
Apply only the specified grease to the link. Otherwise abnormal noise or
improper operation may result.
1. Disassemble in the order indicated in the table.
...
 Front Heat Duct Removal/Installation
1. Disconnect the negative battery cable..
2. Remove the following parts:
a. Dashboard under cover.
b. Side wall.
c. Glove compartment.
3. Detach the tab and remove the front heat duct.
LH ...
Other materials:
Auto Light Sensor
Purpose
The auto light sensor detects the illumination level above and in front of
the vehicle and outputs it to the front body control module (FBCM).
Function
The auto-light sensor uses the upward illumination level sensor to detect
the illumination level above the vehicle ...
Brake Pedal Inspection
Pedal Height Inspection
1. Measure the distance from the center of the upper surface of the pedal pad
to the insulator and verify that it is as specified.
If not within the specification, inspect the following items and repair or
replace the applicable part if there is any malfunct ...
Auto Wiper System
Outline
The auto wiper system detects the amount of rainfall on the windshield and
automatically operates the windshield wipers intermittently or at low/high speed
and stops. Using the sensitivity adjustment function of the rain sensor, the
operation speed and the intermittent period ...
