Mazda CX-5 Service & Repair Manual: Battery Recharging [Skyactiv G 2.0]
Using GR8-1291:
(See GR8-1291 INSTANT TRAINING MODULE (VIDEO).)
WARNING:
-
Keep all flames away from the battery, otherwise evaporated gas from the battery fluid may catch fire and cause serious injury.
1. Remove the battery filler caps and check the water level. If necessary, add water to the appropriate level. Reinstall the caps.
2. Attach the large red clamp to the positive battery terminal and the large black clamp to the negative terminal.
3. Select the diagnostic icon in the Main Menu, then press the NEXT key.
4. Follow the on-screen instructions to input the appropriate information. Refer to the Mazda GR8-1291 Instruction Manual for more information.
5. The GR8-1291 will test and charge the battery. Before the diagnostic charging results are displayed, use the keypad on the Control Module to input the last 5 digits of the vehicle's VIN and press NEXT to continue.
6. After the charging is completed, the Mazda GR8-1291 will print out the diagnostic charging results and display one of the following results listed below. Review the results and follow the action step for the displayed result.
|
Battery Tester Display |
Action Step |
|
GOOD BATTERY |
Return the battery to service. |
|
REPLACE BATTERY |
Replace the battery. |
|
BAD CELL - REPLACE |
Replace the battery. WARNING:
|
|
SIDE POST TEST |
Test data was inconclusive using the side post. Retest using side post adapters. |
|
JUMP START POST |
Data was inconclusive using the jump start post. Retest at the battery terminals. |
Without Using GR8-1291:
WARNING:
-
Keep all flames away from the battery, otherwise evaporated gas from the battery fluid may catch fire and cause serious injury.
-
Remove the battery filler caps when recharging to prevent battery deformation or damage.
CAUTION:
-
Do not quick charge for more than 30 min. Otherwise, it will damage the battery.
1. Remove the battery and then place it in a pan of water.
2. Remove the battery filler caps.
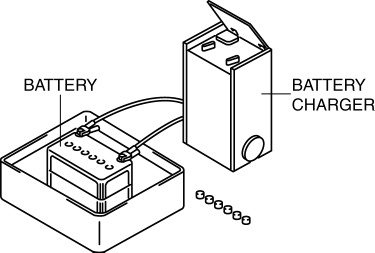
3. Connect a battery charger to the battery and adjust the charging current as follows.
-
Battery slow charge current
-
55D23L (48): 4.5—5.5 A
-
75D23L (52): 5.0—6.0 A
-
Battery quick charge current [30 min]
-
55D23L (48): 30 A
-
75D23L (52): 35 A
4. After the battery is recharged, verify that the voltage is within the specification and remains at the same value for 1 h or more
after the recharging has been completed.
-
If not within specification, replace the battery.
-
Standard voltage
-
12.4 V or more
 Battery Inspection [Skyactiv G 2.0]
WARNING:
Since battery acid is toxic, be careful when handling the battery.
Since battery acid is highly corrosive, be careful not to allow it to contact
clothing or the vehicle.
...
 Battery Removal/Installation [Skyactiv G 2.0]
1. Remove in the order indicated in the table.
2. Install in the reverse order of removal.
1
Negative battery cable
(See NEGATIVE BATTERY CABLE DISCONNECTION/CONNECT ...
Other materials:
Mass Air Flow (MAF) Sensor
Purpose/Function
Detects the intake airflow amount introduced into the cylinder as basic information
for mainly determining the fuel injection amount.
Detects the intake airflow amount introduced into the cylinder and inputs
it to the PCM as an intake airflow amount signal.
...
Cooling Fan Component
Purpose, Function
The cooling fan rotates according to vehicle conditions and enhances the
cooling efficiency of the radiator.
Structural View
Operation
For the operation, refer to CONTROL SYSTEM..
Fail-safe
Function not equipped.
...
D Pillar Reinforcement (Lower) Installation [Panel Replacement]
Symbol Mark
Installation Procedure
1. When installing new parts, measure and adjust the body as necessary to conform
with standard dimensions.
2. Drill holes for the plug welding before installing the new parts.
3. After temporarily installing new parts, make sure the related parts fit p ...
