
Mazda CX-5 Service & Repair Manual: Seat Weight Sensor Control Module Removal/Installation [Two Step Deployment Control System]
CAUTION:
-
When the seat weight sensor control module is replaced with a new one, perform the seat weight sensor calibration using the M?MDS..
1. Switch the ignition to off.
2. Disconnect the negative battery cable and wait for 1 min or more
..
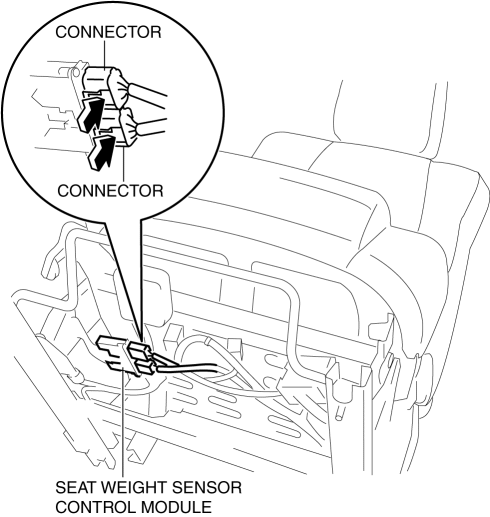
3. Disconnect the connectors.
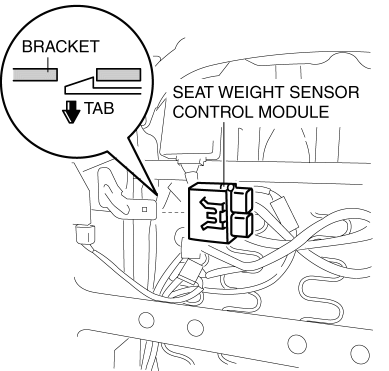
4. Remove the seat weight sensor control module from the bracket by lifting the tab in the direction of the arrow.
5. Install in the reverse order of removal.
6. Switch the ignition ON (engine off or on).
7. Verify that the air bag system warning light illuminates for approx. 6 s
and goes out.
-
If the air bag system warning light does not operate normally, refer to the on-board diagnostic system (air bag system) and perform inspection of the system..
 Seat Weight Sensor Calibration [Two Step Deployment Control System]
CAUTION:
If any of the following work is performed, perform the seat weight sensor
calibration using the M-MDS.
Replacement with a new seat weight sensor
Replacement ...
 Seat Weight Sensor Inspection [Two Step Deployment Control System]
CAUTION:
If any of the following work is performed, perform the seat weight sensor
inspection using the M-MDS.
Removal of the passenger-side seat
Loosening and retig ...
Other materials:
Efficient Installation Of Body Panels
Checking Preweld Measurements And Watching
Align to the standard reference dimensions, based upon the body dimensions
illustration, so that new parts are installed in the correct position.
Welding Notes
For the number of weld points, welding should be performed in accord ...
Starting a Flooded Engine
If the engine fails to start, it may be flooded (excessive fuel in the engine).
Follow this procedure:
1. If the engine does not start within five seconds on the first try, wait ten
seconds and try again.
2. Make sure the parking brake is on.
3. Depress the accelerator all the way and hold it ...
Hood Latch And Release Lever Removal/Installation
Hood Latch
1. Open the hood.
2. Disconnect the negative battery cable..
3. Remove the front bumper..
4. Insert a tape-wrapped flathead screwdriver into the position shown in the
figure.
5. Move the tape-wrapped flathead screwdriver in the direction of arrow (1) shown
in the figure t ...
