Mazda CX-5 Service & Repair Manual: Seat Track Position Sensor [Two Step Deployment Control System]
Purpose
-
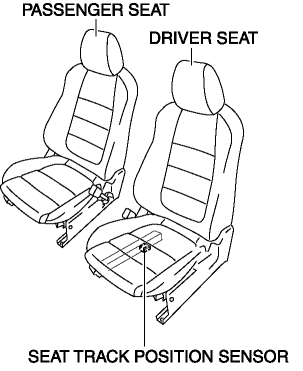
The seat track position sensor detects the front and back positions of the driver seat.
Function
-
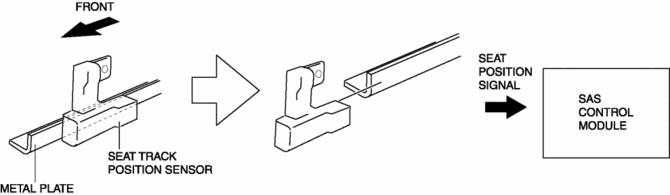
The seat track position sensor converts the seat position into an electrical signal and sends it to the SAS control module.
Construction
-
The seat track position sensor consists of a hall element (semi-conductor) and a magnet. The sensor converts the effect of the magnetic flux (produced by the magnet) on the hall element, into an electrical signal.
-
The seat track position sensor installed on the driver-side seat rail.
Operation
-
If the driver’s seat is slid forward, the seat track position sensor will separate from the metal plate installed to the seat slider.
-
When this occurs the magnetic flux of the sensor changes and that change is sent as an electrical signal to the SAS control module.
-
The SAS control module receives this signal and determines that the driver’s seat has been moved to a forward position.
Fail-safe
-
Function not equipped.
 Seat Track Position Sensor Removal/Installation [Two Step Deployment Control
System]
Seat Track Position Sensor Removal/Installation [Two Step Deployment Control
System]
1. Switch the ignition to off.
2. Disconnect the negative battery cable and wait for 1min or more..
3. Remove the front driver’s seat..
4. Disconnect the connector from the seat track positio ...
 Seat Warmer Control Unit Inspection
WARNING:
Handling a front seat (with built-in side air bag) improperly can accidentally
operate (deploy) the air bag, which may seriously injure you. Read the service
warnings/cautions b ...
Other materials:
Rear Stabilizer Control Link Inspection
1. Remove the rear stabilizer control link..
2. Inspect for bending or damage. If there is any malfunction, replace the rear
stabilizer control link.
3. Rotate the ball joint stud 10 times and shake it side to side 10
times.
4. Measure the ball-joint rotational torque using an Allen wrench ...
Entertainment System
Outline
The following entertainment system has been adopted.
Audio system (with audio system)
Car-navigation system (with car-navigation system)
Park assist system (with park assist system)
Bluetooth system (with Bluetooth system)
...
Front Drive Shaft (Double Offset Joint) Disassembly/Assembly
1. Disassemble in the order indicated in the table.
2. Assemble in the reverse order of disassembly.
1
Boot band (transaxle side)
(See FRONT DRIVE SHAFT (TRIPOD JOINT) DISASSEMBLY/ASSEMBLY.)
2
Clip
(See Clip Disassembly Note.)
...
