Mazda CX-5 Service & Repair Manual: Discharge Headlight Control Module Removal/Installation
WARNING:
-
Incorrect servicing of the discharge headlights could result in electrical shock. Before servicing the discharge headlights, always refer to the service warnings..
1. Disconnect the negative battery cable..
2. Remove the front bumper..
3. Disconnect the connector.

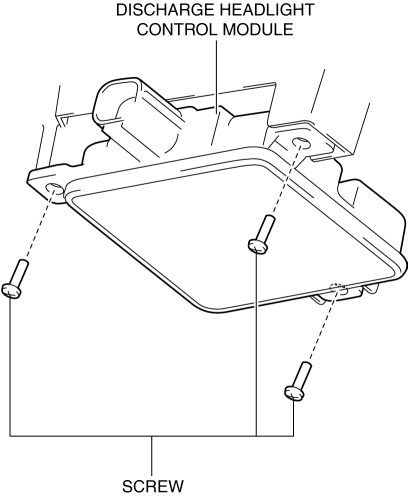
4. Remove the screws.
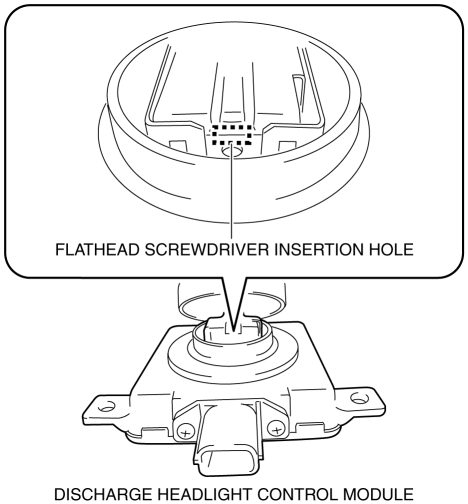
5. Insert a tape-wrapped flathead screwdriver into the clearance between the discharge headlight control module and connector shown in the figure.
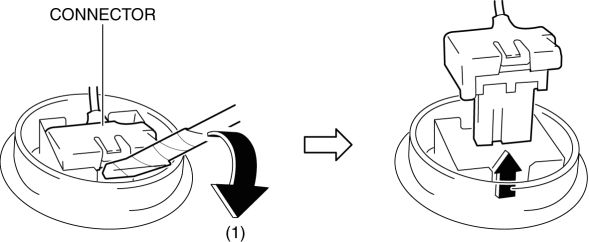
6. Move the flathead screwdriver in the direction of the arrow (1) shown in the figure, lift up the connector, and disconnect it.
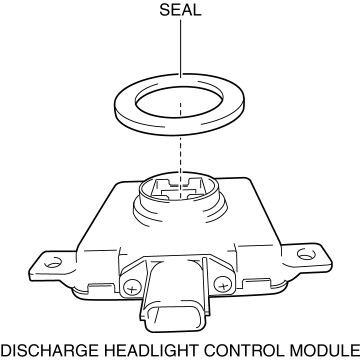
7. Remove the seal.
8. Remove the discharge headlight control module.
9. Install in the reverse order of removal.
 Discharge Headlight Control Module
Purpose
Converts DC voltage from the battery to AC voltage and outputs the stabilized
voltage to the discharge headlight.
Function
The discharge headlight control module control ...
 Discharge Headlight Service Warnings
Discharge Headlight Service Warnings
When replacing a discharge headlight bulb, performing the servicing with
the negative battery cable connected or in a wet work area could result in elect ...
Other materials:
Rear Differential Removal/Installation
WARNING:
When replacing the coupling component, read the special character string
before installing a new coupling component and write it to the AWD control module
after replacement. The special character string is indicated in the two locations
shown in the figure.
1. D ...
Seat Weight Sensor Control Module Removal/Installation [Two Step Deployment
Control System]
CAUTION:
When the seat weight sensor control module is replaced with a new one, perform
the seat weight sensor calibration using the M?MDS..
1. Switch the ignition to off.
2. Disconnect the negative battery cable and wait for 1 min or more..
3. Disconnect the connectors.
...
Pressure Sensor [Two Step Deployment Control System]
Purpose
The pressure sensor determines at an earlier stage whether to detonate the
air bag on the side of the vehicle (around front door) receiving an impact.
This is for improved accuracy of the side air bag operation (deployment).
Function
When the vehicle is involved in ...
