Mazda CX-5 Service & Repair Manual: Torque Box Installation [Panel Replacement]
Symbol Mark

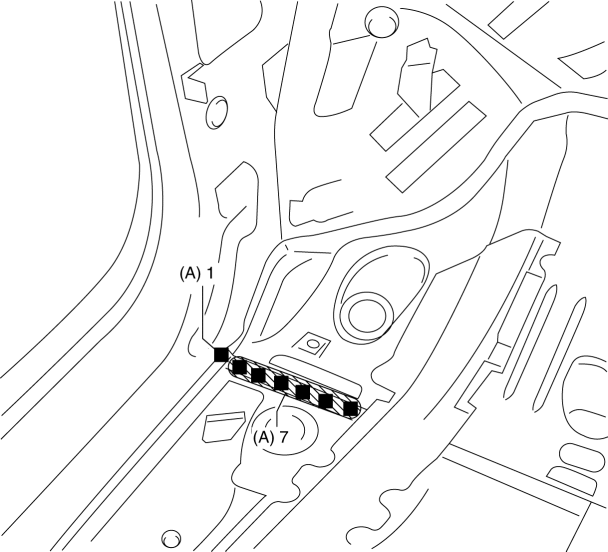
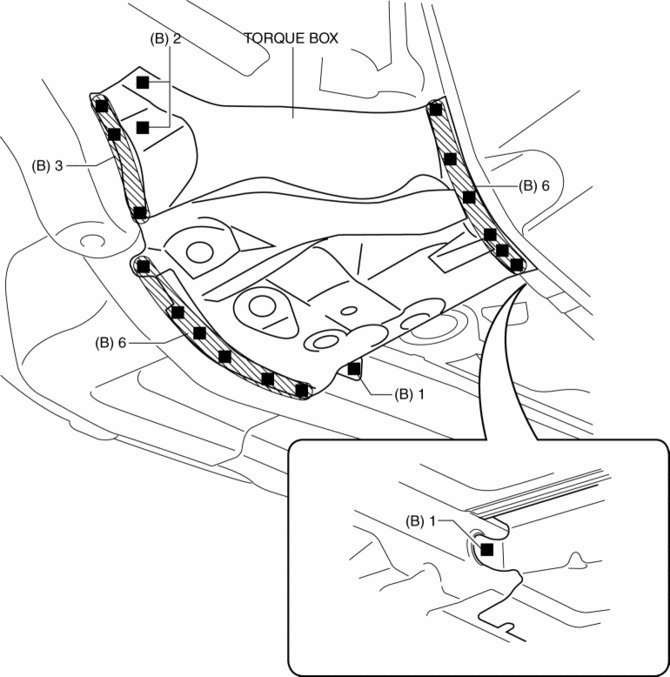
Installation Procedure
1. When installing new parts, measure and adjust the body as necessary to conform with standard dimensions.
2. Drill holes for the plug welding before installing the new parts.
3. After temporarily installing new parts, make sure the related parts fit properly.
4. Plug weld the 8 locations indicated by (A) from the inside shown in the figure.
5. Plug weld the 19 locations indicated by (B) shown in the figure, then install the torque box.
 Side Member Removal [Panel Replacement]
Symbol Mark
Removal Procedure
1. Drill the 45 locations shown in the figure.
NOTE:
When drilling, do not drill a hole all the way through or there could be
a problem when installing ...
 Torque Box Removal [Panel Replacement]
Symbol Mark
Removal Procedure
1. Drill the 19 locations indicated by (A) shown in the figure.
NOTE:
When drilling the 19 locations indicated by (A) shown in the figure, do not
drill ...
Other materials:
Cooling System Cap
Purpose, Function
The cooling system cap maintains appropriate pressure in the engine coolant
passage. In addition, cooling efficiency has been improved by increasing the
engine coolant boiling point.
Construction
The cooling system cap is installed to the upper part of the ...
Power Window Motor Inspection
Front driver side
1. Disconnect the negative battery cable..
2. Remove the inner garnish..
3. Remove the front door trim..
4. Disconnect the power window motor connector.
5. Apply battery positive voltage and connect the ground to power window motor
terminals E and F, and then inspect the ...
Main Silencer
Purpose, Function
Reduces the exhaust noise.
Construction
The main silencer is installed to the vehicle rear, under the trunk compartment.
2WD
AWD
The main silencer consists of the filters, holder, set plates and stiffener.
...
