Mazda CX-5 Service & Repair Manual: Rear Over Fender Removal/Installation
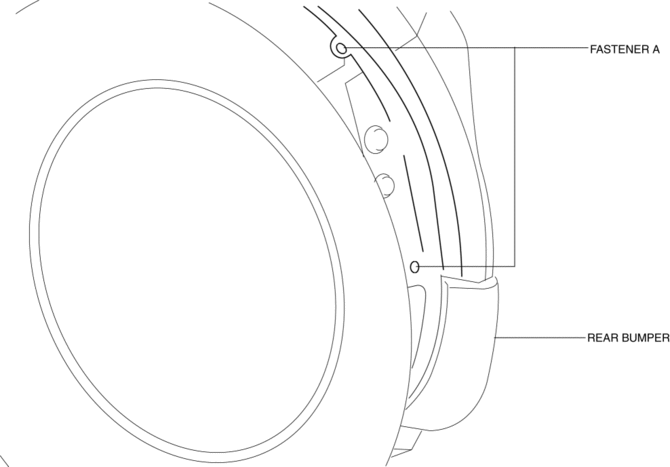
1. Remove fasteners A.
2. Pull the rear over fender in the direction of the arrow while removing clips B.
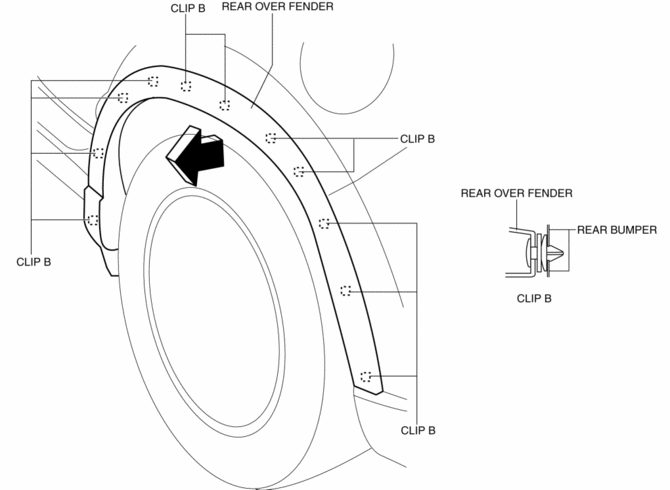
3. Install in the reverse order of removal.
 Rear Fender Panel Removal [Panel Replacement]
Symbol Mark
Removal Procedure
CAUTION:
Avoid cutting with a blowtorch or similar tools as the insulator (shaded
area) is flammable.
1. Rough cut the 3 locations indicated by ...
 Rear Sash Molding Installation
WARNING:
Using a utility knife with bare hands can cause injury. Always wear gloves
when using a utility knife.
NOTE:
Double-sided adhesive tape has already been attached to t ...
Other materials:
Front Seat Back Component Removal/Installation
WARNING:
Handling a side air bag improperly can accidentally operate (deploy) the
air bag, which may seriously injure you. Read the service warnings/cautions
in the Workshop Manual before handling the front seat (side air bag integrated)..
If the sliding mechanisms on both side ...
Auto Light Off System
Purpose
The auto light-Off system turns off the TNS or headlights automatically.
The front body control module (FBCM) performs auto light-Off system fail-safe..
Function
The auto light-Off system controls the front body control module (FBCM).
The front body contro ...
Torque Sensor
Purpose/ Function
The torque sensor detects the steering torque and the steering direction,
and outputs the signal to the Electric Power Steering (EPS) control module (CM).
Construction, Operation
The Hall IC-type torque sensor is installed to the top of the steering column
...
