Mazda CX-5 Service & Repair Manual: Rear Drive Shaft Inspection
1. Inspect each connecting part for looseness.
-
Tighten or replace parts if necessary.
2. Inspect the dust boot on the drive shaft for cracks, damage, leaking grease, and looseness in the boot band.
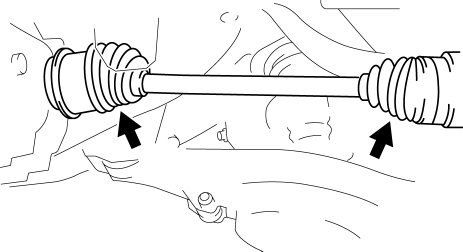
3. Inspect the drive shaft for bends, cracks, and wear in the joints or splines.
-
Repair or replace the drive shaft or boot band if necessary.
 Rear Drive Shaft Disassembly/Assembly
1. Disassemble in the order indicated in the table.
2. Assemble in the reverse order of disassembly.
1
Boot band (differential side)
(See Boot Band (Differential Sid ...
 Rear Drive Shaft Removal/Installation
CAUTION:
Performing the following procedures without first removing the ABS wheel?speed
sensor may possibly cause an open circuit in the harness if it is pulled by
mistake. Before perf ...
Other materials:
Engine
Special Features
For SKYACTIV-G 2.0, the following is performed to lower fuel consumption.
Improvement of mechanical resistance loss
Narrowed down crankshaft journal
Optimized piston skirt shape
Lowered piston ring tension
...
Intermediate Shaft Removal/Installation
WARNING:
The steering column (EPS motor) temperature increases directly after continuous
turning of the steering mechanism which could cause burns if it is touched.
Before performing any servicing, verify that the steering column has cooled
off.
1. Rotate the steering wheel un ...
Auto Leveling Sensor Inspection
1. Disconnect the negative battery cable..
2. Remove the auto leveling sensor..
3. Prepare three dry cell batteries (1.5 V).
4. Connect the three dry cell batteries in a series.
5. Connect the positive pole of the dry cell battery to auto leveling sensor
terminal C, and the negative po ...
