Mazda CX-5 Service & Repair Manual: Rear Door Speaker Removal/Installation
Without Bose®
NOTE:
-
If the procedure is performed while holding the front door speaker cone, it could deform the cone causing a malfunction. Therefore, perform the procedure while holding any part other than the cone.
1. Disconnect the negative battery cable..
2. Remove the rear door trim..
3. Disconnect the connector.
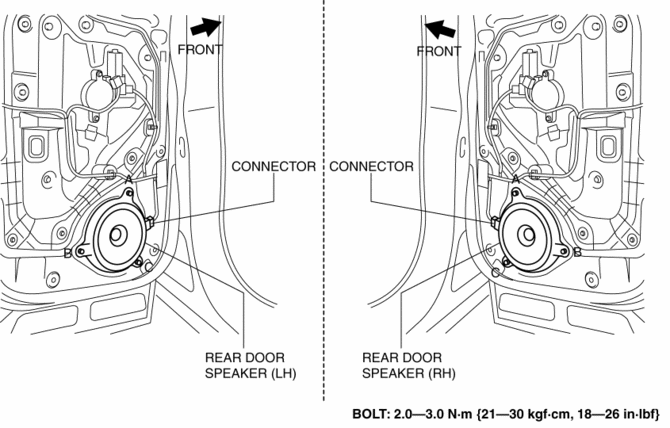
4. Remove the bolts in alphabetical order.
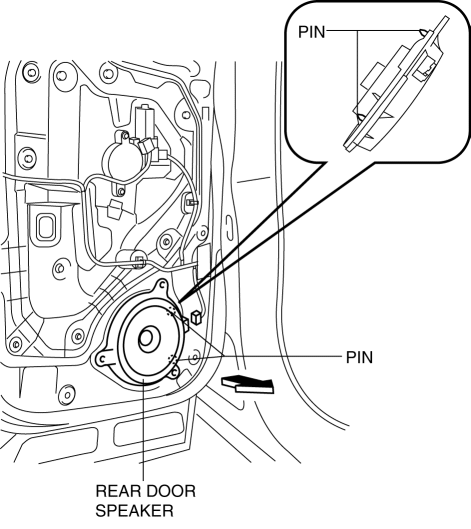
5. Pull the rear door speaker in the direction of the arrow shown in the figure and remove it while detaching the pins.
6. Install in the reverse order of removal.
With Bose®
1. Disconnect the negative battery cable..
2. Remove the rear door trim..
3. Disconnect the connector.
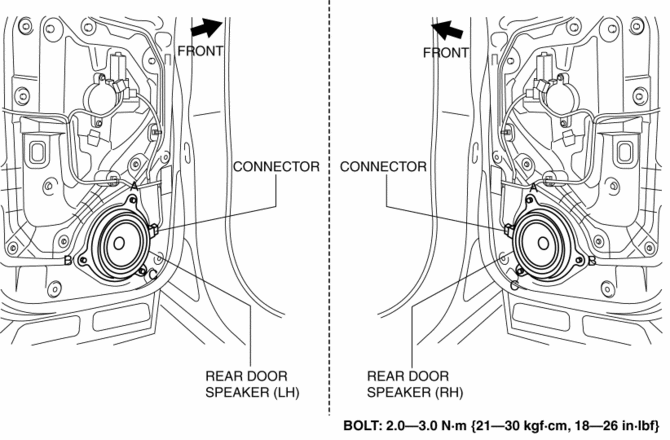
4. Remove the bolts in alphabetical order.
5. Pull the rear door speaker in the direction of the arrow shown in the figure and remove it while detaching the pins.

6. Install in the reverse order of removal.
 Rear Door Speaker Inspection
1. Disconnect the negative battery cable..
2. Remove the rear door trim..
3. Disconnect the rear door speaker connector..
4. Verify that the resistance between the rear door speaker terminals is ...
 Rear Mount Camera
Purpose, Function
The rear mount camera shoots the conditions at the rear of the vehicle in
color, and after converting the video signal, it outputs the signal to the audio
unit. (with co ...
Other materials:
Rear Door Speaker Inspection
1. Disconnect the negative battery cable..
2. Remove the rear door trim..
3. Disconnect the rear door speaker connector..
4. Verify that the resistance between the rear door speaker terminals is as indicated
in the table.
If not as indicated in the table, replace the rear door sp ...
Driver and Front Passenger Occupant Classification System
First, please read “Supplemental Restraint System (SRS) Precautions” carefully.
Driver Seat Slide Position Sensor
Your vehicle is equipped with a driver seat slide position sensor as a part of
the supplemental restraint system. The sensor is located under the driver seat.
The sensor ...
Vanity Mirror Illumination Bulb Removal/Installation
1. Disconnect the negative battery cable..
2. Insert a tape-wrapped flathead screwdriver into the service hole in the position
shown in the figure.
3. Move a flathead screwdriver in the direction of the arrow (1) shown in the
figure and detach the lens tab and sunvisor.
4. Detach a ...
