Mazda CX-5 Owners Manual: Hood
WARNING
Always check that the hood is closed and securely locked:
A hood that is not closed and securely locked is dangerous as it could fly open while the vehicle is moving and block the driver's vision which could result in a serious accident.
Opening the Hood
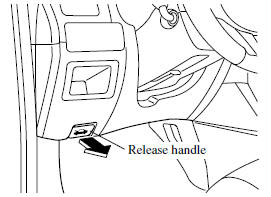
1. With the vehicle parked, pull the release handle to unlock the hood.
2. Insert your hand into the hood opening, slide the latch lever to the right, and lift up the hood.
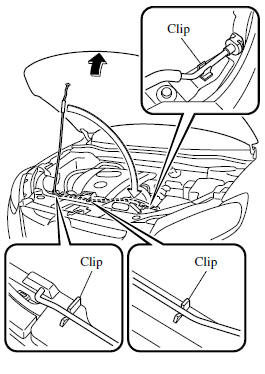
3. Grasp the support rod in the padded area and secure it in the support rod hole indicated by the arrow to hold the hood open.

Closing the Hood
1. Check under the hood area to make certain all filler caps are in place and all loose items (e.g. tools, oil containers, etc.) have been removed.
2. Lift the hood, grasp the padded area on the support rod, and secure the support rod in the clip. Verify that the support rod is secured in the clip before closing the hood.
3. Lower the hood slowly until it rests in the unlocked position, and then remove your hands. Push the front center edge of the hood downward until a latching sound is heard, and the hood closes completely.
 Owner Maintenance Precautions
The owner or a qualified service technician should make these vehicle inspections
at the indicated intervals to ensure safe and dependable operation.
Bring any problem to the attention of an Author ...

Other materials:
Scheduled Maintenance (Mexico)
Follow Schedule 1 if the vehicle is operated mainly where none of the following
conditions apply.
• Repeated short-distance driving
• Driving in dusty conditions
• Driving with extended use of brakes
• Driving in areas where salt or other corrosive
materials are used
• Driving on ...
Changing a Flat Tire
NOTE
If the following occurs while driving, it could indicate a flat tire.
• Steering becomes difficult.
• The vehicle begins to vibrate excessively.
• The vehicle pulls in one direction.
If you have a flat tire, drive slowly to a level spot that is well off the road
and out of the way ...
Rear Shock Absorber Disposal
WARNING:
Whenever drilling into a rear shock absorber, wear protective eye wear. The
gas in the rear shock absorber is pressurized, and could spray metal chips into
the eyes and face when drilling.
1. Clamp a rear shock absorber on a flat surface or with the piston pointing
...
