Mazda CX-5 Owners Manual: Head Restraints
Your vehicle is equipped with head restraints on all outboard seats and the rear center seat. The head restraints are intended to help protect you and the passengers from neck injury.
WARNING
Always drive with the head restraints installed when seats are being used and make sure they are properly adjusted.:
Driving with the head restraints adjusted too low or removed is dangerous. With no support behind your head, your neck could be seriously injured in a collision.
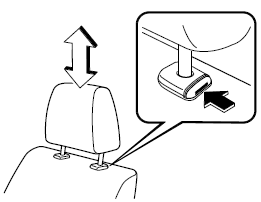
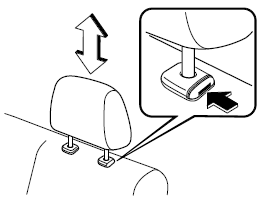
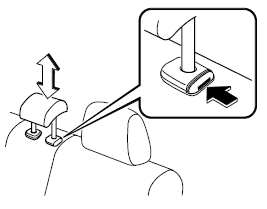
Height adjustment
To raise a head restraint, pull it up to the desired position.
To lower the head restraint, press the stopcatch release, then push the head restraint down.
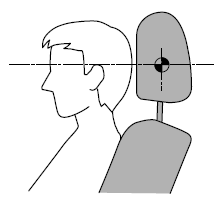
Adjust the head restraint so that the center is even with the top of the passenger's ears.
Front outboard seat
Rear outboard seat
Rear center seat
Removal/Installation
To remove the head restraint, pull it up while pressing the stop-catch.
To install the head restraint, insert the uprights into the holes while pressing the stop-catch.
WARNING
Always drive with the head restraints installed when seats are being used and make sure they are properly installed:
Driving with the head restraints not installed is dangerous. With no support behind your head, your neck could be seriously injured in a collision.
 Rear Seat
Split Folding
The seatbacks can be folded down to provide more space in the luggage compartment.
WARNING
Tightly secure cargo in the luggage compartment when it is transported
with the seatbacks ...

Other materials:
Auto Dimming Mirror
Purpose
The automatic glare prevention rearview mirror prevents the driver from being
affected by light from vehicles at the rear.
Structural view
System wiring diagram
Function
The automatic glare prevention rearview mirror detects the level of the surrounding
li ...
Starter Interlock Switch Inspection [Skyactiv G 2.0]
CAUTION:
Do not reuse the starter interlock switch if it is removed from the vehicle
even once. Replace with a new starter interlock switch when installing.
1. Disconnect the negative battery cable..
2. Disconnect the starter interlock switch connector.
3. Verify that the contin ...
Uniform Tire Quality Grading System (UTQGS)
Uniform Tire Quality Grading System (UTQGS)
This information relates to the tire grading system developed by the U.S. National
Highway Traffic Safety Administration for grading tires by tread wear, traction,
and temperature performance.
Tread Wear
The tread wear grade is a comparative rating ...
