Mazda CX-5 Service & Repair Manual: Front Side Trim Removal/Installation
1. Remove the front scuff plate..
2. Partially peel back the seaming welt.
3. Remove the cap nut.
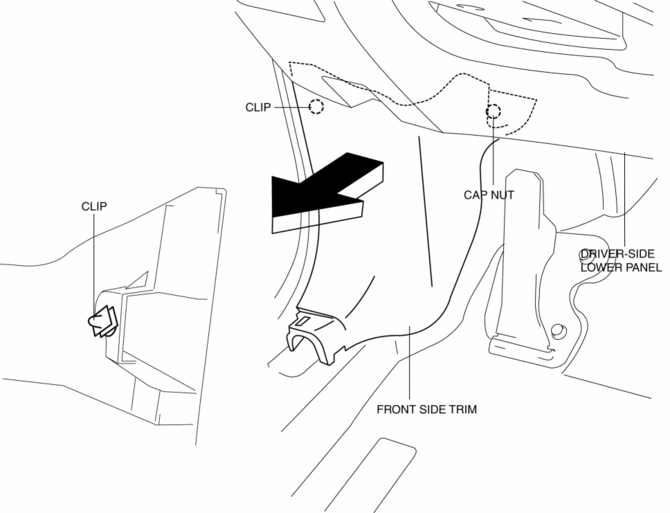
4. Pull the front side trim in the direction of the arrow shown in the figure and remove it while detaching the clip.
5. Install in the reverse order of removal.
 Front Scuff Plate Removal/Installation
1. Take the shaded area shown in the figure, detach tab A while pulling the front
scuff plate in the direction of the arrow (1) shown in the figure, then detach the
hook B, clip C, and pin D while ...
 Headliner
Purpose/Function
The headliner is equipped with a shock absorbing pad for driver's head protection
during a collision.
Construction
The front and rear side of the headliner ...
Other materials:
Roof Molding Removal
1. Insert a tape-wrapped flathead screwdriver in the position shown in the figure.
2. Rotate a tape-wrapped flathead screwdriver in the direction of the arrow in
the order of (1), (2) shown in the figure and remove the roof molding from the front
T-stud.
3. Rotate the roof molding in th ...
Event Data Recorder
Event Data Recorder
This vehicle is equipped with an event data recorder (EDR). The main purpose
of an EDR is to record, in certain crash or near crash-like situations, such as
an air bag deployment or hitting a road obstacle, data that will assist in understanding
how a vehicle's systems ...
Thermostat Removal/Installation
WARNING:
Never remove the cooling system cap or loosen the radiator drain plug while
the engine is running, or when the engine and radiator are hot. Scalding engine
coolant and steam may shoot out and cause serious injury. It may also damage
the engine and cooling system.
Tu ...
