Mazda CX-5 Service & Repair Manual: Cargo Compartment Light Removal/Installation
1. Disconnect the negative battery cable..
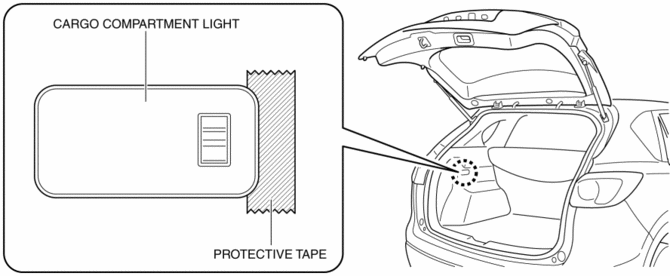
2. To prevent scratches or damage, affix protective tape to the position shown in the figure.
CAUTION:
-
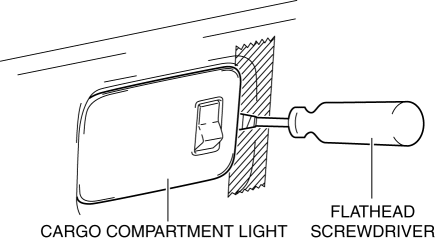
If a flathead screwdriver is inserted into the gap between the cargo compartment light and trunk side trim, the trunk side trim could interfere with the flathead screwdriver and be damaged. When removing the cargo compartment light from the trunk side trim, perform the procedure after affixing protective tape to the trunk side trim.
3. Insert a tape-wrapped flathead screwdriver into the gap between the cargo compartment light and trunk side trim shown in the figure.
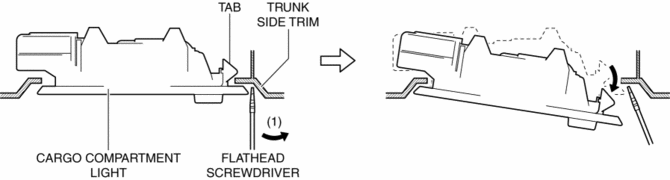
4. Move the flathead screwdriver in the direction of the arrow (1) shown in the figure, pull out the cargo compartment light from the trunk side trim, and detach the cargo compartment light tab and trunk side trim.
5. Remove the cargo compartment light.
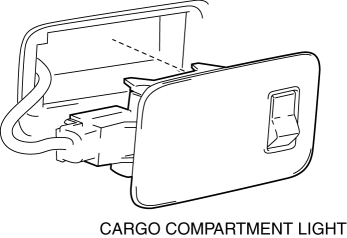
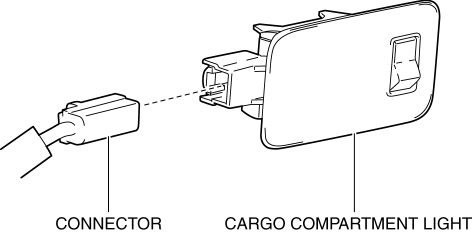
6. Disconnect the connector.
7. Install in the reverse order of removal.
 Cargo Compartment Light Inspection
1. Disconnect the negative battery cable..
2. Remove the cargo compartment light..
3. Verify that the continuity between the cargo compartment light terminals is
as indicated in the table.
...
 Lighting System Personalization
A personalization function has been adopted with which settings for each
function can be changed.
The following settings for the auto light system and interior light control
system ...
Other materials:
Hazard Warning Flasher
The hazard warning lights should always be used when you stop on or near a roadway
in an emergency.
The hazard warning lights warn other drivers that your vehicle is a traffic hazard
and that they must take extreme caution when near it.
Depress the hazard warning flasher and all the turn sig ...
Wiper/Washer System Personalization
A customize function has been adopted which switches the auto wiper system
between operable/inoperable.
Using Mazda Modular Diagnostic System (M-MDS)
The auto wiper function can be enabled or disabled using the Mazda Modular
Diagnostic System (M-MDS). Refer to the Workshop M ...
Seat Belt Extender
If your seat belt is not long enough, even when fully extended, a seat belt extender
may be available to you at no charge from your Authorized Mazda Dealer.
This extender will be only for you and for the particular vehicle and seat. Even
if it plugs into other seat belts, it may not hold in the ...
