
Mazda CX-5 Owners Manual: Wiper Blades
CAUTION
●Hot waxes applied by automatic car washers have been known to affect the wiper's ability to clean windows.
● To prevent damage to the wiper blades, do not use gasoline, kerosene, paint thinner, or other solvents on or near them.
● When the wiper lever is in the AUTO position and the ignition is switched ON, the wipers may move automatically in the following cases:
● If the windshield above the rain sensor is touched.
● If the windshield above the rain sensor is wiped with a cloth.
● If the windshield is struck with a hand or other object.
● If the rain sensor is struck with a hand or other object from inside the vehicle.
Be careful not to pinch hands or fingers as it may cause injury, or damage the wipers. When washing or servicing your Mazda, make sure the wiper lever is in the OFF position.
Contamination of either the windshield or the blades with foreign matter can reduce wiper effectiveness. Common sources are insects, tree sap, and hot wax treatments used by some commercial car washes.
If the blades are not wiping properly, clean the window and blades with a good cleaner or mild detergent; then rinse thoroughly with clean water. Repeat if necessary.
Replacing Windshield Wiper Blades
When the wipers no longer clean well, the blades are probably worn or cracked.
Replace them.
CAUTION
To prevent damage to the wiper arms and other components, do not try to sweep the wiper arm by hand.
NOTE
To prevent damage to the wiper arm blades when raising both the driver and passenger side wiper arms, raise the driver side wiper arm first. Conversely, when setting down the wiper arms, set the passenger side wiper arm down first.
1. Raise the wiper arm.
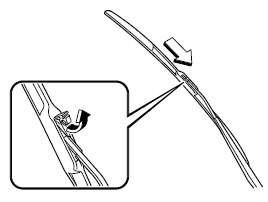
2. Open the clip and slide the blade assembly in the direction of the arrow.
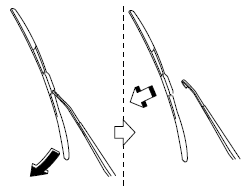
3. Tilt the blade assembly and remove it from the arm.
CAUTION
To prevent damage to the windshield let the wiper arm down easily, do not let it slap down on the windshield.
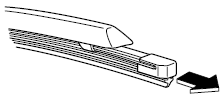
4. Pull down the blade rubber and slide it out of blade holder.
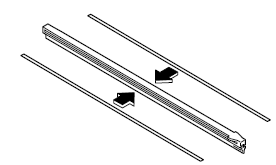
5. Remove the metal stiffeners from each blade rubber and install them in the new blade.
CAUTION
● Do not bend or discard the stiffeners. You need to use them again.
● If the metal stiffeners are switched, the blade's wiping efficiency could be reduced.
So do not use the driver's side metal stiffeners on the passenger's side, or vice versa.
● Be sure to reinstall the metal stiffeners in the new blade rubber so that the curve is the same as it was in the old blade rubber.
6. Carefully insert the new blade rubber.
Then install the blade assembly in the reverse order of removal.
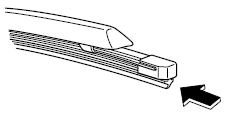
Replacing Rear Window Wiper Blade
When the wiper no longer cleans well, the blade is probably worn or cracked.
Replace it.
CAUTION
To prevent damage to the wiper arm and other components, do not move the wiper by hand.
1. Remove the cover and raise the wiper arm.
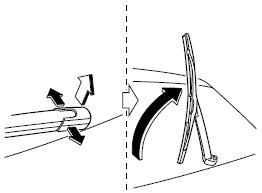
2. Firmly rotate the wiper blade to the right until it unlocks, then remove the blade.
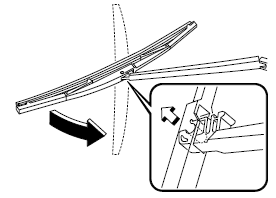
CAUTION
To prevent damage to the rear window, do not let the wiper arm fall on it.
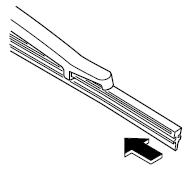
3. Pull down the blade rubber and slide it out of the blade holder.
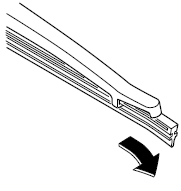
4. Remove the metal stiffeners from the blade rubber and install them in the new blade.
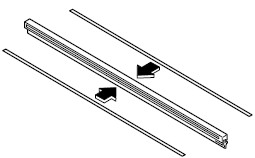
CAUTION
Do not bend or discard the stiffeners.
You need to use them again.
5. Carefully insert the new blade rubber.
Then install the blade assembly in the reverse order of removal.
 Body Lubrication
All moving points of the body, such as door and hood hinges and locks, should
be lubricated each time the engine oil is changed. Use a nonfreezing lubricant on
locks during cold weather.
Make sur ...
 Battery
WARNING
Wash hands after handling the battery and related accessories:
Battery posts, terminals and related accessories contain lead and lead compounds,
chemicals known to the State of California ...
Other materials:
Gear Position Indicator [Fw6 A EL, Fw6 Ax EL]
Purpose/Function
The gear position indicator illuminates while under manual shift control
and displays the gear number while driving.
Construction
The gear position indicator is built into the instrument cluster.
Operation
The TCM sends a gear position indic ...
Electrical Fan Control
Outline
Through cooling of the radiator and condenser by operation of the cooling
fan according to vehicle conditions, engine reliability and cooling performance
have been improved.
Block Diagram
Operation
The PCM determines the demand airflow volume by the following c ...
Refrigerant Pressure Sensor [Manual Air Conditioner]
Purpose
The refrigerant pressure sensor detects the refrigerant pressure in the refrigerant
cycle.
Function
The refrigerant pressure sensor converts the detected refrigerant pressure
to an electric signal and sends it to the PCM.
Construction
The refriger ...
