Mazda CX-5 Service & Repair Manual: Windshield Wiper Arm And Blade Removal/Installation
Windshield Wiper Arm
1. Open the hood.
CAUTION:
-
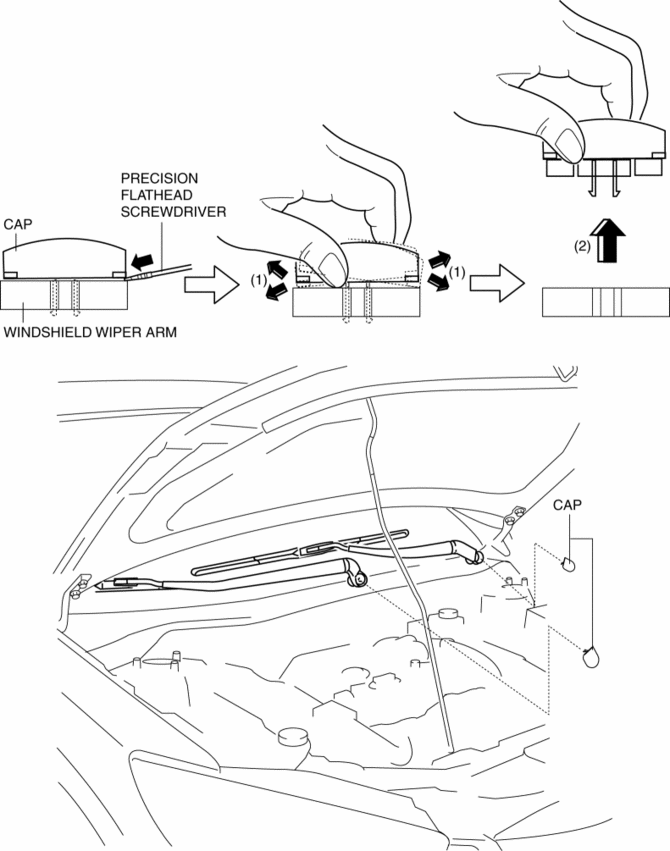
If excessive force is applied when removing the cap, tabs could break. Carefully remove the cap.
2. Insert a tape-wrapped precision flathead screwdriver into the gap between the windshield wiper arm and cap, and slightly raise the cap.
3. Detach cap tabs from the windshield wiper arm while slightly moving the cap in the direction of the arrows (1) shown in the figure, carefully pull it up in the direction of the arrow (2), and remove it.
4. Loosen nuts until it is jointed temporarily with the windshield wiper arm pressed as shown in the figure.
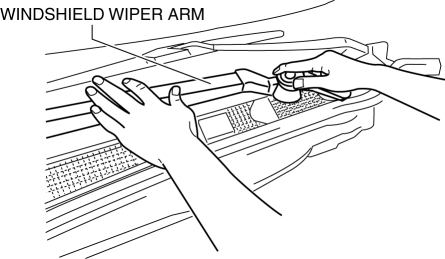
5. Close the hood.
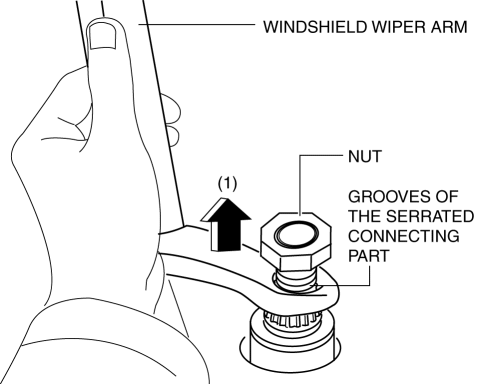
6. Raise the windshield wiper arm as shown in the figure and pull it up until the temporary joint nut points outward in the direction of the arrow (1) from the serrated connecting part.
CAUTION:
-
Always temporarily tighten the temporary joint nut when removing the windshield wiper arm. If it is removed from the serrated connecting part without temporarily tightening the nut, the windshield wiper arm could contact the hood.
7. Remove the nut.
8. Remove the windshield wiper arm..
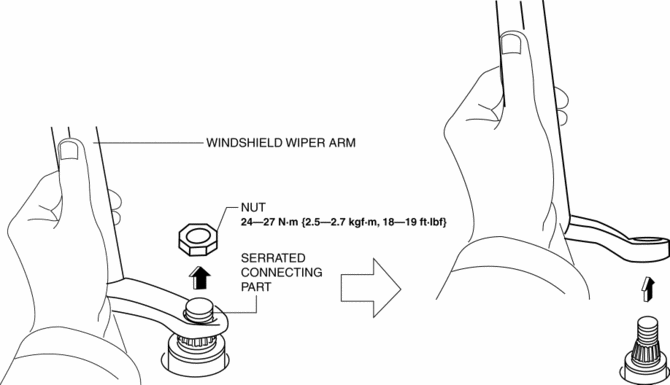
9. Install in the reverse order of removal.
10. Adjust the windshield wiper arm and blade..
Windshield Wiper Blade
CAUTION:
-
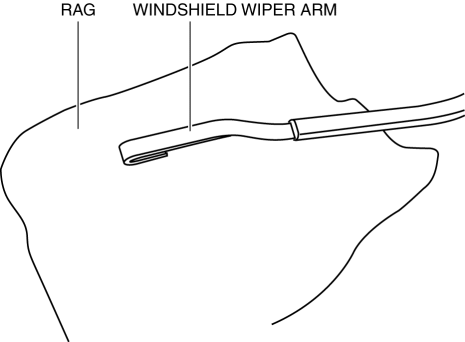
If the windshield wiper arm end is placed directly on the windshield after removing the windshield wiper blade, it could scratch the windshield. If the windshield wiper arm end is placed on the windshield, place it on a rag to protect the windshield.
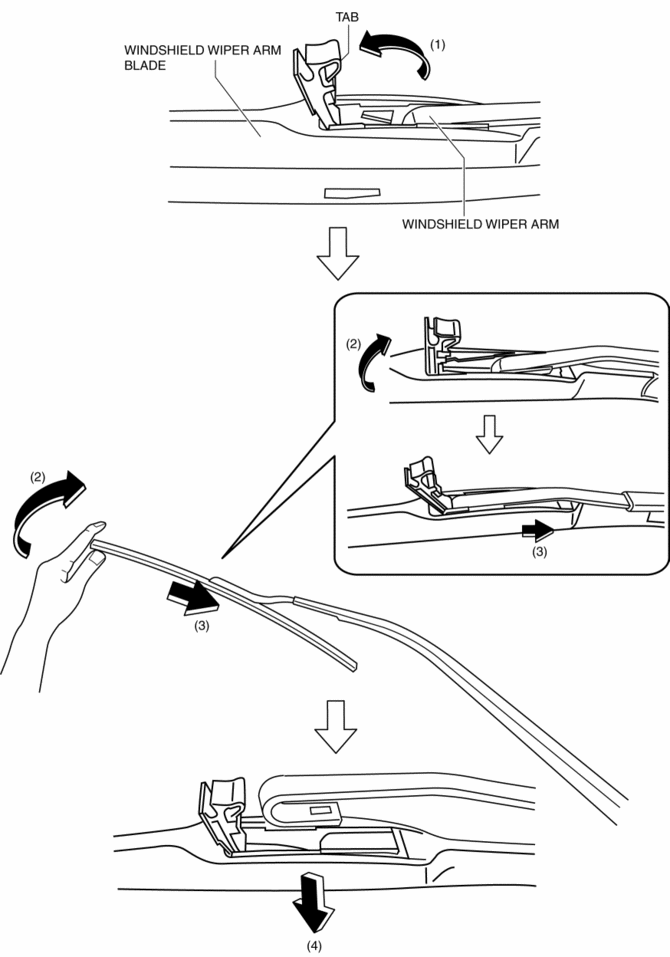
1. Pull the windshield wiper blade tab up in the direction of the arrow (1).
2. Press the windshield wiper blade end in the direction of the arrow (3) while tilting it in the direction of the arrow (2).
3. Remove the windshield wiper blade in the direction of the arrow (4) from the windshield wiper arm.
4. Install in the reverse order of removal.
Windshield Wiper Arm Installation Note
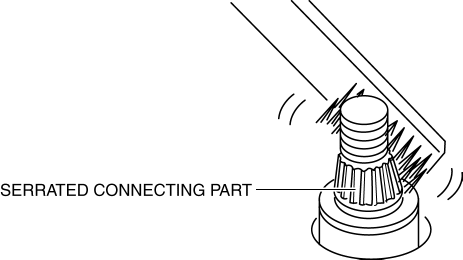
1. Clean the serrated connecting part with a wire brush before installing the windshield wiper arm.
 Windshield Wiper Arm And Blade Adjustment
1. Switch the ignition ON (engine off or on).
2. Operate the windshield wiper at low speed.
3. Verify that the windshield wiper operates at low speed and stop the windshield
wiper.
4. Verify t ...
 Windshield Wiper Motor
Purpose
The windshield wiper motor transmits rotation force to the windshield wiper
link to operate the windshield wiper arms and blades.
Function
The windshield wiper motor ope ...
Other materials:
Seat Track Position Sensor Removal/Installation [Two Step Deployment Control
System]
1. Switch the ignition to off.
2. Disconnect the negative battery cable and wait for 1min or more..
3. Remove the front driver’s seat..
4. Disconnect the connector from the seat track position sensor by pressing the
connector tab and pulling out the lock lever in the direction of the arro ...
Instrument Cluster Operation Record
Purpose
The instrument cluster operation record stores the record of the illumination
or flashing of the warning light.
Function
The operation record is stored by the instrument cluster and displayed using
the Mazda Modular Diagnostic System (M-MDS).
The instrument ...
Fuel System
Purpose, Outline
A multiple hole type fuel injector has been adopted which provides higher
fuel injection accuracy for improved fuel efficiency and output.
Piston movement-compression by the 4-head cam inside the high pressure fuel
pump heightens the fuel pressure, achieving imp ...
