Mazda CX-5 Service & Repair Manual: Washer Tank Removal/Installation
With Washer Fluid-level Sensor
1. Disconnect the negative battery cable..
2. Set the front over fender aside..
3. Set the mudguard (RH) aside..
4. Remove the front bumper..
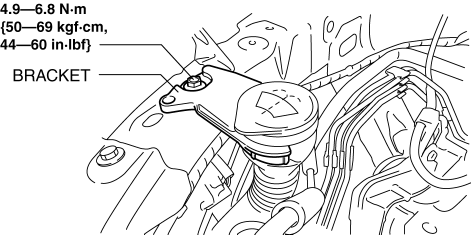
5. Remove the bracket.
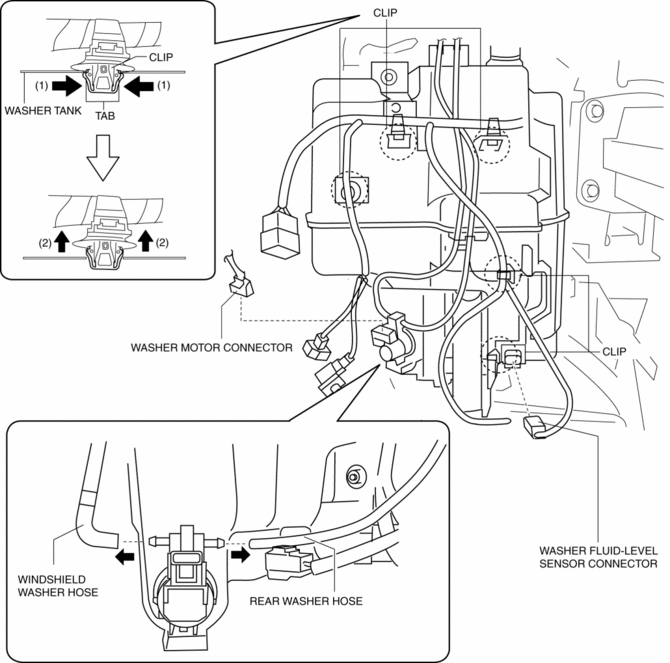
6. Disconnect the washer motor connector.
7. Disconnect the washer fluid-level sensor connector.
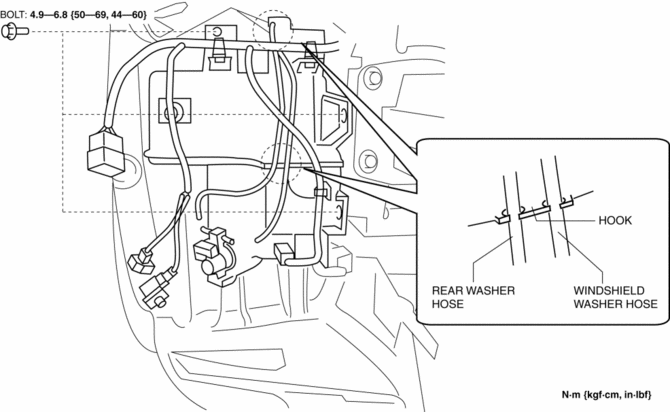
8. Disconnect the windshield washer hose.
9. Disconnect the rear washer hose.
10. While pressing tabs of clips in the direction of the arrows (1) shown in the figure, remove it in the direction of the arrow (2).
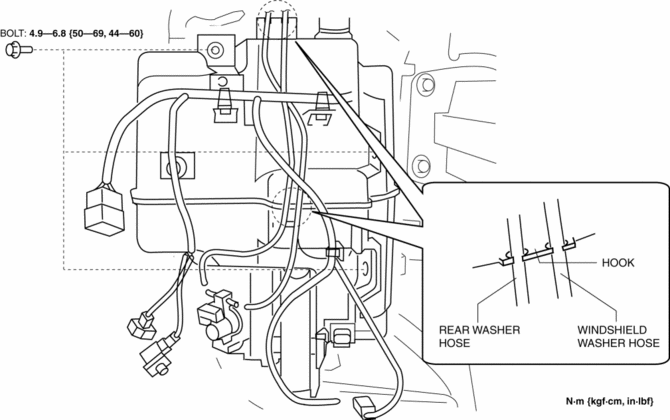
11. Remove the windshield washer hose from the hooks.
12. Remove the rear washer hose from the hooks.
13. Remove bolts.
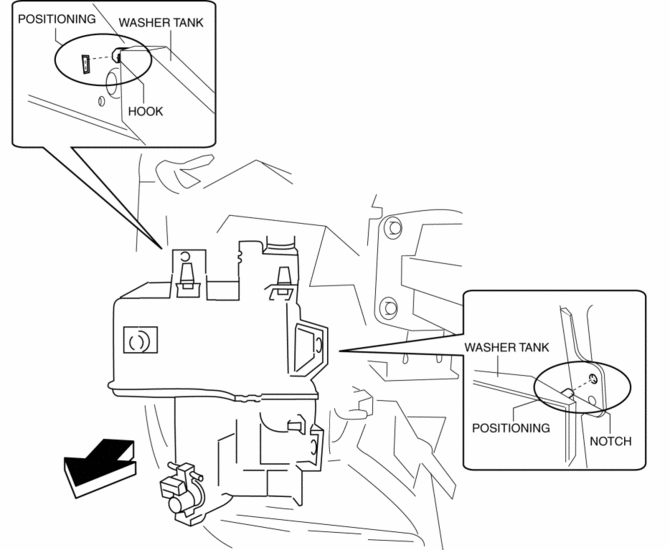
14. Remove the washer tank positioning hook and notch from the vehicle and remove the washer tank.

15. Install in the reverse order of removal.
Without Washer Fluid-level Sensor
1. Disconnect the negative battery cable..
2. Set the front over fender aside..
3. Set the mudguard (RH) aside..
4. Remove the front bumper..
5. Remove the bracket.
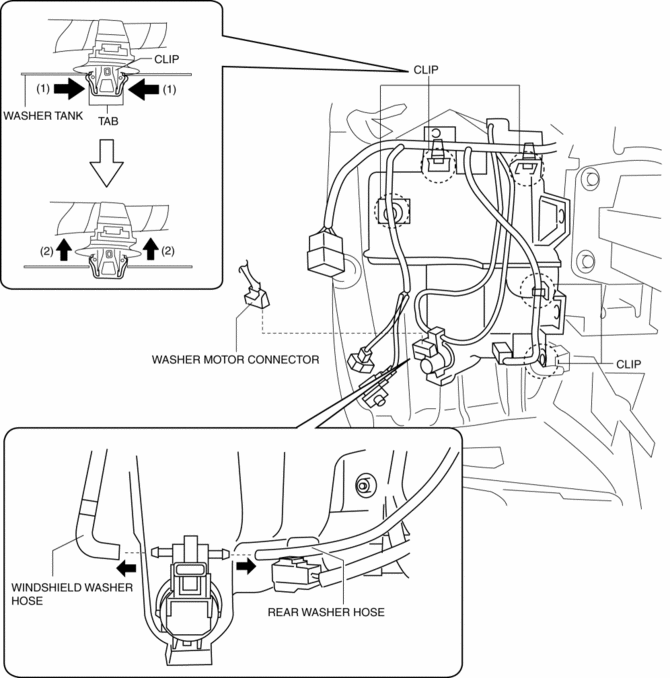
6. Disconnect the washer motor connector.
7. Disconnect the windshield washer hose.
8. Disconnect the rear washer hose.
9. While pressing tabs of clips in the direction of the arrows (1) shown in the figure, remove it in the direction of the arrow (2).
10. Remove the windshield washer hose from the hooks.
11. Remove the rear washer hose from the hooks.
12. Remove bolts.
13. Remove the washer tank positioning hook and notch from the vehicle and remove the washer tank.
14. Install in the reverse order of removal.
 Washer Nozzle
Purpose
The washer nozzle sprays the washer fluid sent from the washer motor to the
optimum positions on the windshield.
Construction
A ball-shaped spray orifice is set inside t ...
 Windshield Washer Hose Removal/Installation
1. Disconnect the negative battery cable..
2. Remove the front over fender..
3. Remove the mudguard (RH)..
4. Remove the windshield wiper arm and blade..
5. Disconnect the windshield washer ho ...
Other materials:
Resistor Inspection [Manual Air Conditioner]
1. Verify that the resistance between the resistor terminals is as shown in the
table.
If there is any malfunction, replace the resistor.
Terminal
Resistance (ohm)
A—D
0.35—0.41
A—B
0. ...
Storage Compartments
WARNING
Keep storage boxes closed when driving:
Driving with the storage boxes open is dangerous. To reduce the possibility of
injury in an accident or a sudden stop, keep the storage boxes closed when driving.
CAUTION
Do not leave lighters or eyeglasses in the storage boxes while parked under ...
Rain Sensor Removal/Installation
1. Disconnect the negative battery cable..
2. Spread open the rain sensor cover in the direction of the arrows (1) and disengage
tabs A to remove it.
3. Disconnect the rain sensor connector in the direction of the arrow (2).
4. Slide rain sensor tabs B in the direction of the arrow ...
