Mazda CX-5 Owners Manual: Storage Compartments
WARNING
Keep storage boxes closed when driving:
Driving with the storage boxes open is dangerous. To reduce the possibility of injury in an accident or a sudden stop, keep the storage boxes closed when driving.
CAUTION
Do not leave lighters or eyeglasses in the storage boxes while parked under the sun. A lighter could explode or the plastic material in eyeglasses could deform and crack from high temperature.
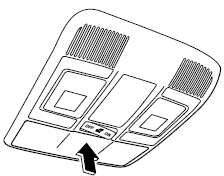
Overhead Console
This console box is designed to store eyeglasses or other accessories.
Push and release to open.
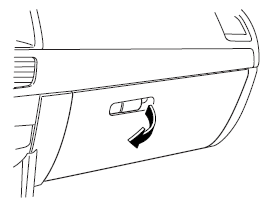
Glove Compartment
To open the glove compartment, pull the latch toward you.
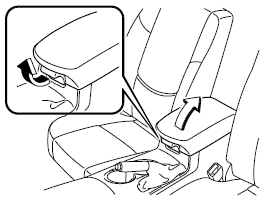
Center Console
To open, pull the release latch.
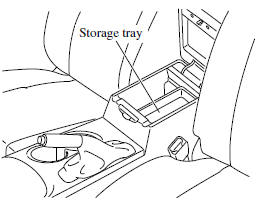
Storage tray
The storage tray can be removed.
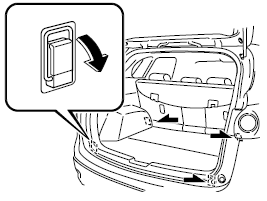
Cargo Securing Loops
WARNING
Make sure luggage and cargo is secured before driving:
Not securing cargo while driving is dangerous as it could move or be crushed during sudden braking or a collision and cause injury.
Use the loops in the luggage compartment to secure cargo with a rope or net. The tensile strength of the loops is 196 N (20 kgf, 44 lbf). Do not apply excessive force to the loops as it will damage them.
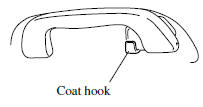
Rear Coat Hooks
WARNING
Never hang heavy or sharp objects on the assist grips and coat hooks:
Hanging heavy or sharp-ended objects such as a coat hanger from the assist grips or coat hooks is dangerous as they can fly off and hit an occupant in the cabin if a curtain air bag was to deploy, which could result in serious injury or death.
Always hang clothes on the coat hooks and the assist grips without hangers.
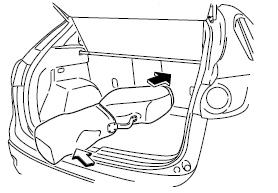
Luggage Compartment
Golf bags can be carried in the luggage compartment.
Up to four golf bags can be carried in the luggage compartment.
Place each of the first three golf bags into the luggage compartment with the bottom of each bag pointed to the right, and then set the top of each bag so that it is pointed to the left.
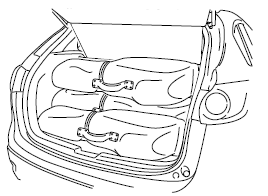
Place the fourth golf bag with its top pointed to the left, and then set the bottom of the bag so that it is pointed to the right.
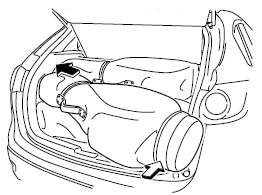
NOTE
Some golf bags cannot fit depending on their size.
 Bottle Holder
Bottle holders are on the inside of the doors.
CAUTION
Do not use the bottle holders for containers without caps. The contents may spill
when the door is opened or closed. ...
 Maintenance and Care
How to keep your Mazda in top condition. ...
Other materials:
Oil Seal (Control Valve Body) Replacement [Fw6 A EL, Fw6 Ax EL]
1. Disconnect the negative battery cable..
2. Remove the air cleaner component..
3. Disconnect the control valve body connector.
CAUTION:
Make sure that your hand does not touch the terminal as the connector terminal
could be damaged.
Water or foreign objects entering th ...
Rocking the Vehicle
WARNING
Do not spin the wheels at more than 56 km/h (35 mph), and do not allow anyone
to stand behind a wheel when pushing the vehicle: When the vehicle is stuck, spinning
the wheels at high speed is dangerous. The spinning tire could overheat and explode.
This could cause serious injuries.
...
Scheduled Maintenance (U.S.A., Canada, and Puerto Rico)
Follow Schedule 1 if the vehicle is operated mainly where none of the following
conditions apply.
• Repeated short-distance driving
• Driving in dusty conditions
• Driving with extended use of brakes
• Driving in areas where salt or other corrosive
materials are used
• Driving on ...
