Mazda CX-5 Service & Repair Manual: Speaker Grille Removal/Installation
Center Speaker Grille
1. Insert a tape-wrapped flathead screwdriver into shown in the figure and remove hooks A in the direction of arrow (1).
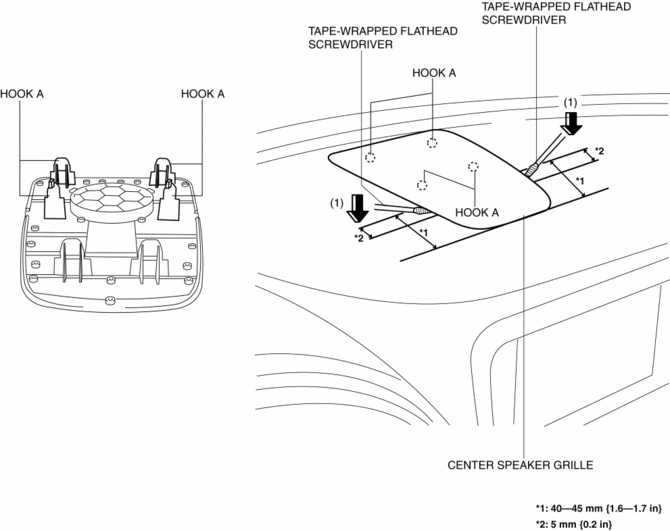
2. Take the shaded area shown in the figure, and remove the center speaker grille in the direction of arrow (2) while detaching hooks B.
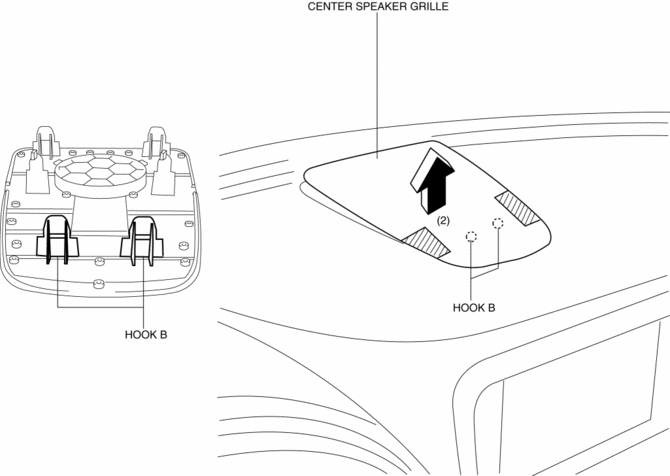
3. Install in the reverse order of removal.
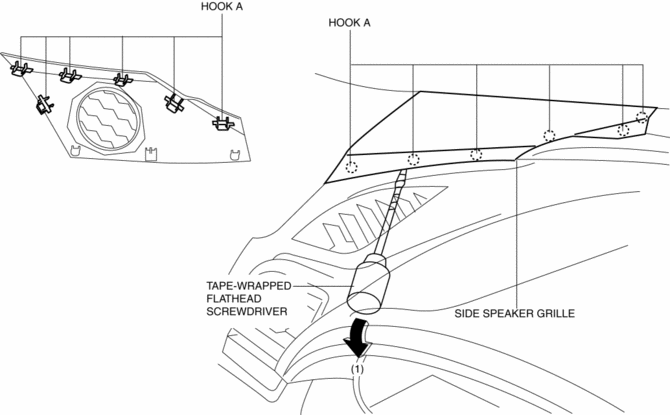
Side Speaker Grille
1. Insert a tape-wrapped flathead screwdriver into the service hole and remove hooks A in the direction of arrow (1).
2. Pull the side speaker grille in the direction of the arrow (2), and remove the side speaker grille while detaching hooks B.
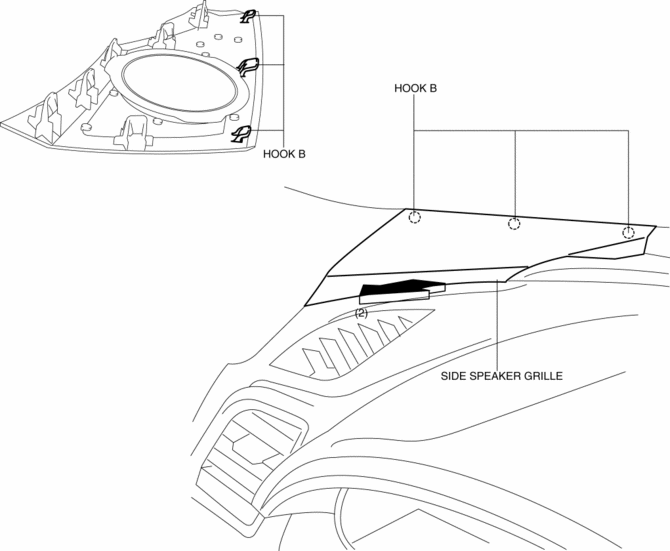
3. Install in the reverse order of removal.
 Side Step Molding Removal/Installation
1. Set the rear over fender aside..
2. Insert a tape-wrapped flathead screwdriver shown in the figure and remove
the clip A in the direction of arrow (1).
3. Slide the side step molding in t ...
 Splash Shield Removal/Installation
Front
Front splash shield No.1
1. Set the mudguard aside..
2. Remove fasteners A.
3. Remove the front splash shield No.1.
4. Install in the reverse order of removal.
Front splash shield ...
Other materials:
Exhaust System
Purpose, Outline
A 4-2-1 exhaust system has been adopted which reduces residual gas in the
cylinders using the scavenging effect and contributes to a high compression
ratio.
The loop structure of the exhaust pipes for the 4-2-1 system takes up less
space.
Structural Vie ...
Camshaft Position (CMP) Sensor Inspection
Intake CMP Sensor
Visual inspection
CAUTION:
When replacing the CMP sensor, make sure there is no foreign material on
it such as metal shavings. If it is installed with foreign material, the sensor
output signal will malfunction resulting from fluctuation in magnetic flux and
caus ...
Manual Transaxle Oil Replacement [C66 M R]
1. Park the vehicle on level ground.
2. Remove the front under cover No.2..
3. Remove the drain plug and gasket, and drain the manual transaxle oil.
4. Install a new gasket and the drain plug.
Tightening torque
39—59 N·m {4.0—6.0 kgf·m, 29—43 ft·lbf}
5. Remove the ...
