Mazda CX-5 Service & Repair Manual: Side Sill Panel Removal [Panel Replacement]
Symbol Mark

Removal Procedure
Side sill (front side)
1. Rough cut the 2 locations indicated by (A) shown in the figure.
2. Drill the 18 locations indicated by (B) shown in the figure.
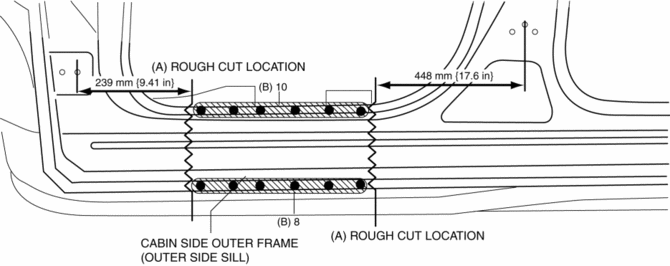
3. Remove the cabin side outer frame (outer side sill).
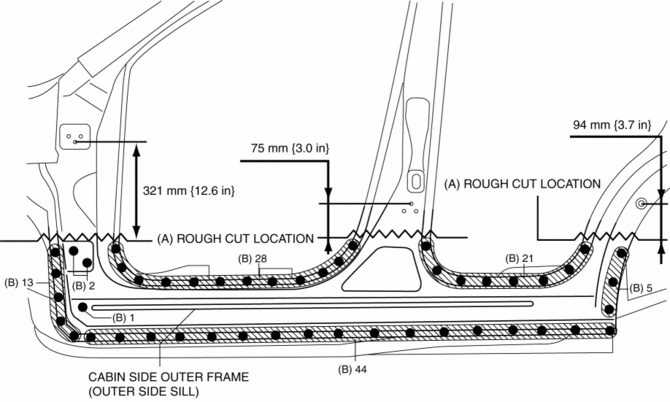
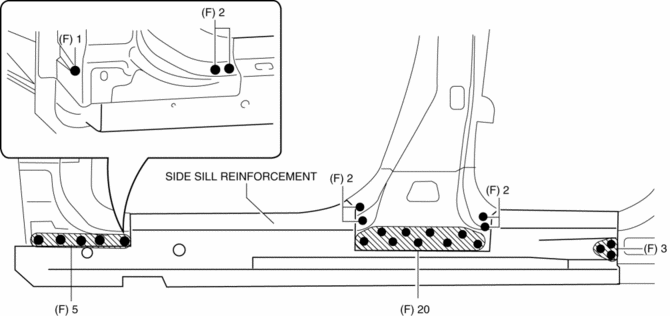
Side sill (component)
1. Rough cut the 3 locations indicated by (A) shown in the figure.
2. Drill the 114 locations indicated by (B) shown in the figure, then remove the cabin side outer frame (outer side sill).
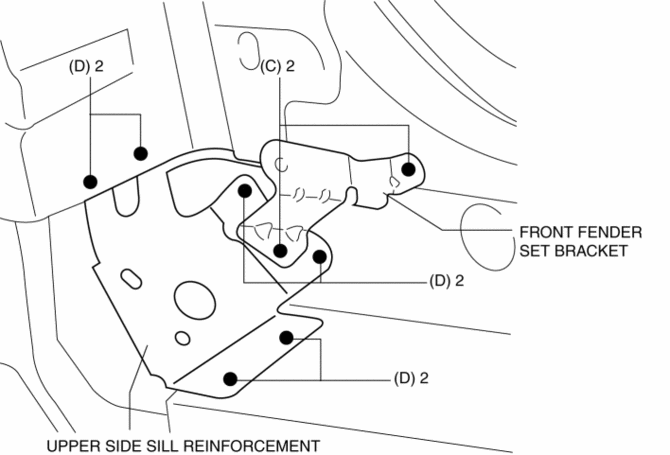
3. Drill the 2 locations indicated by (C) shown in the figure, then remove the front fender set bracket.
4. Drill the 6 locations indicated by (D) shown in the figure, then remove the upper side sill reinforcement.
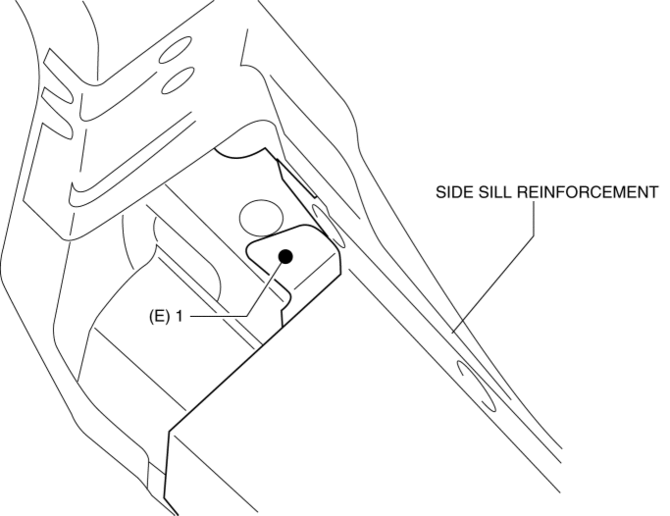
5. Drill the 1 location indicated by (E) shown in the figure.
6. Drill the 35 locations indicated by (F) shown in the figure.
7. Pull the side sill reinforcement from the inner side sill, hinge reinforcement and center pillar reinforcement, and then remove it.
 Side Sill Panel Installation [Panel Replacement]
Symbol Mark
Installation Procedure
Side sill (front side)
1. When installing new parts, measure and adjust the body as necessary to conform
with standard dimensions.
2. Drill holes for the ...
 Side Step Molding Removal/Installation
1. Set the rear over fender aside..
2. Insert a tape-wrapped flathead screwdriver shown in the figure and remove
the clip A in the direction of arrow (1).
3. Slide the side step molding in t ...
Other materials:
Airflow Mode Actuator Inspection [Full Auto Air Conditioner]
CAUTION:
If the lever position exceeds the operation range shown in the figure, the
circuit in the actuator could be damaged. Always perform an actuator operation
inspection with the lever movement within the range shown in the figure.
1. Connect battery positive voltage to airfl ...
On Board Diagnostic System PID/Data Monitor Inspection [Fw6 A EL, Fw6 Ax EL]
1. Connect the M-MDS to the DLC-2.
2. After the vehicle is identified, select the following items from the initialization
screen of the M-MDS.
a. Select “DataLogger”.
b. Select “Modules”.
c. Select “TCM”.
3. Select the applicable PID from the PID table.
4. Verify the PID da ...
Heater Hose Removal/Installation
With Water Temperature Sensor
1. Remove the battery..
2. Drain the engine coolant..
3. Remove the insulator.
4. Remove the clips and remove the heater hose.
5. Remove the heater hose.
6. Install in the reverse order of the removal.
7. Inspect for engine coolant leaka ...
