Mazda CX-5 Service & Repair Manual: Roof Carrier Bracket Removal/Installation
1. Disconnect the negative battery cable..
2. Remove the following parts:
a. Sunroof seaming welt (with sunroof system).
b. A-pillar trim.
c. Front map light.
d. Sunvisor.
e. Front scuff plate.
f. Rear scuff plate.
g. B-pillar lower trim.
h. Adjust anchor cover.
i. Upper anchor installation bolt on the seat belt.
j. B-pillar upper trim.
k. Assist handle.
l. Trunk board.
m. Trunk end trim.
n. Trunk side trim.
o. D-pillar trim.
p. C-pillar trim.
q. Headliner.
3. Remove nuts.
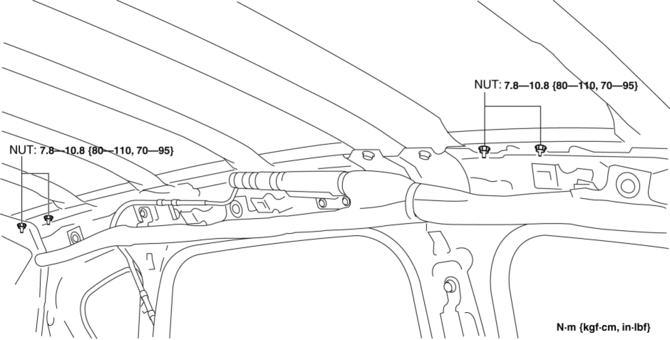
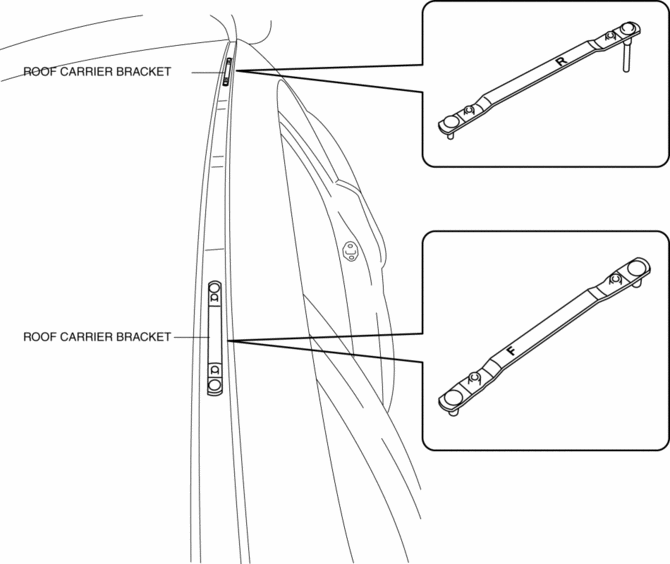
4. Remove the roof carrier brackets.
5. Install in the reverse order of removal.
NOTE:
-
Install the roof carrier bracket so that the F on it faces vehicle front. (front side)
-
Install the roof carrier bracket so that the R on it faces vehicle rear. (rear side)
 Rear Differential Removal/Installation
WARNING:
When replacing the coupling component, read the special character string
before installing a new coupling component and write it to the AWD control module
after replacement. The ...
 Driveshafts
...
Other materials:
Conventional Brake System
Outline
A brake pedal with an intrusion minimizing mechanism has been adopted. As
a result, driver safety has been improved.
A small diameter long-stroke type master cylinder has been adopted, improving
operability and response.
A vacuum pump has been adopted, improving ...
Starting the Engine
WARNING
Radio waves from the key may affect medical devices such as pacemakers: Before
using the key near people who use medical devices, ask the medical device manufacturer
or your physician if radio waves from the key will affect the device.
NOTE
• The key must be carried because the
ke ...
Seat Track Position Sensor Removal/Installation [Two Step Deployment Control
System]
1. Switch the ignition to off.
2. Disconnect the negative battery cable and wait for 1min or more..
3. Remove the front driver’s seat..
4. Disconnect the connector from the seat track position sensor by pressing the
connector tab and pulling out the lock lever in the direction of the arro ...
