Mazda CX-5 Service & Repair Manual: Rear Stabilizer Removal/Installation [Awd]
WARNING:
-
Verify that the rear crossmember is securely supported by a jack. If the rear crossmember falls off, it can cause serious injury or death, and damage to the vehicle.
CAUTION:
-
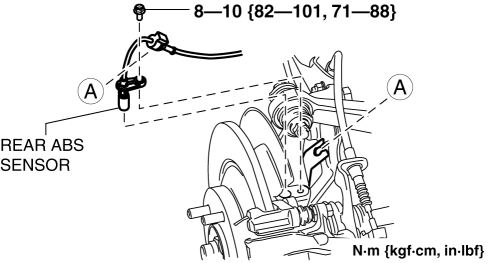
Performing the following procedures without first removing the rear ABS wheel-speed sensor may possibly cause an open circuit in the harness if it is pulled by mistake. Before performing the following procedures, disconnect the rear ABS wheel-speed sensor (axle side) and fix it to an appropriate place where the sensor will not be pulled by mistake while servicing the vehicle.
1. Disconnect the rear auto leveling sensor link. (With auto leveling sensor).
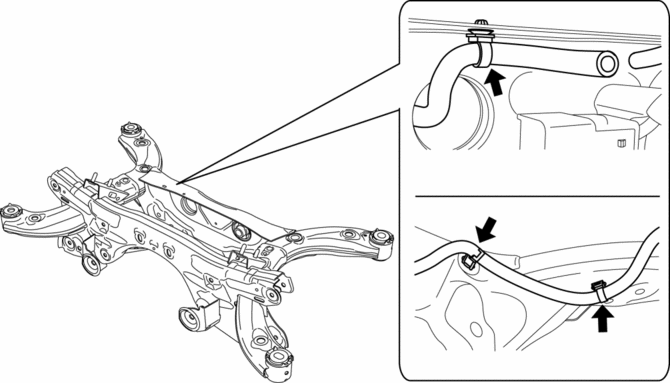
2. Disconnect the wiring harness clips and connectors installed to the rear crossmember.
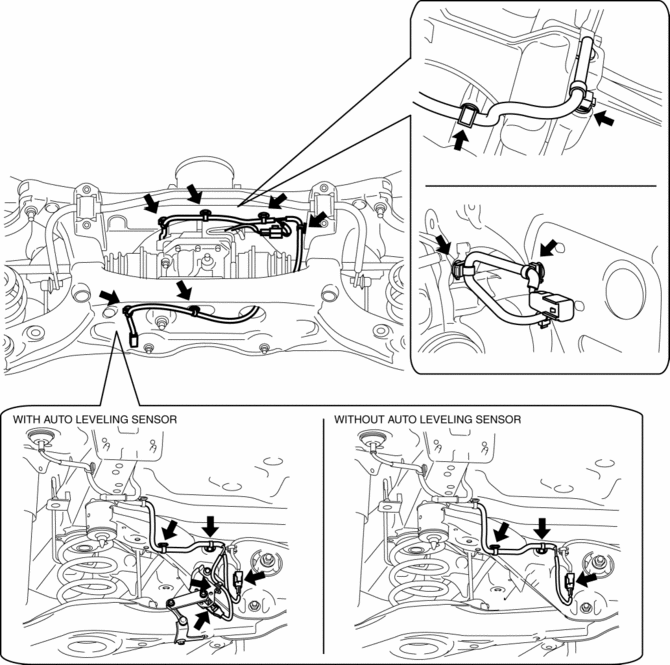
3. Set the rear differential breather hose aside.
4. Disconnect the rear ABS wheel-speed sensor wiring harness installed to the hub support and set it aside..
5. Remove the propeller shaft..
6. Remove the TWC..
7. Remove the rear coil spring..
8. Remove in the order indicated in the table.
9. Install in the reverse order of removal.
10. Inspect the wheel alignment and adjust it if necessary..

|
1 |
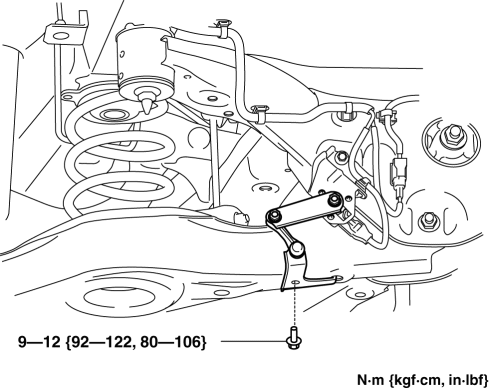
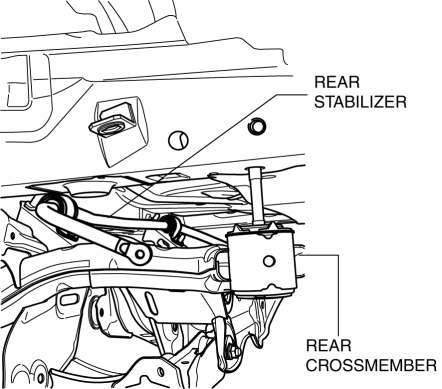
Rear stabilizer control link |
|
2 |
Rear stabilizer component (See Rear Stabilizer Component Removal Note.) (See Rear Stabilizer Component Installation Note.) |
|
3 |
Rear stabilizer bracket (See Rear Stabilizer Component Installation Note.) |
|
4 |
Rear stabilizer bushing (See Rear Stabilizer Component Installation Note.) |
|
5 |
Rear stabilizer |
Rear Stabilizer Component Removal Note
1. Support the rear crossmember component with a jack and remove the rear crossmember installation nuts.
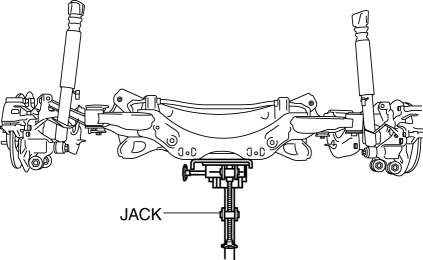
2. Press down on the rear crossmember component until the rear stabilizer component can be removed from the vehicle using a jack.
Rear Stabilizer Bracket Removal Note
1. Secure the rear stabilizer bracket flange using a vise.

Rear Stabilizer Bushing, Rear Stabilizer Bracket Installation Note
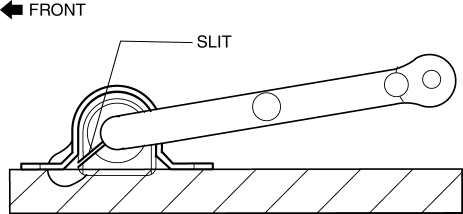
1. Install the rear stabilizer bushing with the slit pointing toward the front of the vehicle.
2. Install the rear stabilizer bracket to the front stabilizer bushing by hand using the following procedure.
3. If the rear stabilizer bracket cannot be installed by hand, install it using a vice.
CAUTION:
-
If the rear stabilizer bracket is installed using a vice, it could be deformed.
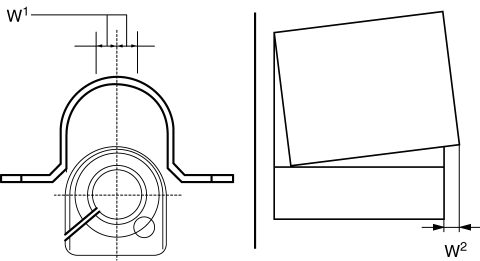
-
Set a cylindrically-shaped object as shown in the figure so that pressure is applied to the raer stabilizer bracket flange, and install the raer stabilizer bracket to the raer stabilizer bushing.

4. During rear stabilizer bracket installation, keep the deviation in the positions of the rear stabilizer bracket and the rear stabilizer bushing within the range shown in the figure.
-
W1: 0.5 mm {0.21 in} max.
-
W2: 2 mm {0.08 in} max.
5. After installing the rear stabilizer bracket, verify that the positions of the rear stabilizer bracket and the rear stabilizer bushing are within the range shown in the figure.

-
H1: 13 mm {0.51 in} max.
6. After installing the rear stabilizer bracket, verify that the right and left-side positions of the rear stabilizer bracket are within the range shown in the figure.
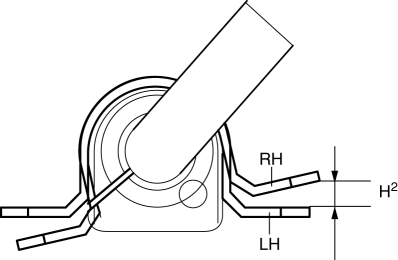
-
H2: 3 mm {0.1 in} max.
7. Place the rear stabilizer component on a level workbench, and verify that it is within the range shown in the figure.
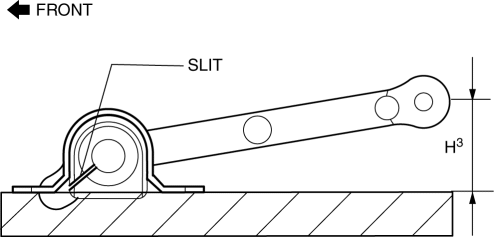
-
H3: 41.8—51.8 mm {1.65—2.03 in}
Rear Stabilizer Component Installation Note
1. Temporarily tighten bolts A and B shown in the figure.
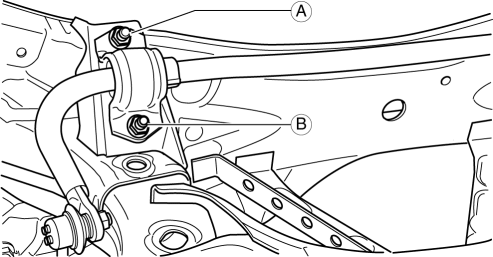
2. Tighten bolt A.
-
Tightening torque
-
21—26 N·m {9.3—11 kgf·m, 16—19 ft·lbf}
3. Tighten bolt B.
-
Tightening torque
-
21—26 N·m {9.3—11 kgf·m, 16—19 ft·lbf}
4. Tighten bolt A.
-
Tightening torque
-
21—26 N·m {9.3—11 kgf·m, 16—19 ft·lbf}
5. Lift up the rear crossmember component using a jack and install the rear crossmember installation nuts.
-
Tightening torque
-
91—111 N·m {9.3—11 kgf·m, 68—81 ft·lbf}
 Rear Stabilizer Removal/Installation [2 Wd]
WARNING:
Verify that the rear crossmember is securely supported by a jack. If the
rear crossmember falls off, it can cause serious injury or death, and damage
to the vehicle.
C ...
 Rear Suspension
Outline
E-type multi-link rear suspension has been adopted.
The longitudinal span of the rear crossmember was extended and the longitudinal
offset of the rear lateral link ...
Other materials:
Back Up Light Switch Inspection
1. Disconnect the negative battery cable..
2. Remove the front under cover No.2..
3. Remove the back-up light switch..
4. Verify that the continuity between the back-up light switch terminals is as
indicated in the table.
If not as indicated in the table, replace the back-up ...
Rear Drive Shaft
Purpose, Function
Engine noise and vibration have been reduced due to adoption of a bell joint
on the wheel side of the constant velocity joint.
A low noise and vibration double offset joint with low slide resistance has
been adopted for the differential side of the constant v ...
Automatic Transaxle Outline [Fw6 A EL, Fw6 Ax EL]
Outline
Contribution to low fuel economy
Wide TCC range
Clutch/brake resistance reduction
Realized direct feel and quick shifting
Oil passage resistance reduction and improved clutch/brake response
b ...
