Mazda CX-5 Service & Repair Manual: Rear Side Marker Light Bulb Removal/Installation
1. Disconnect the negative battery cable..
2. Insert a tape-wrapped flathead screwdriver into the service hole in the position shown in the figure.
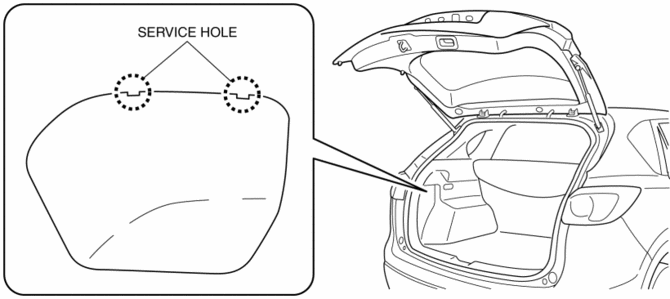
3. Move the flathead screwdriver in the direction of the arrow (1) shown in the figure, pull out the service hole cover, and detach the service hole cover tab and trunk side trim.

4. Pull out the service hole cover in the direction of the arrow (2) shown in the figure and pull out the service hole cover hook from the trunk side trim.

5. Remove the service hole cover.
6. Rotate the socket in the direction of the arrow (3) shown in the figure and remove it from the rear combination light in the direction of the arrow (4) shown in the figure.

7. Remove the rear side marker light bulb.

8. Install in the reverse order of removal.
 Rear Combination Light Removal/Installation
NOTE:
Fogging or condensation on the inside of the rear combination lights may
occur due to a natural phenomenon occurring as a result of a temperature difference
between the interior an ...
 Taillight Bulb Removal/Installation
1. Disconnect the negative battery cable..
2. Insert a tape-wrapped flathead screwdriver into the service hole in the position
shown in the figure.
3. Move the flathead screwdriver in the di ...
Other materials:
Low Fuel Warning Light
Purpose
The low fuel warning light warns the driver that the remaining fuel level
is low.
Function
The instrument cluster calculates the fuel quantity based on the following
CAN signals, and if a remaining fuel amount of approx. 10 L {2.6 US gal, 2.2
Imp gal} (fuel gauge ...
Liftgate Recess Removal/Installation
1. Insert a tape-wrapped flathead screwdriver in the position indicated by the
arrow in the figure and detach hooks A.
2. Remove the liftgate recess in the direction of the arrow shown in the figure
avoiding hooks B.
3. Install in the reverse order of removal. ...
Scheduled Maintenance (U.S.A., Canada, and Puerto Rico)
Follow Schedule 1 if the vehicle is operated mainly where none of the following
conditions apply.
• Repeated short-distance driving
• Driving in dusty conditions
• Driving with extended use of brakes
• Driving in areas where salt or other corrosive
materials are used
• Driving on ...
