
Mazda CX-5 Service & Repair Manual: Rear Shock Absorber Removal/Installation
1. Remove in the order indicated in the table.
2. Install in the reverse order of removal.
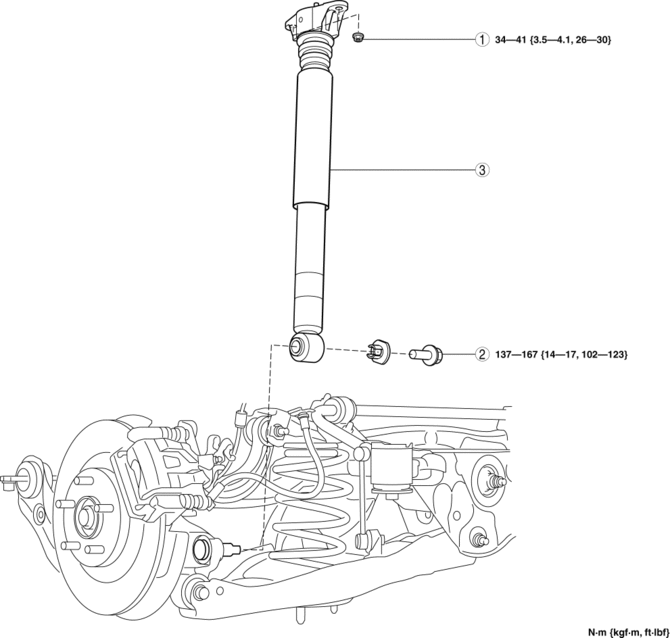
|
1 |
Rear shock absorber upper nut (See Rear Shock Absorber Upper nut Installation Note.) |
|
2 |
Rear shock absorber lower bolt |
|
3 |
Rear shock absorber |
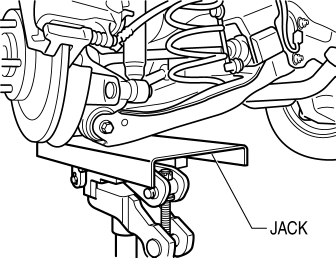
Rear Shock Absorber Upper nut Installation Note
1. Lift up the rear lower arm using a jack and install the rear shock absorber upper nuts.
 Rear Shock Absorber Inspection
1. Remove the rear shock absorber..
2. Inspect for damage and oil leakage.
3. Compress and extend the shock piston at least three times. Verify that the
operational force does not change and tha ...
 Rear Stabilizer Control Link Inspection
1. Remove the rear stabilizer control link..
2. Inspect for bending or damage. If there is any malfunction, replace the rear
stabilizer control link.
3. Rotate the ball joint stud 10 times and s ...
Other materials:
Power Window System Initialization Procedure
NOTE:
If the following operations have been performed, initial setting is reset,
and auto up/down operation are disabled. Therefore, performing initial setting
is necessary.
Negative battery cable is disconnected..
Power window main switch connector is dis ...
Clock Spring Removal/Installation [Standard Deployment Control System]
CAUTION:
If the disc on the combination switch is deformed or has foreign material
adhering to it, performance of the steering angle sensor may be reduced, causing
abnormal operation. When handling the clock spring, be careful not to deform
the disc and make sure there is no foreign ...
No.27 Fuel Refill Concerns
27
FUEL REFILL CONCERNS
DESCRIPTION
Fuel tank does not fill smoothly.
POSSIBLE CAUSE
PCM DTC is stored.
Non-return valve malfunction
Pressure control v ...
