Mazda CX-5 Service & Repair Manual: Rear Seat Removal/Installation
CAUTION:
-
When removing or putting in the rear seat, contact with the surrounding areas of the vehicle could cause scratches and damage. When removing or putting in the rear seat, always use two or more persons to perform the work and be careful not to scratch or damage the rear seat and the surrounding area of the vehicle.
-
When performing the procedure with a rear seat removed from the vehicle, perform the procedure on a clean cloth so as not to damage or soil the seat.
NOTE:
-
When removing the rear seat from the vehicle or putting it back in, it can be performed smoothly by removing the headrest
1. Remove the trunk board..
2. Disconnect the remote cable on the remote handle lever side from the remote cable on the rear seat side..
3. Detach tabs A in the direction of the arrow (1) shown in the figure while lifting cover A in the direction of the arrow (2), detach hook B, and then remove cover A.
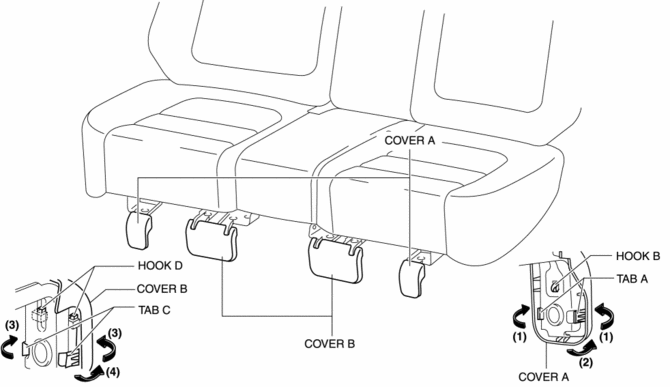
4. Detach tabs C in the direction of the arrow (3) shown in the figure while lifting cover B in the direction of the arrow (4), detach hook D, and then remove cover B.
5. Remove bolts A.
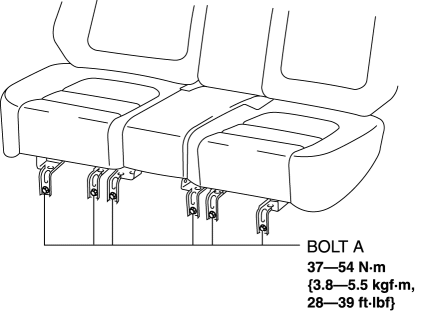
6. Press the push knob to fold the rear seat back.
7. Remove bolts B.
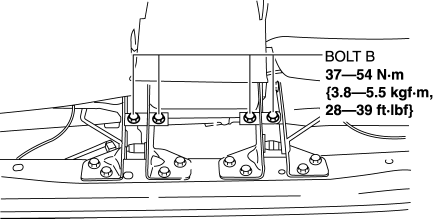
8. Remove the plate in the direction of the arrow (5) shown in the figure.
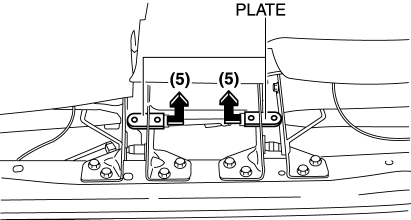
9. Remove bolts C.
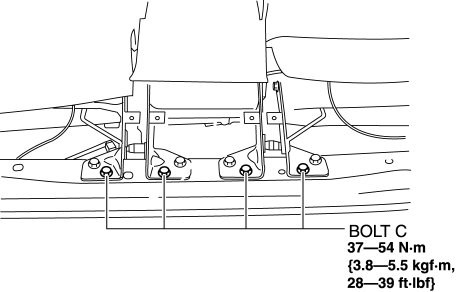
10. Hold up the rear seat back.
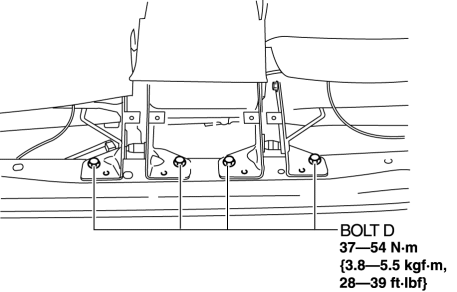
11. Remove bolts D..
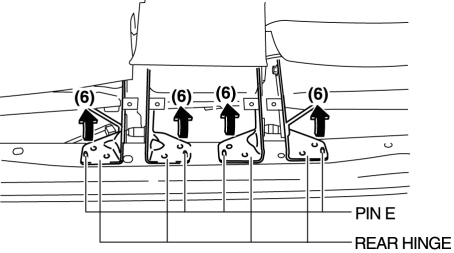
12. Move the rear hinge in the direction of the arrow (6) shown in the figure and disconnect pins E..
13. Remove bolt E.
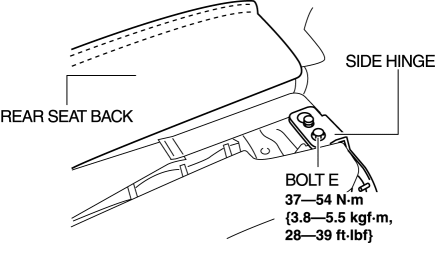
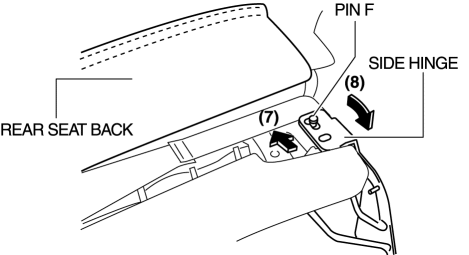
14. After moving the rear seat in the direction of the arrow (7) shown in the figure, remove pin F while moving the side hinge in the direction of the arrow (8).
15. Lift up the rear seat cushion in the direction of the arrow (9) shown in the figure and set pins G aside from the front hinge.
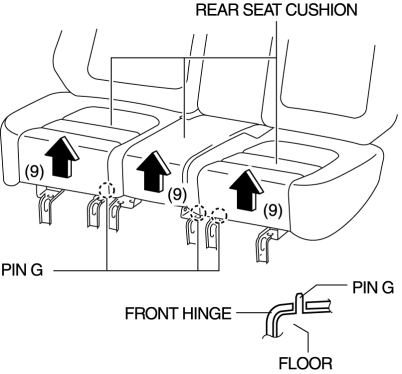
16. Remove the rear seat..
17. Install in the reverse order of removal..
18. Pull the remote handle levers and verify that the rear seat backs are unlocked.
-
If any of the rear seat backs does not unlock, or it is hard to unlock or lock, adjust the remote cable..
Rear Seat Carry Into Vehicle Note
1. Before carrying the rear seat into the vehicle, shift the rear buckle in the direction of the arrow (1).
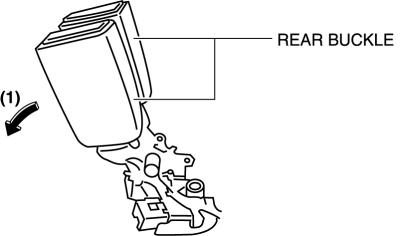
2. Insert a needle into area A shown in the figure and fix the rear buckle in the down condition
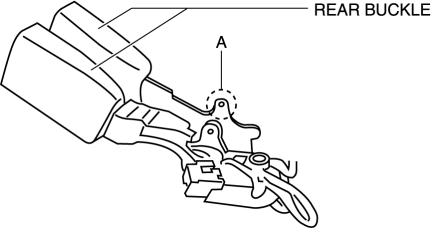
3. Carry the rear seat into the vehicle.
4. Remove the needle fixing the rear buckle tilted frontward, and fold the rear buckle to area B shown in the figure.
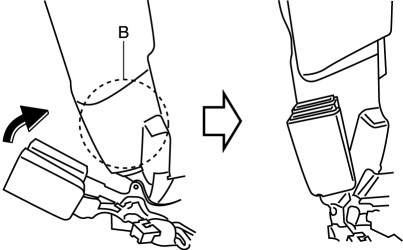
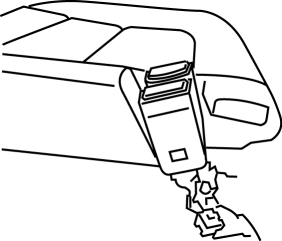
5. Fold the rear seat cushion, and verify that the rear buckle is folded into the rear seat cushion.
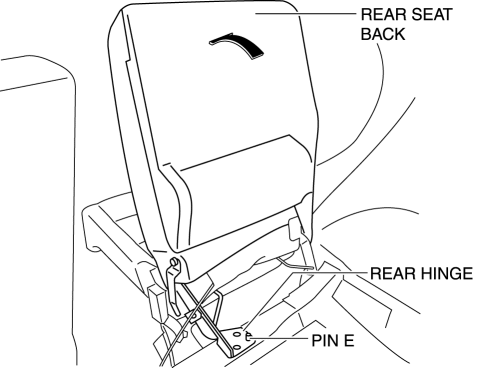
Rear Hinge Removal Note
1. While moving the rear seat back in the direction of arrow shown in the figure, remove the rear hinge to pin E.
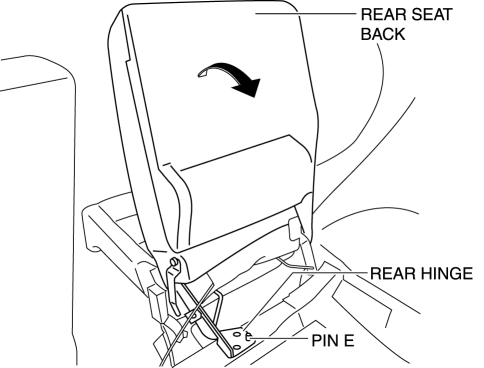
Rear Hinge Installation Note
1. While moving the rear seat back in the direction of arrow shown in the figure, install the rear hinge to pin E.
Rear Seat Installation Note
1. When installing the rear seat, temporarily tighten all of the tightening bolts.
2. After temporarily tightening all of the tightening bolts, shake the entire rear seat forward and back/left and right with the rear seat back folded to improve the installation fit of the entire seat.
3. Completely tighten the bolts in the reverse order of removal.
Remote Cable Adjustment Procedure
NOTE:
-
Adjust the remote cable of a seat which has the following malfunctions. The adjustment procedure is available for all the seats.
-
Does not unlock
-
Hard to unlock
-
Hard to lock
1. Press the push knob and fold the rear seat back.
2. Remove the trunk mat..
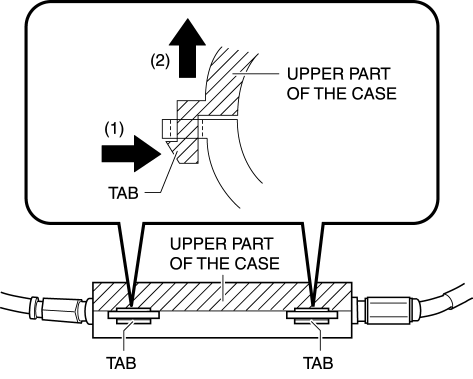
3. Press the tab in the direction of the arrow (1) shown in the figure to disengage it, and open the upper part of the case in the direction of the arrow (2).
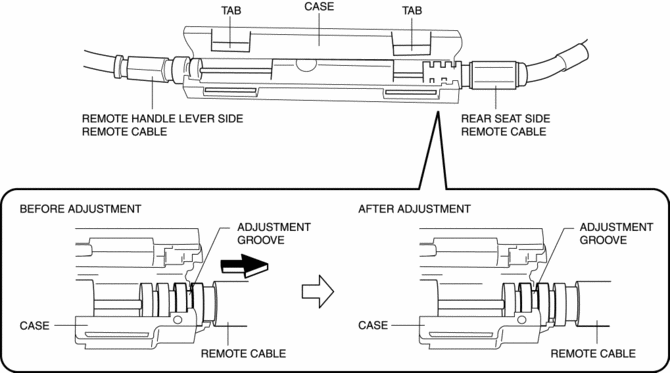
4. Move the position of the remote cable adjustment groove on the rear seat back side one step in the direction of the arrow shown in the figure.
CAUTION:
-
If the remote cable adjustment groove is moved excessively, the remote cable is pulled in the unlock direction and the rear seat back may not be able to lock. When adjusting the remote cable, move the position of the adjustment groove one step at a time while verifying the lock condition of the rear seat back.
5. Close the case to engage the tab.
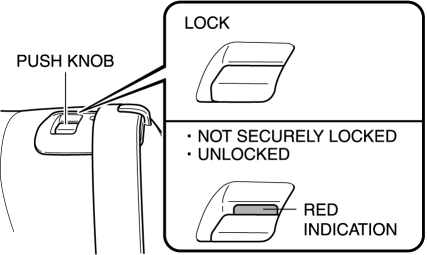
6. Move the rear seat back to its upright position and verify that the red indication cannot be seen on the push knob.
NOTE:
-
If red indication can seen on the push knob, it indicates that the seat back is not locked securely or unlocked.
7. Pull the remote handle lever and verify that the rear seat back is unlocked.
-
If the rear seat back does not unlock, or it is hard to unlock or lock, move the remote cable adjustment groove one step more.
8. Install the remote cable..
9. Install the trunk mat..
 Rear Seat Cushion Trim Removal/Installation
CAUTION:
When removing or putting in the rear seat cushion, contact with the surrounding
areas of the vehicle could cause scratches and damage. When removing or putting
in the rear seat ...
 Recliner Motor Inspection
WARNING:
Handling a side air bag improperly can accidentally operate (deploy) the
air bag, which may seriously injure you. Read the service warnings/cautions
in the Workshop Manual befor ...
Other materials:
Relay Inspection
Relay Type
Connector type
Part name
Type A
TNS relay
A/C relay
Headlight HI relay
Headlight LO relay
Headlight LO relay (LH)
Horn relay
ACC rel ...
Rear Suspension
Outline
E-type multi-link rear suspension has been adopted.
The longitudinal span of the rear crossmember was extended and the longitudinal
offset of the rear lateral link attachment position was reduced.
Welding flanges were removed from the rear cros ...
Hill Launch Assist (Hla)
Purpose/Function
The hill launch assist (HLA) is a function which assists the driver in accelerating
the vehicle on a slope by activating the traction control solenoid valve in
the DSC HU/CM when the vehicle begins accelerating on a slope, and maintaining/reducing
brake fluid pressur ...
