Mazda CX-5 Service & Repair Manual: Rear Seat Cushion Trim Removal/Installation
CAUTION:
-
When removing or putting in the rear seat cushion, contact with the surrounding areas of the vehicle could cause scratches and damage. When removing or putting in the rear seat cushion, always use two or more persons to perform the work and be careful not to scratch or damage the rear seat cushion and the surrounding area of the vehicle.
-
When performing the procedure with a rear seat cushion removed from the vehicle, perform the procedure on a clean cloth so as not to damage or soil the seat.
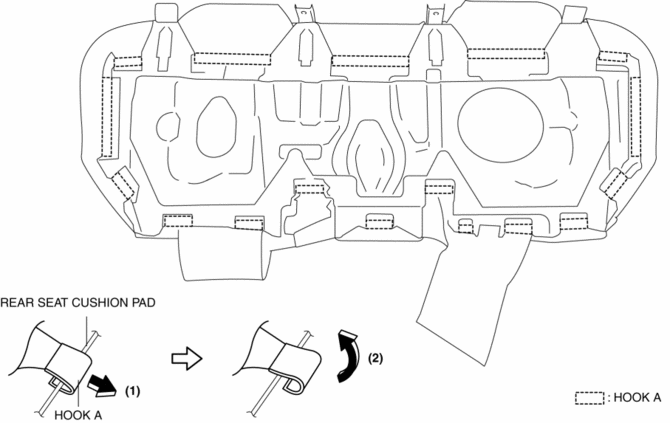
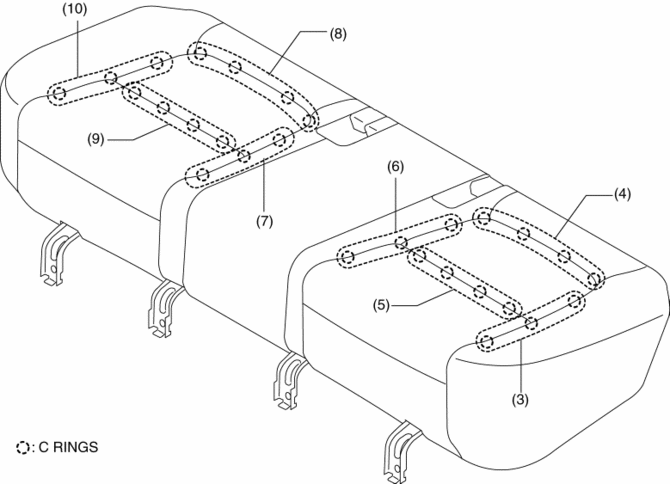
6:4 Split Type
1. Remove the rear seat cushion.
2. Slide hooks A in the order of (1), (2) shown in the figure to detach it from the rear seat cushion pad.
3. Partially peal back the rear seat cushion trim from the rear seat cushion pad, remove C rings in the order of (3), (4), (5), (6), (7), (8), (9), (10) shown in the figure,
CAUTION:
-
If a damaged C rings are reused, it may not be possible to install the rear seat cushion trim and rear seat cushion pad correctly. When removing and installing C rings, be careful not to damage them.
-
If a C rings are damaged, replace the C rings with a new one.
4. Install in the reverse order of removal.
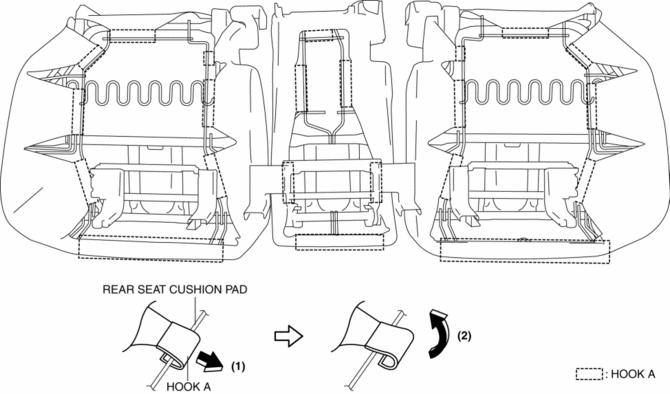
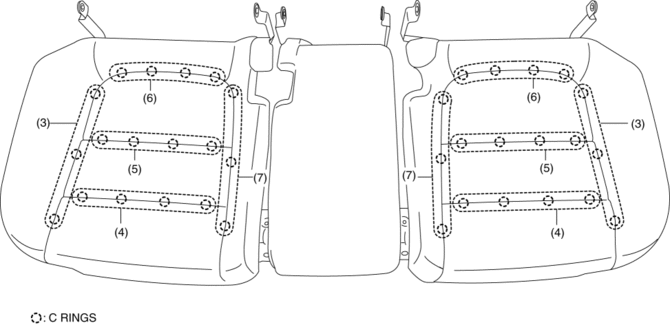
4:2:4 Split Type
1. Remove the trunk board..
2. Remove the rear seat..
3. Slide hooks A in the order of (1), (2) shown in the figure to detach it from the rear seat cushion pad.
4. Partially peal back the rear seat cushion trim from the rear seat cushion pad, remove C rings in the order of (3), (4), (5), (6), (7) shown in the figure,
CAUTION:
-
If a damaged C rings are reused, it may not be possible to install the rear seat cushion trim and rear seat cushion pad correctly. When removing and installing C rings, be careful not to damage them.
-
If a C rings are damaged, replace the C rings with a new one.
5. Install in the reverse order of removal.
 Rear Seat Cushion Removal/Installation
CAUTION:
When removing or putting in the rear seat cushion, contact with the surrounding
areas of the vehicle could cause scratches and damage. When removing or putting
in the rear seat ...
 Rear Seat Removal/Installation
CAUTION:
When removing or putting in the rear seat, contact with the surrounding areas
of the vehicle could cause scratches and damage. When removing or putting in
the rear seat, always ...
Other materials:
Drive By Wire Control
Outline
Calculates the optimum target throttle valve opening angle at all engine
speeds and controls the throttle valve actuator.
The drive-by-wire control is composed of the idle air control, accelerator
control, traction control, excess engine speed control, overspeed control, ...
A Pillar Trim Removal/Installation
1. Partially peel back the seaming welt.
2. Take the shaded area shown in the figure, and pull the A-pillar trim in the
direction of the arrow (1) while detaching clip A, clips B.
3. Cut the lead wire connecting clips B and grommet using a nipper.
4. Pull the A-pillar trim in the dir ...
DRL (Daytime Running Light) System
Outline
The DRL system automatically switches the headlights to HI beams (50% dim)
or illuminates the DRL bulb when the ignition is switched ON (engine on), the
parking brake is released, and the shift lever is in a position other than P
(ATX).
The front body control module ( ...
