Mazda CX-5 Service & Repair Manual: Rear End Panel Removal [Panel Replacement]
Symbol Mark

Removal Procedure
1. Drill the 77 locations indicated by (A) shown in the figure.
2. Drill the 18 locations indicated by (B) from room side shown in the figure.
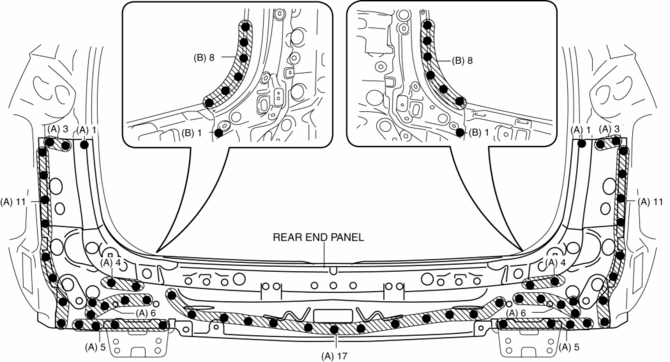
3. Remove the rear end panel.
 Rear End Panel Installation [Panel Replacement]
Symbol Mark
Installation Procedure
1. When installing new parts, measure and adjust the body as necessary to conform
with standard dimensions.
2. Drill holes for the plug welding before inst ...
 Rear Fender Lower Panel Installation [Panel Replacement]
Symbol Mark
Installation Procedure
1. When installing new parts, measure and adjust the body as necessary to conform
with standard dimensions.
2. After temporarily installing new parts, make ...
Other materials:
Front Tilt Motor Inspection
WARNING:
Handling a side air bag improperly can accidentally operate (deploy) the
air bag, which may seriously injure you. Read the service warnings/cautions
in the Workshop Manual before handling the front seat (side air bag integrated)..
CAUTION:
When performing the pro ...
Air Bag System Service Warnings [Two Step Deployment Control System]
Air Bag Module Inspection
Inspecting an air bag module using a tester can operate (deploy) the air
bag module, which may cause serious injury. Do not use a tester to inspect an
air bag module. Always use the on-board diagnostic function to diagnose the
air bag module for malfunctions ...
Warning/Indicator Lights
Warning (Display Indication)
Message information such as system operations or malfunctions is indicated in
the display. Check the vehicle condition or have the vehicle inspected at an Authorized
Mazda Dealer according to the indication.
Brake System Warning Light
This warning has th ...
