Mazda CX-5 Service & Repair Manual: Rear Drive Shaft Inspection
1. Inspect each connecting part for looseness.
-
Tighten or replace parts if necessary.
2. Inspect the dust boot on the drive shaft for cracks, damage, leaking grease, and looseness in the boot band.
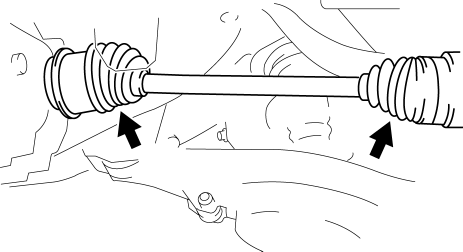
3. Inspect the drive shaft for bends, cracks, and wear in the joints or splines.
-
Repair or replace the drive shaft or boot band if necessary.
 Rear Drive Shaft Disassembly/Assembly
1. Disassemble in the order indicated in the table.
2. Assemble in the reverse order of disassembly.
1
Boot band (differential side)
(See Boot Band (Differential Sid ...
 Rear Drive Shaft Removal/Installation
CAUTION:
Performing the following procedures without first removing the ABS wheel?speed
sensor may possibly cause an open circuit in the harness if it is pulled by
mistake. Before perfor ...
Other materials:
Seat Weight Sensor Control Module Removal/Installation [Two Step Deployment
Control System]
CAUTION:
When the seat weight sensor control module is replaced with a new one, perform
the seat weight sensor calibration using the M?MDS..
1. Switch the ignition to off.
2. Disconnect the negative battery cable and wait for 1 min or more..
3. Disconnect the connectors.
...
Passenger Compartment Temperature Sensor Removal/Installation [Full Auto Air
Conditioner]
1. Disconnect the negative battery cable..
2. Remove the following parts:
a. Front scuff plate (driver-side).
b. Front side trim (driver-side).
c. Switch panel.
d. Decoration panel.
e. Shift lever knob (MTX).
f. Front console box.
g. Shift panel.
h. Upper panel.
i. Rear console. ...
Steering Wheel And Column Removal/Installation
WARNING:
Handling the air bag module improperly can accidentally operate (deploy)
the air bag module, which may seriously injure you. Read the service warnings
and cautions before handling the air bag module..
The steering column (EPS motor) temperature increases directly after ...
