Mazda CX-5 Service & Repair Manual: Rear Door Speaker Removal/Installation
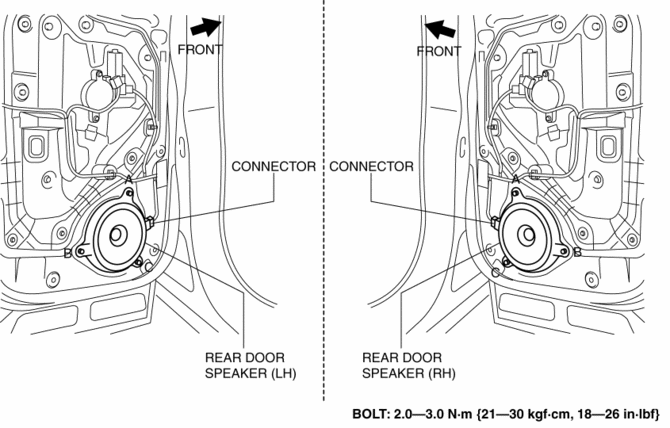
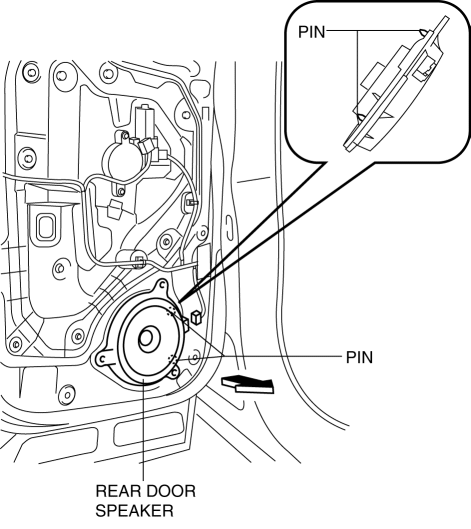
Without Bose®
NOTE:
-
If the procedure is performed while holding the front door speaker cone, it could deform the cone causing a malfunction. Therefore, perform the procedure while holding any part other than the cone.
1. Disconnect the negative battery cable..
2. Remove the rear door trim..
3. Disconnect the connector.

4. Remove the bolts in alphabetical order.
5. Pull the rear door speaker in the direction of the arrow shown in the figure and remove it while detaching the pins.

6. Install in the reverse order of removal.
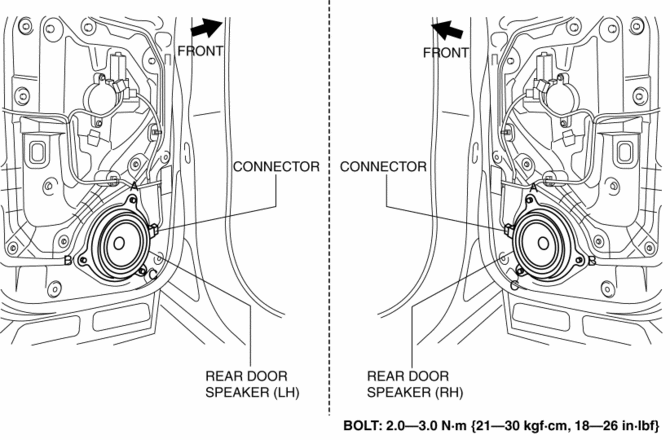
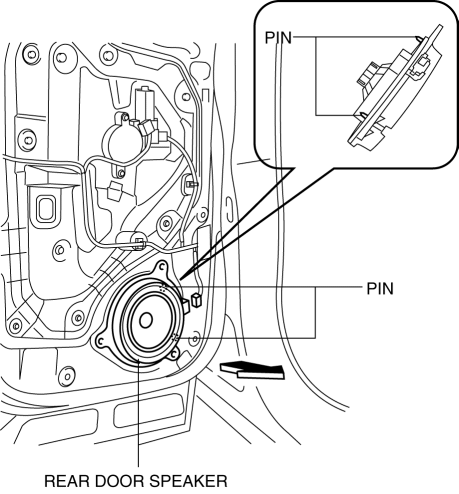
With Bose®
1. Disconnect the negative battery cable..
2. Remove the rear door trim..
3. Disconnect the connector.

4. Remove the bolts in alphabetical order.
5. Pull the rear door speaker in the direction of the arrow shown in the figure and remove it while detaching the pins.

6. Install in the reverse order of removal.
 Rear Door Speaker Inspection
1. Disconnect the negative battery cable..
2. Remove the rear door trim..
3. Disconnect the rear door speaker connector..
4. Verify that the resistance between the rear door speaker terminals is ...
 Rear Mount Camera
Purpose, Function
The rear mount camera shoots the conditions at the rear of the vehicle in
color, and after converting the video signal, it outputs the signal to the audio
unit. (with co ...
Other materials:
Condenser Removal/Installation
1. Disconnect the negative battery cable..
2. Discharge the refrigerant..
3. Remove the front under cover No.1..
4. Drain the engine coolant..
5. Remove the following parts:
a. Plug hole plate.
b. Air cleaner, air hose and fresh air duct component.
c. Coolant reserve tank.
d. Cooling ...
Front Body Control Module (Fbcm)
Outline
Located at the front of the vehicle, the front body control module (FBCM)
performs numerous system controls for functions at the front of the vehicle.
Function
The front body control module (FBCM) controls the system based on the input/output
signals.
The fu ...
Magnet Clutch [Manual Air Conditioner]
Purpose
The magnetic clutch transmits the rotation force from the engine to the shaft
in the A/C compressor.
Function
The magnetic clutch engages or disengages the magnetic clutch and the A/C
turns on or off by switching the power transmission from the engine.
Con ...
