Mazda CX-5 Service & Repair Manual: Rear Door Garnish Removal/Installation
WARNING:
-
Using a utility knife with bare hands can cause injury. Always wear gloves when using a utility knife.
Front
1. Using a tape-wrapped fastener remover, remove clips A in the direction of arrow (1), (2) shown in the figure.
2. Remove the double-sided adhesive tape in the position shown in the figure using the utility knife, remove the rear door garnish from the rear door sash.
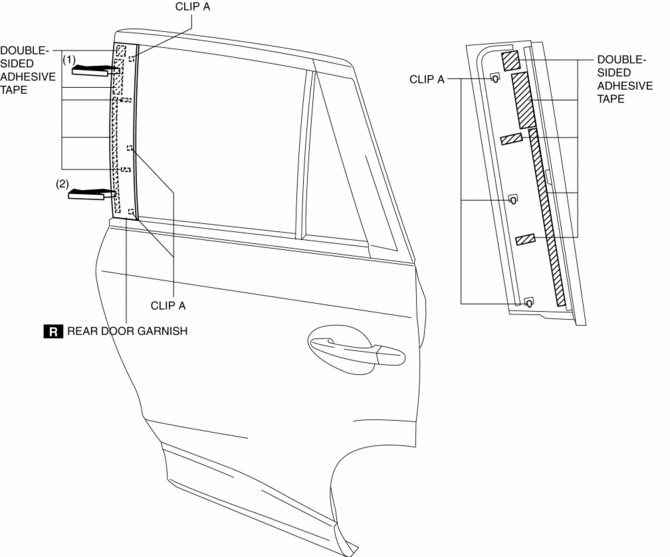
3. Install in the reverse order of removal.
Rear
1. Using a tape-wrapped fastener remover, remove clips B in the direction of arrow (1), (2) shown in the figure.
2. Remove the double-sided adhesive tape in the position shown in the figure using the utility knife, remove the rear door garnish from the rear door sash.
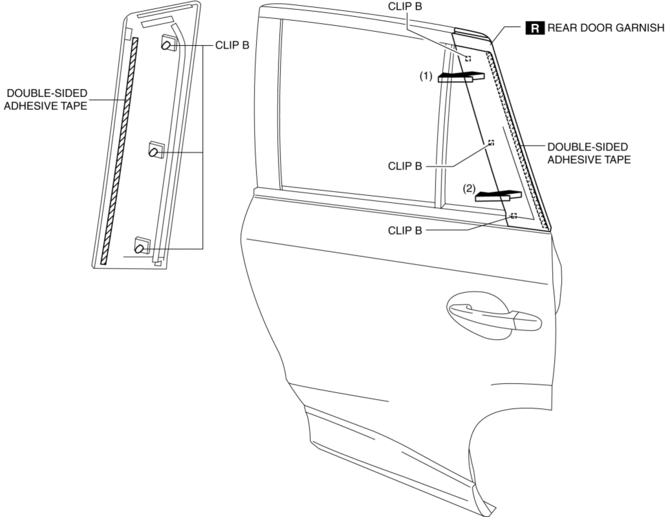
3. Install in the reverse order of removal.
 Rear Door Checker Removal/Installation
1. Fully close the rear door glass.
2. Disconnect the negative battery cable..
3. Remove the rear door trim..
4. Remove the rear door speaker..
5. Remove bolt.
6. Remove nuts.
7. P ...
 Rear Door Hinge Removal/Installation
1. Disconnect the negative battery cable..
2. Remove the following parts:
a. Rear door.
b. Front scuff plate.
c. Rear scuff plate.
d. B-pillar lower trim.
3. Remove in the order shown in t ...
Other materials:
Power Brake Unit Removal/Installation
CAUTION:
Once the brake switch clearance has automatically been adjusted, it cannot
be adjusted again. Therefore, replace the switch with a new one when replacing
the power brake unit or performing any procedure that changes the pedal stroke.
1. Remove the battery and battery tra ...
Main Silencer
Purpose, Function
Reduces the exhaust noise.
Construction
The main silencer is installed to the vehicle rear, under the trunk compartment.
2WD
AWD
The main silencer consists of the filters, holder, set plates and stiffener.
...
Front Door Trim Disassembly/Assembly
Driver-side
1. Disassemble in the order shown in the figure.
1
Switch panel cover
2
Power window main switch
(See Power Window Main Switch, Power Window Subswitch And Lock Switch
Removal Note.)
3
Fastener
...
