Mazda CX-5 Service & Repair Manual: Rear Bumper Reinforcement Removal/Installation
1. Disconnect the negative battery cable..
2. Remove the following parts:
a. Rear splash shield.
b. Rear combination light.
c. Rear bumper.
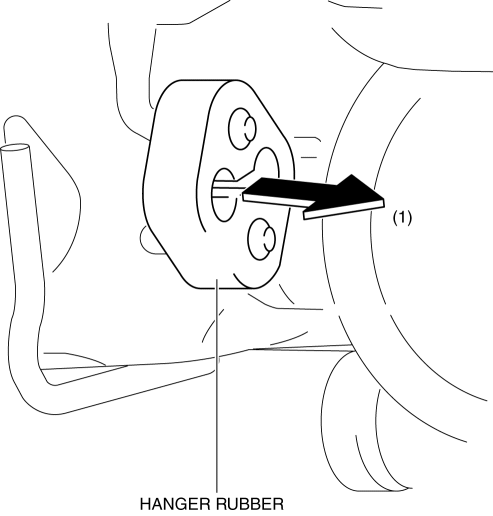
3. Remove the hanger rubber in the direction of the arrow (1) shown in the figure.
4. Remove nuts.
CAUTION:
-
Removing the rear bumper reinforcement without supporting it could cause the rear bumper reinforcement to fall and cause serious injury. Always perform the procedure with at least another person to prevent the rear bumper reinforcement from falling.
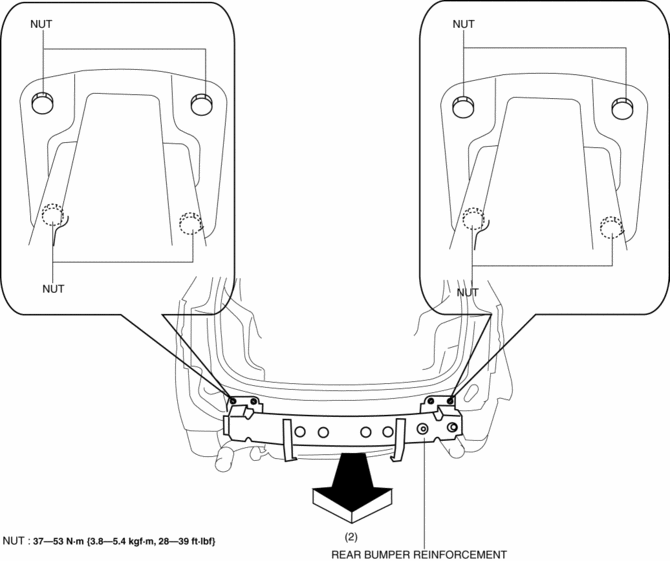
5. Remove the rear bumper reinforcement in the direction of the arrow (2) shown in the figure.
6. Install in the reverse order of removal.
 Rear Bumper Disassembly/Assembly
1. Disassemble in the order indicated in the table.
1
Screw
2
Reflector
3
Rear bumper face
2. Assemble ...
 Rear Bumper Removal/Installation
CAUTION:
Affix the protective tape to the position (body side) shown in the figure.
1. Disconnect the negative battery cable..
2. Remove the rear combination light..
3. Remove ...
Other materials:
Audio Set (Type A)
1 Power/Volume/Sound Controls
2 Operating the Radio
3 Operating the Compact Disc (CD) Player
4 How to use auxiliary jack/USB port
5 Error Indications
Power/Volume/Sound Controls
Power ON/OFF
Switch the ignition to ACC or ON. Press the power/volume dial to turn the audio
system on. Pre ...
Intake Manifold
Purpose, Function
Distributes intake air to each cylinder evenly.
Optimizes the combustion efficiency and performance of the engine by distributing
intake air to each cylinder.
Construction
The intake manifold is installed to the cylinder head.
...
Discharge Headlight System Inspection
WARNING:
Incorrect servicing of the discharge headlights could result in electrical
shock. Before servicing the discharge headlights, always refer to the service
warnings..
Terminal layout
Inspection procedure
Step
Inspection
Actio ...
