Mazda CX-5 Service & Repair Manual: Rear Buckle Removal/Installation
1. Switch the ignition to off.
2. Disconnect the negative battery cable and wait for 1 min or more
..
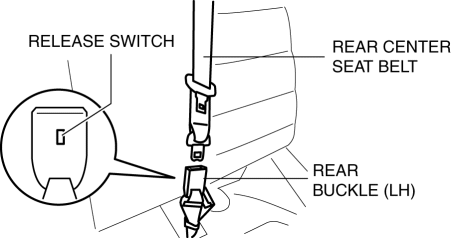
3. Press the release switch, then disconnect the rear center seat belt and rear buckle.
4. Fold down the rear seat back.
5. Remove the trunk board..
6. Remove the bolt.
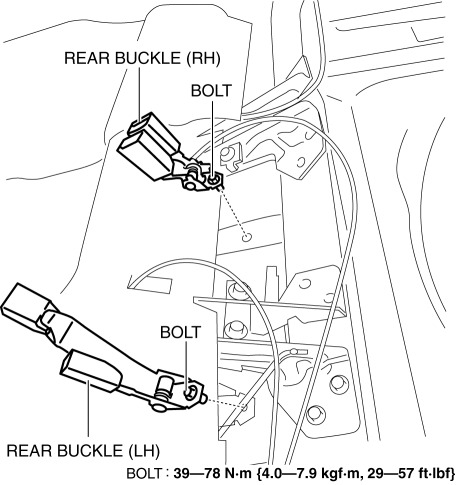
7. Remove the rear buckle (RH) and rear buckle (LH).
8. Install in the reverse order of removal..
Rear Buckle Installation Note
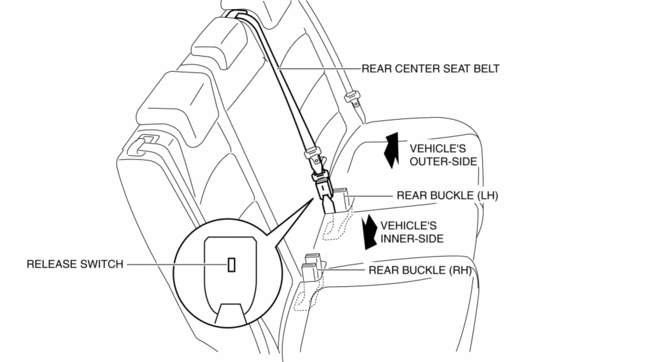
1. After installing the rear center seat belt, place the release switch of the rear buckle so that it faces the vehicle’s inner-side as shown in the figure.
 Pre Tensioner Seat Belt [Two Step Deployment Control System]
Purpose
The pre-tensioner seat belt retracts and tightens the seat belt webbing to
protect the front passengers during a collision.
Function
The pre-tensioner seat belts operate ...
 Rear Seat Belt Removal/Installation
CAUTION:
The ELR (emergency locking retractor) has a spring that will unwind if the
retractor cover is removed. The spring cannot be rewound by hand. If this occurs,
the ELR will not wor ...
Other materials:
High Clutch [Fw6 A EL, Fw6 Ax EL]
Purpose/Function
The high clutch operates in 4GR, 5GR, and 6GR and intermittently operates
the rear carrier by drive force from the turbine shaft.
For the high clutch, a centrifugal balance clutch has been adopted to prevent
clutch drag and to assure stabilized piston thrust in ...
Synchronizer Mechanism [C66 M R]
Purpose, Function
For smooth gear changes, the synchronizer mechanism synchronizes the rotation
of the engaging area and engages gears.
Construction
Detent ball-type synchronizer key
A detent ball-type synchronizer key has been adopted for the synchronizer
mechanism ex ...
Rear Body Control Module (Rbcm) Configuration (Using Read/Write Function)
NOTE:
When performing configuration, it is necessary to read the vehicle specification
information from the rear body control module (RBCM) before replacing it. Connect
the M-MDS to the vehicle and perform vehicle identification before removing
the rear body control module (RBCM). T ...
