
Mazda CX-5 Service & Repair Manual: Power Seat System
Outline
-
The power seat system drives the electric motor, operates the front seat safely, and changes the driving posture to suit the occupant by operating the power seat switch.
-
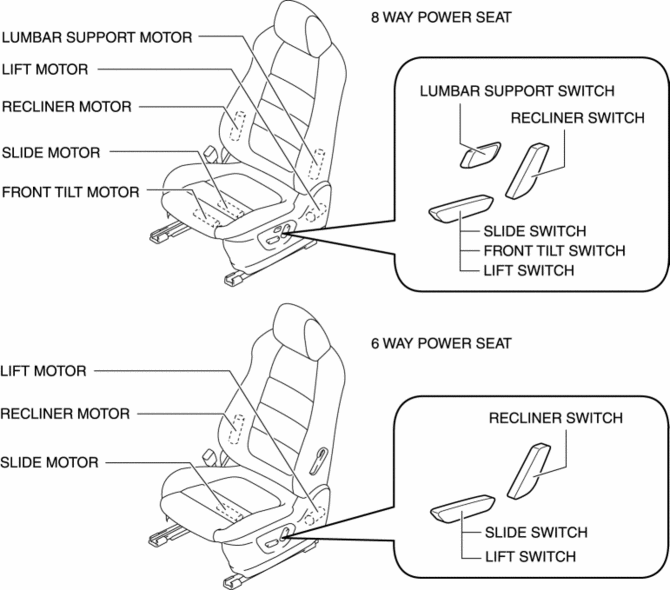
8 way power seats or 6 way power seats have been adopted on the driver's seat.
Function
-
The 8 way power seats are equipped with the following functions:
-
Slide mechanism
-
Recliner mechanism
-
Lift mechanism
-
Front tilt mechanism
-
Lumbar support mechanism
-
The 6 way power seats are equipped with the following functions:
-
Slide mechanism
-
Recliner mechanism
-
Lift mechanism
Slide mechanism
-
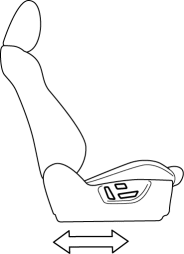
The sliding function adjusts the front and back positions of the front seat.
Recliner mechanism
-
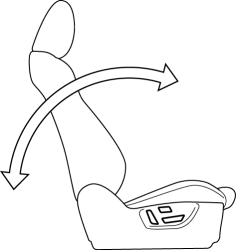
The recliner function adjusts the angle of the front seat back.
Front tilt mechanism
-
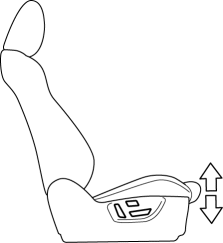
The front tilt function adjusts the height of the front part of the front seat cushion.
Lift mechanism
-
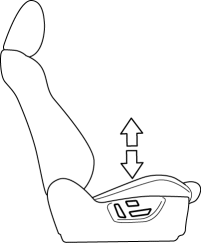
The lift function adjusts the height of the front seat.
Lumbar support mechanism
-
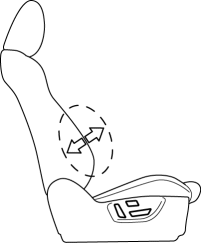
The lumbar support function adjusts the bulge amount of the abdominal area of the front seat back.
Structural View
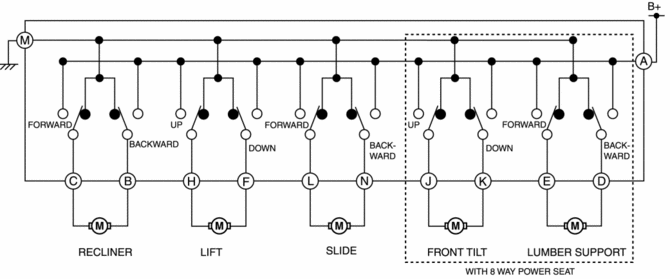
System Diagram
Operation
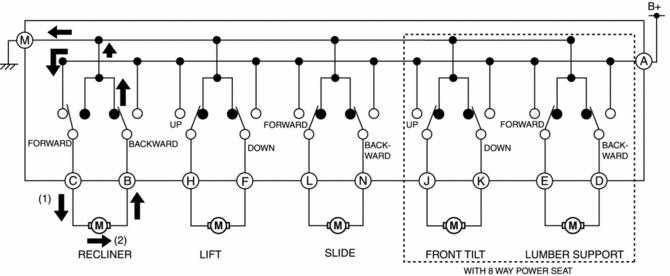
Recliner operation (example: forward recline operation)
1. When the recliner switch is operated (1) forward, current from the battery flows (2) to the recliner motor.
2. When current flows to the recliner motor for forward motion, the motor drives to tilt the front seat back forward.
Lift operation (example: lift up operation)
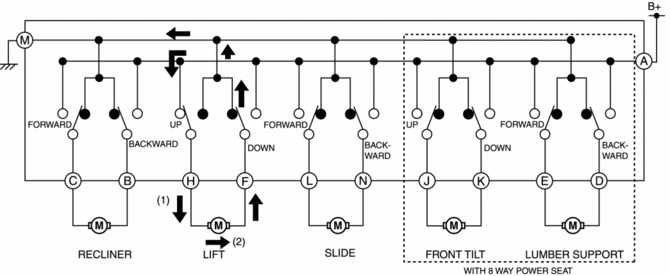
1. When the lift switch is operated (1) in the lift-up direction, current from the battery flows (2) to the lift motor.
2. When current flows to the lift motor for lift-up motion, the motor drives to set the position of the front seat higher.
Slide operation (example: forward slide operation)
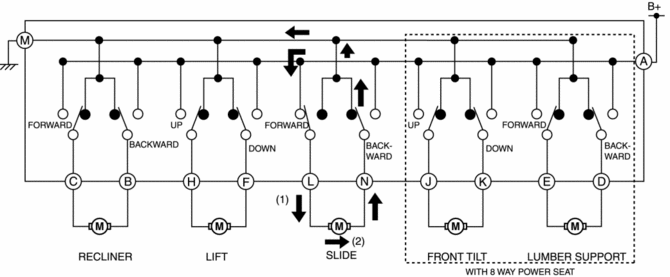
1. When the sliding switch is operated (1) forward, current from the battery flows (2) to the sliding motor.
2. When current flows to the sliding motor for forward motion, the motor drives to slide the front seat forward.
Front tilt operation (example: forward tilt up operation) (with 8 way power seat)
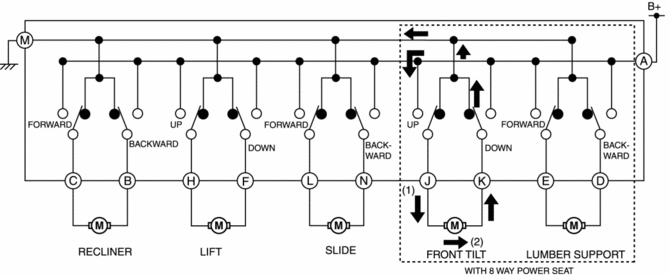
1. When the front tilt switch is operated (1) in the tilt-up direction, current from the battery flows (2) to the front tilt motor.
2. When current flows to the front tilt motor for tilt-up motion, the motor drives to set the position of the front part of the front seat cushion higher.
Lumber support operation (example: forward operation) (with 8 way power seat)
1. When the lumbar support switch is operated (1) forward, current from the battery flows (2) to the lumbar support motor.
2. When current flows to the lumbar support motor for forward motion, the motor drives to set the bulge amount of the abdominal area of the front seat back.

Fail-safe
-
Function not equipped.
 Lumber Support Motor Removal/Installation
WARNING:
Handling a side air bag improperly can accidentally operate (deploy) the
air bag, which may seriously injure you. Read the service warnings/cautions
in the Workshop Manual befor ...
 Rear Center Seat Belt Removal/Installation
CAUTION:
The ELR (emergency locking retractor) has a spring that will unwind if the
retractor cover is removed. The spring cannot be rewound by hand. If this occurs,
the ELR will not wor ...
Other materials:
Back Up Light Bulb Removal/Installation
1. Disconnect the negative battery cable..
2. Insert a tape-wrapped flathead screwdriver into the service hole in the position
shown in the figure.
3. Move the flathead screwdriver in the direction of the arrow (1) shown in the
figure, pull out the service hole cover from the liftgate, a ...
Transmission/Transaxle Abbreviations
AAS
Active Adaptive Shift
ABS
Antilock Brake System
ABDC
After Bottom Dead Center
ACC
Accessories
AFS
Adaptive Front Lighting System
ALC
...
Rear Drive Shaft
Purpose, Function
Engine noise and vibration have been reduced due to adoption of a bell joint
on the wheel side of the constant velocity joint.
A low noise and vibration double offset joint with low slide resistance has
been adopted for the differential side of the constant v ...
