Mazda CX-5 Service & Repair Manual: Parking/Front Turn Light Bulb Removal/Installation
Halogen Type
1. Disconnect the negative battery cable..
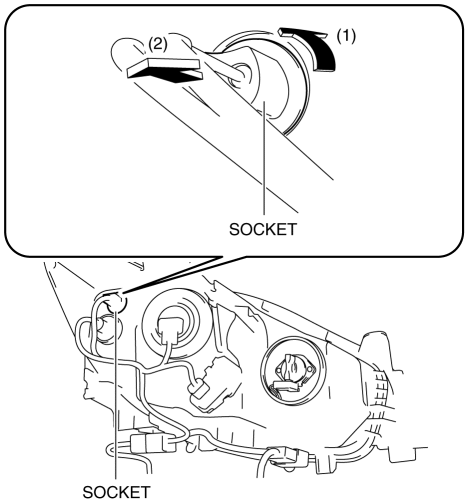
2. Rotate the socket in the direction of the arrow (1) shown in the figure and remove it from the front combination light in the direction of the arrow (2) shown in the figure.
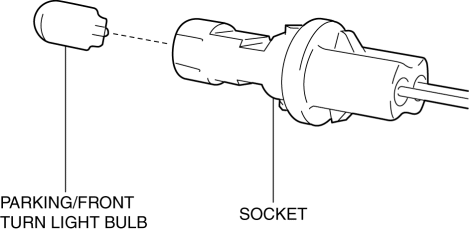
3. Remove the parking/front turn light bulb.

4. Install in the reverse order of removal.
Discharge Type
Parking/Front turn light bulb (LH)
1. Disconnect the negative battery cable..
2. Remove the air cleaner cover..
3. Remove the relay and fuse block upper cover..
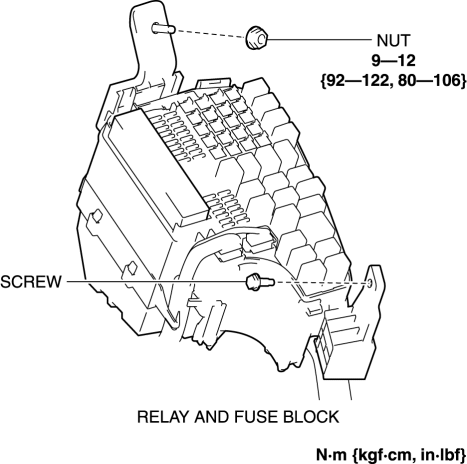
4. Remove the nut and screw.
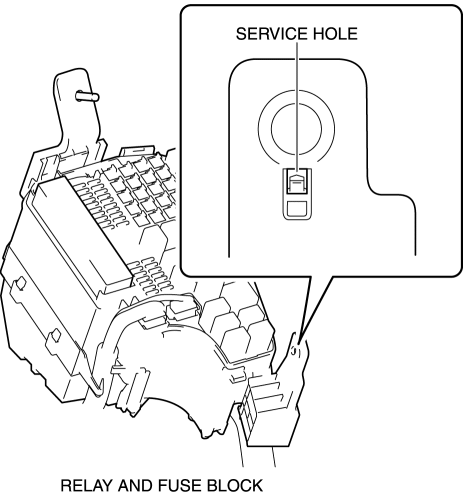
5. Insert a tape-wrapped flathead screwdriver into the service hole in the position shown in the figure.
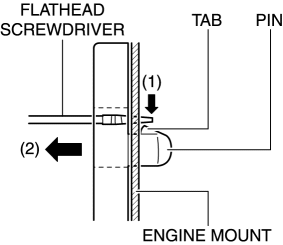
6. While pressing the pin tab in the direction of the arrow (1) shown in the figure using a flathead screwdriver, pull the pin in the direction of the arrow (2) shown in the figure to detach the pin tab and engine mount.
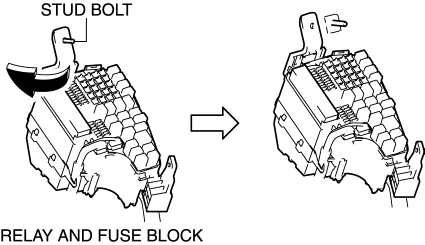
7. Pull out the relay and fuse block from the stud bolt and set it aside as shown in the figure.
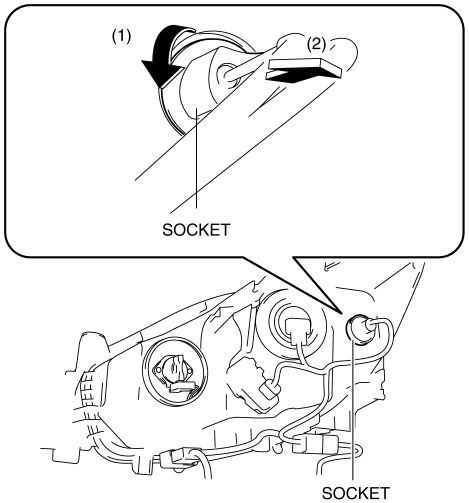
8. Rotate the socket in the direction of the arrow (3) shown in the figure and remove it from the front combination light in the direction of the arrow (4) shown in the figure.

9. Remove the parking/front turn light bulb.
10. Install in the reverse order of removal.
Parking/Front turn light bulb (RH)
1. Disconnect the negative battery cable..
2. Remove the washer tank bracket..
3. Rotate the socket in the direction of the arrow (1) shown in the figure and remove it from the front combination light in the direction of the arrow (2) shown in the figure.
4. Remove the parking/front turn light bulb.
5. Install in the reverse order of removal.
 Lighting Systems
Outline
Front combination lights have been adopted with parts related to the front
exterior lights grouped and housed together.
The following systems have been adopted to the headlig ...
 Rear Turn Light Bulb Removal/Installation
1. Disconnect the negative battery cable..
2. Insert a tape-wrapped flathead screwdriver into the service hole in the position
shown in the figure.
3. Move the flathead screwdriver in the di ...
Other materials:
Clock Spring Inspection [Two Step Deployment Control System]
1. Disconnect the negative battery cable and wait for 1 min or more..
2. Remove the driver?side air bag module..
3. Remove the steering wheel..
4. Remove the column cover..
5. Remove the clock spring..
6. Verify that the continuity is as indicated in the table.
If not as indicated ...
Shroud Side Member Installation [Panel Replacement]
Symbol Mark
Installation Procedure
1. When installing new parts, measure and adjust the body as necessary to conform
with standard dimensions.
2. Drill holes for the plug welding before installing the new parts.
3. After temporarily installing new parts, make sure the related parts fit p ...
Oil Cooler [Fw6 A EL, Fw6 Ax EL]
Purpose/Function
The oil cooler constantly maintains maximum ATF performance in the transaxle
by maintaining an optimum ATF temperature which has the effect of achieving
reduced fuel consumption.
Construction/Operation
The oil cooler performs the following operations accord ...
