Mazda CX-5 Service & Repair Manual: Outer Mirror Glass Removal
1. Disconnect the negative battery cable..
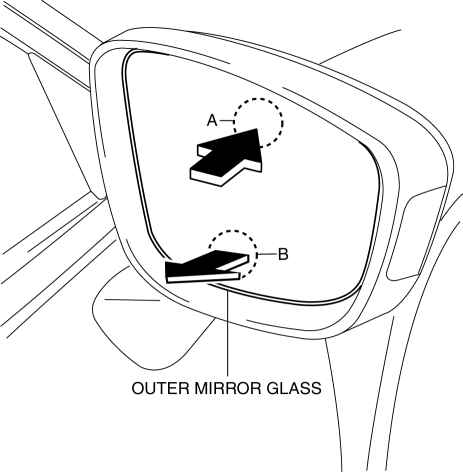
2. Press area A of the outer mirror glass shown in the figure so that area B moves outward.
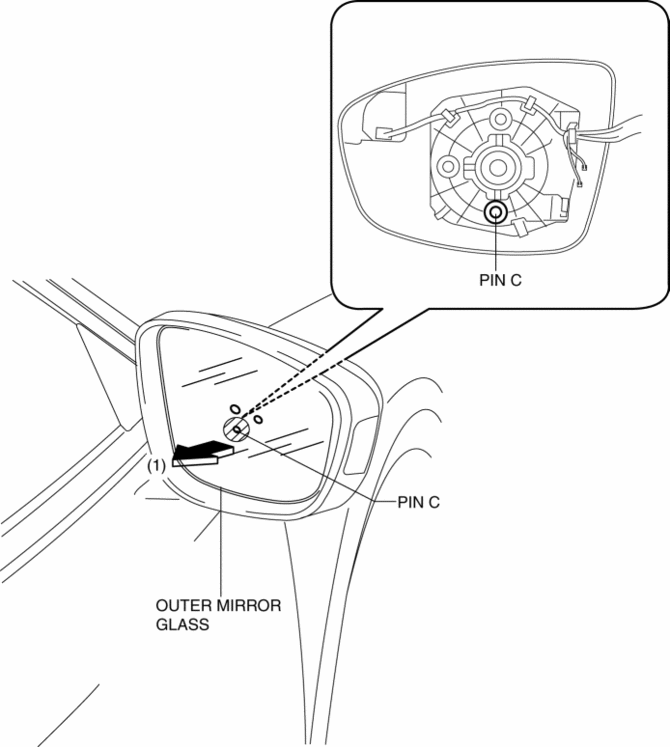
3. Put your hand on the lower part of the outer mirror glass and while supporting the hatch-marked area shown in the figure, remove pin C in the direction of the arrow (1).
CAUTION:
-
When removing the outer mirror glass, if excessive force is applied to the area other than cross-hatched area, the outer mirror glass could be damaged.
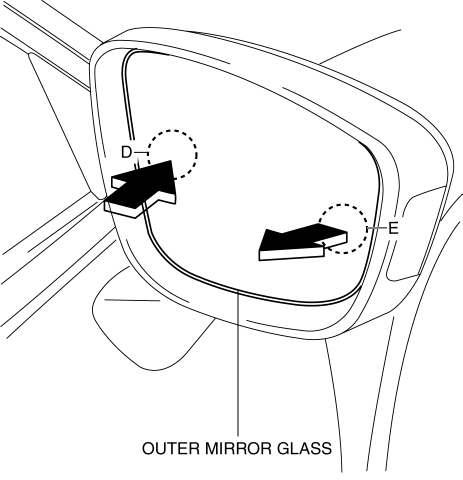
4. Press area D of the outer mirror glass shown in the figure so that area E moves outward.
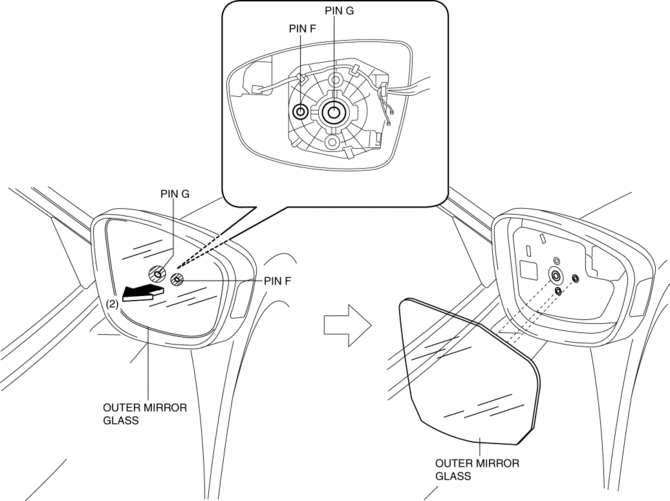
5. Put your hand on the side part of the outer mirror glass and while supporting the hatch-marked area shown in the figure, remove pin F, pin G in the direction of the arrow (2).
CAUTION:
-
When removing the outer mirror glass, if excessive force is applied to the area other than cross-hatched area, the outer mirror glass could be damaged.
6. Pull the outer mirror glass in the direction of the arrow (1) and remove it while detaching the pin E from the mirror glass holder.
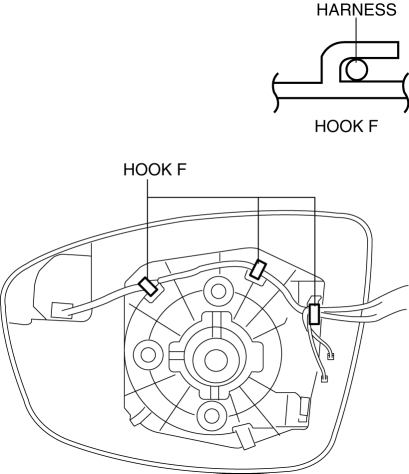
7. Remove the harness from hooks F.
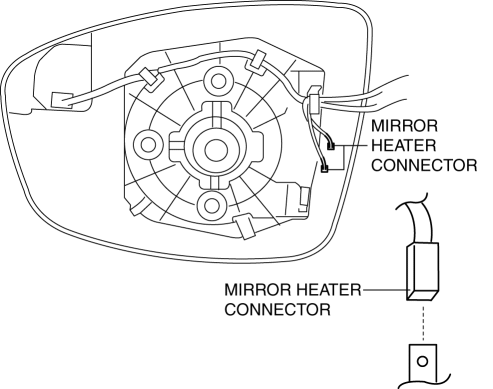
8. Disconnect the mirror heater connectors. (with heated outer mirror)
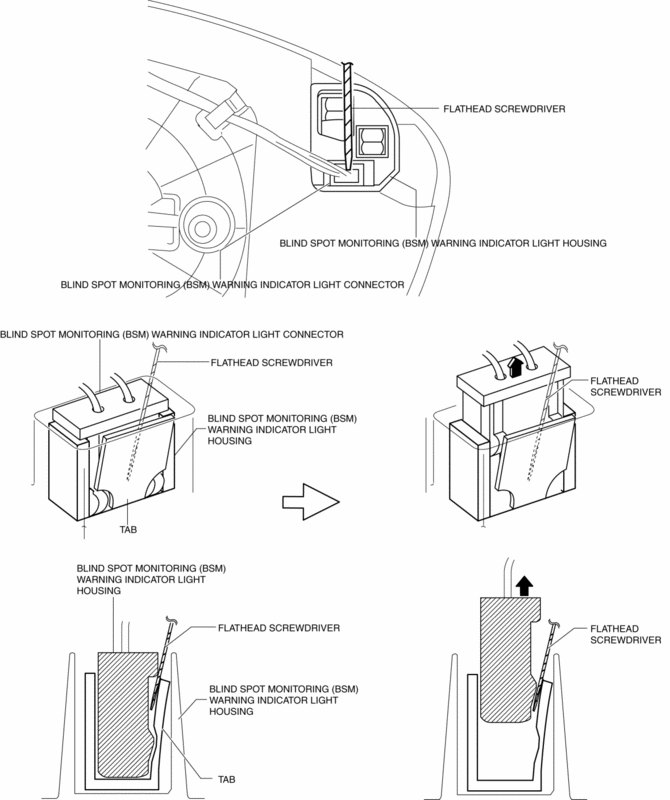
9. Insert a tape-wrapped flathead screwdriver to the position shown in the figure, remove the blind spot monitoring (BSM) warning indicator light connector (with blind spot monitoring system).
CAUTION:
-
The connector can be easily deformed, therefore do not apply excessive force.
10. Remove the mirror glass holder and the outer mirror glass as a single unit.
 Outer Mirror Glass Installation
1. Connect the mirror heater connectors. (with heated outer mirror)
2. Connect the blind spot monitoring (BSM) warning indicator light connector
(with blind spot monitoring system).
NOTE:
...
 Power Outer Mirror
Outline
The power outer mirror adjusts the outer mirror glass position up/down and
left/right using the up/down adjustment motor and, left/right adjustment motor.
The up/down adjustm ...
Other materials:
Cooling System
Outline
Passing water resistance is reduced by improvement of the engine coolant
passage shape.
Pump efficiency is improved by changing the water pump impeller to the closed
impeller.
Structural View
Flow Chart
Structure
Consists of the followi ...
Oil Pressure Switch Inspection
1. Switch the ignition ON (engine off) and verify that the oil pressure warning
light is illuminated.
2. Start the engine and verify that the oil pressure warning light turns off.
If the oil pressure warning light is not illuminated or remains illuminated,
inspect the wiring harness ...
Rear End Panel Installation [Panel Replacement]
Symbol Mark
Installation Procedure
1. When installing new parts, measure and adjust the body as necessary to conform
with standard dimensions.
2. Drill holes for the plug welding before installing the new parts.
3. After temporarily installing new parts, make sure the related parts fit p ...
