Mazda CX-5 Service & Repair Manual: Mass Air Flow (MAF) Sensor Inspection
Visual Inspection
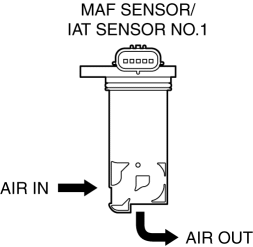
1. Remove the MAF sensor/IAT sensor No.1..
2. Visually inspect the MAF sensor for the following:
-
Damage, cracks, soiling
-
Rusted sensor terminal
-
Bent sensor terminal
-
If there is any malfunction, repair or replace the MAF sensor/IAT sensor No.1..
Voltage Inspection
1. Disconnect the negative battery cable..
2. Remove the MAF sensor/IAT sensor No.1 without disconnect the connector..
3. Reconnect the negative battery cable..
4. Connect the M-MDS to the DLC?2.
5. Switch the ignition ON (engine off or on).
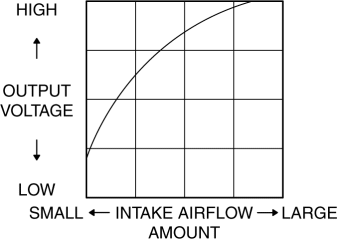
6. As the air gradually approaches the MAF detection part of the MAF sensor/IAT sensor No.1, verify that the MAF sensor output voltage (PID: MAF) varies..

-
If not as verified, replace the MAF sensor/IAT sensor No.1..
Specification

 Manifold Absolute Pressure (Map) Sensor/Intake Air Temperature (Iat) Sensor
No.2 Removal/Installation
NOTE:
Because the IAT sensor No.2 is integrated in the MAP sensor, replacing the
IAT sensor No.2 includes replacement of the MAP sensor/IAT sensor No.2.
1. Disconnect the negative bat ...
 Mass Air Flow (MAF) Sensor
Purpose/Function
Detects the intake airflow amount introduced into the cylinder as basic information
for mainly determining the fuel injection amount.
Detects the intake airflow amou ...
Other materials:
Tire Pressure Monitoring System Warning Light
Purpose, Function
The tire pressure monitoring system warning light notifies the driver that
it was determined that a tire pressure has decreased below the specified value
based on the initialization.
The tire pressure monitoring system warning light notifies the driver that
...
Discharge Headlight Control Module Removal/Installation
WARNING:
Incorrect servicing of the discharge headlights could result in electrical
shock. Before servicing the discharge headlights, always refer to the service
warnings..
1. Disconnect the negative battery cable..
2. Remove the front bumper..
3. Disconnect the connector.
...
Back Up Light Bulb Removal/Installation
1. Disconnect the negative battery cable..
2. Insert a tape-wrapped flathead screwdriver into the service hole in the position
shown in the figure.
3. Move the flathead screwdriver in the direction of the arrow (1) shown in the
figure, pull out the service hole cover from the liftgate, a ...
