Mazda CX-5 Service & Repair Manual: Map Light Bulb Removal/Installation
Front Map Light
1. Disconnect the negative battery cable..
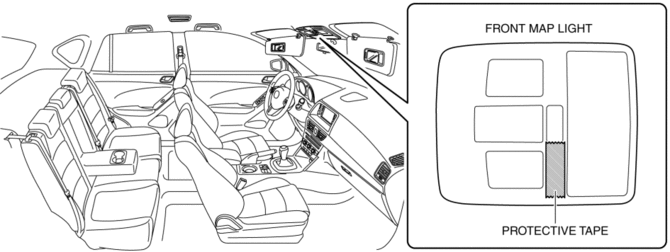
2. To prevent scratches or damage, affix protective tape to the position shown in the figure.
CAUTION:
-
If a flathead screwdriver is inserted into the gap between the front map light and lens, the front map light could interfere with the flathead screwdriver resulting in damage to the front map light. When removing the lens from the front map light, perform the procedure after affixing protective tape to the front map light.
3. Press the lens to secure a sufficient space for inserting a flathead screwdriver.
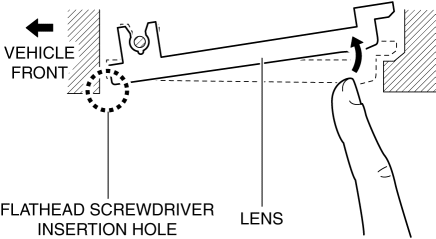
4. Insert a tape-wrapped flathead screwdriver into the gap between the lens and front map light shown in the figure.

5. Move the flathead screwdriver in the direction of the arrow (1) shown in the figure, pull out the lens from the front map light, and detach the front map light pin and lens.
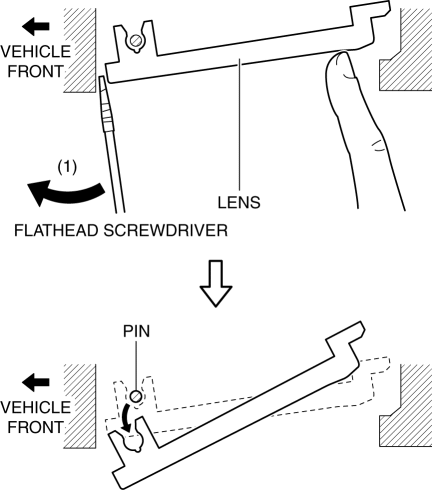
6. Remove the lens.
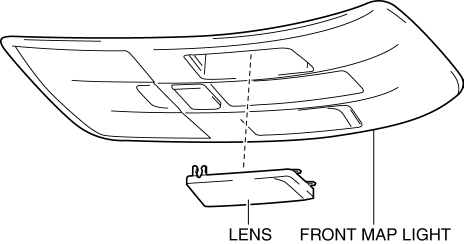
7. Press the front map light spring in the direction of the arrow (2) shown in the figure and detach the front map light spring and front map light bulb.
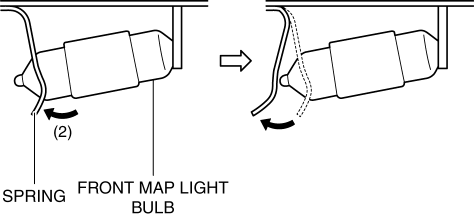
8. Remove the front map light bulb.
9. Install in the reverse order of removal.
Rear Map Light
1. Disconnect the negative battery cable..
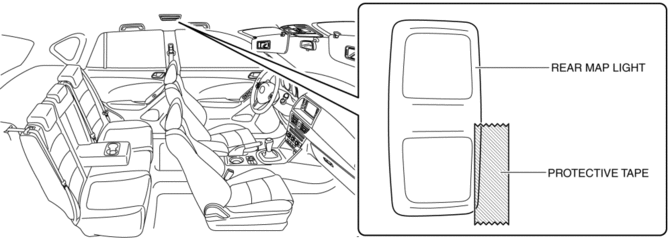
2. To prevent scratches or damage, affix protective tape to the position shown in the figure.
CAUTION:
-
If a flathead screwdriver is inserted into the gap between the rear map light and lens, the rear map light could interfere with the flathead screwdriver resulting in damage to the rear map light. When removing the lens from the rear map light, perform the procedure after affixing protective tape to the rear map light.
3. Press the lens to secure a sufficient space for inserting a flathead screwdriver.

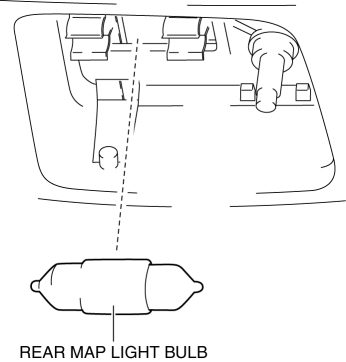
4. Insert a tape-wrapped flathead screwdriver into the gap between the lens and rear map light shown in the figure.

5. Move the flathead screwdriver in the direction of the arrow (1) shown in the figure, pull out the lens from the rear map light, and detach the rear map light pin and lens.

6. Remove the lens.
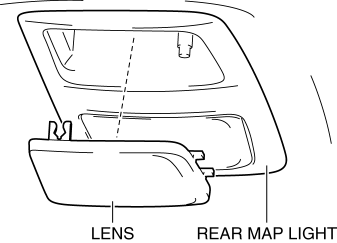
7. Move the rear map light spring in the direction of the arrow (2) shown in the figure and detach the rear map light spring and rear map light bulb.
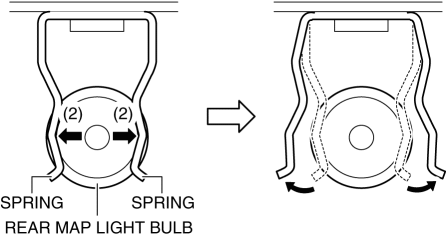
8. Remove the rear map light bulb.
9. Install in the reverse order of removal.
 Interior Lighting System
Outline
A room light control system has been adopted in which illumination time and
illumination level of the interior lights change.
The rear body control module (RBCM) performs roo ...
 Map Light Inspection
Front Map Light
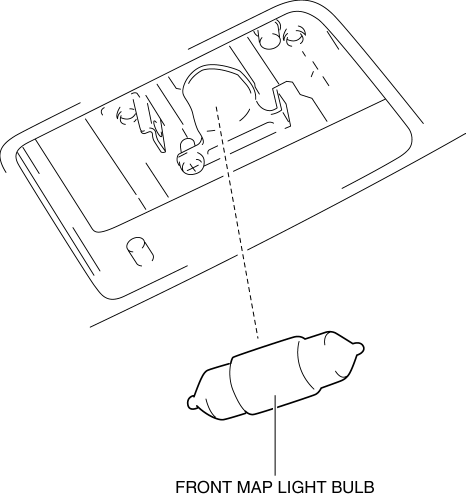
1. Disconnect the negative battery cable..
2. Remove the front map light..
3. Verify that the continuity between the front map light terminals is as indicated
in the table.
...
Other materials:
Fuel System
Purpose, Outline
A multiple hole type fuel injector has been adopted which provides higher
fuel injection accuracy for improved fuel efficiency and output.
Piston movement-compression by the 4-head cam inside the high pressure fuel
pump heightens the fuel pressure, achieving imp ...
Air Bag System Warning Light [Standard Deployment Control System]
Purpose
The air bag system warning light notifies the driver of a malfunction in
the SRS air bag system.
Function
If a malfunction occurs in the SRS air bag system, the air bag system warning
light illuminates or flashes.
Construction
LEDs (light-emitting d ...
Oil Filter Replacement
WARNING:
Hot engines and engine oil can cause severe burns. Turn off the engine and
wait until it and the engine oil have cooled.
A vehicle that is lifted but not securely supported on safety stands is dangerous.
It can slip or fall, causing death or serious injury. Never work ...
