Mazda CX-5 Service & Repair Manual: Light Switch Removal/Installation
NOTE:
-
When removing the light switch, it is necessary to rotate the steering wheel. If the ignition is switched off from ON (engine on) with the driver's door closed, the steering wheel is locked. Therefore, perform the procedure in Steps 1 to 3 so that the steering wheel is not locked.
1. Switch the ignition ON (engine on).
2. Open the driver's door.
3. Switch the ignition to off.
4. Disconnect the negative battery cable..
5. Remove the column cover..
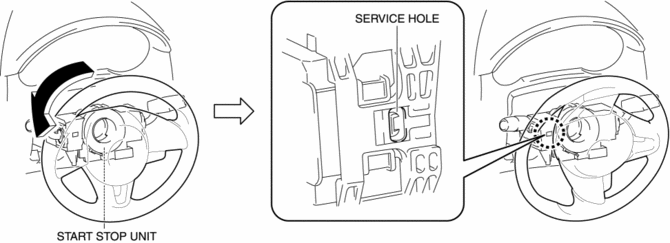
6. Rotate the steering wheel until the service hole in the position shown in the figure is visible.

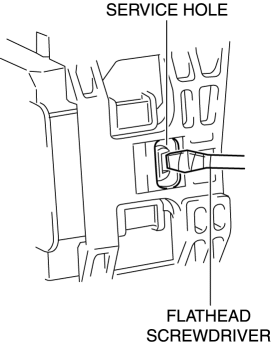
7. Insert a tape-wrapped flathead screwdriver into the service hole in the position shown in the figure.

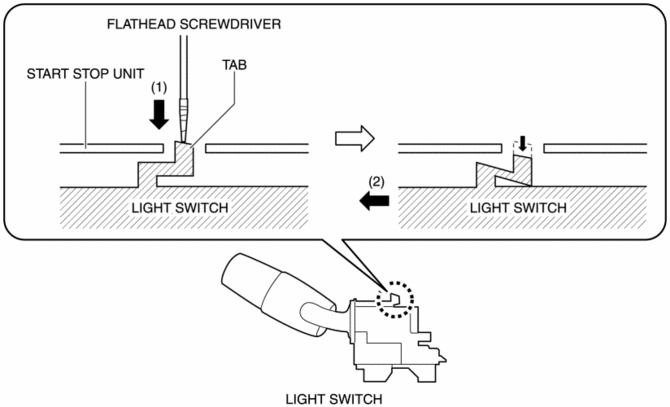
8. While pressing the light switch tab in the direction of the arrow (1) shown in the figure using a flathead screwdriver, pull out the light switch in the direction of the arrow (2) shown in the figure to detach the light switch tab and the start stop unit.

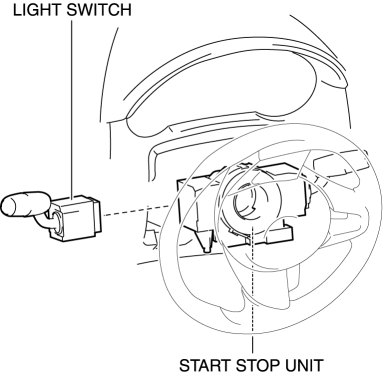
9. Remove the light switch.

10. Install in the reverse order of removal.
 Light Switch Inspection
Light Switch
1. Disconnect the negative battery cable..
2. Remove the column cover..
3. Remove the light switch..
4. Verify that the continuity between the light switch terminals is as indicate ...
 Exterior
...
Other materials:
Manual Transaxle Oil Inspection [C66 M R]
1. Park the vehicle on level ground.
2. Remove the front under cover No.2..
3. Remove the oil level plug and gasket.
4. Verify that the manual transaxle oil is near the brim of the plug port.
When the manual transaxle oil level is lower than the lower limit, add manual
transaxl ...
Fuel Tank Pressure Sensor
Purpose/Function
The fuel tank pressure sensor detects the fuel tank pressure.
Fuel tank pressure sensor is only used for OBD.
Construction
The fuel tank pressure sensor is equipped to the charcoal canister.
A piezoelectric-type sensor has been adopted.
...
Power Brake Unit Removal/Installation
CAUTION:
Once the brake switch clearance has automatically been adjusted, it cannot
be adjusted again. Therefore, replace the switch with a new one when replacing
the power brake unit or performing any procedure that changes the pedal stroke.
1. Remove the battery and battery tra ...
