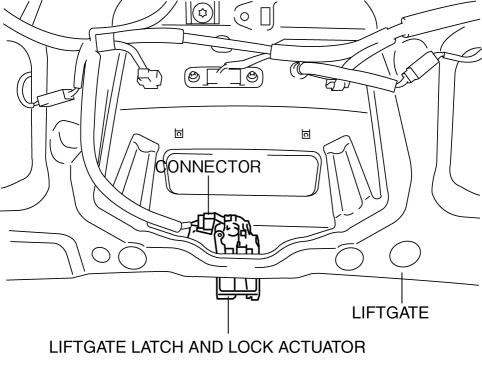
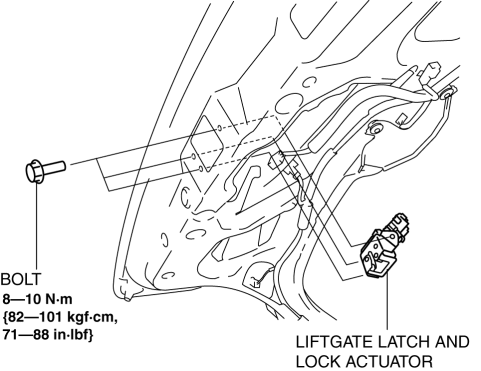
Mazda CX-5 Service & Repair Manual: Liftgate Latch And Lock Actuator Removal/Installation
1. Disconnect the negative battery cable..
2. Remove the following parts:
a. Liftgate upper trim.
b. Liftgate side trim.
c. Liftgate lower trim.
3. Disconnect the connector.

4. Remove the bolts.

5. Remove the liftgate latch and lock actuator from the liftgate.
6. Install in the reverse order of removal.
 Liftgate Latch And Lock Actuator Inspection
The following actuator and switch are integrated with the liftgate latch
and lock actuator.
From the actuator/switch name and operation in the following table, select
the actua ...
 Liftgate Latch Switch
Purpose, Function
The switch turns on/off in conjunction with the rotation of the latch lever,
and it detects the open/closed condition of the liftgate by the voltage value
which is chang ...
Other materials:
Discharge Headlight System
Outline
The discharge headlight system utilizes a gas discharge type light to emit
a white light resembling sunlight over a wide area. Also, use of the gas discharge
type light realizes high efficiency, low power consumption lighting.
Structural View
System Wiring Diagram
...
Tire Pressure Monitoring System Initialization Procedure
Perform the tire pressure monitoring system initialization when the following
operations have been performed:
Tire pressures have been adjusted
Tires or wheels have been replaced
Tires have been rotated
DSC HU/CM replaced
DSC HU/CM ...
Master Cylinder Removal/Installation
1. Remove the battery..
2. Remove in the order indicated in the table.
3. Install in the reverse order of removal.
4. After installation, add brake fluid, bleed the air, and inspect for fluid
leakage..
1
Brake fluid level sensor connector
2
...
