Mazda CX-5 Service & Repair Manual: Liftgate Hinge Removal/Installation
1. Disconnect the negative battery cable..
2. Remove the following parts:
a. Rear scuff plate.
b. Trunk end trim.
c. Trunk side trim.
d. C-pillar trim.
e. D-pillar trim.
f. Liftgate.
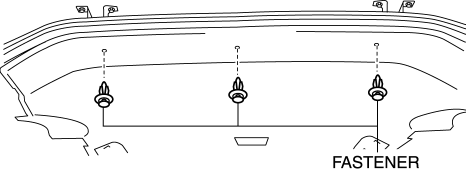
3. Remove fasteners.

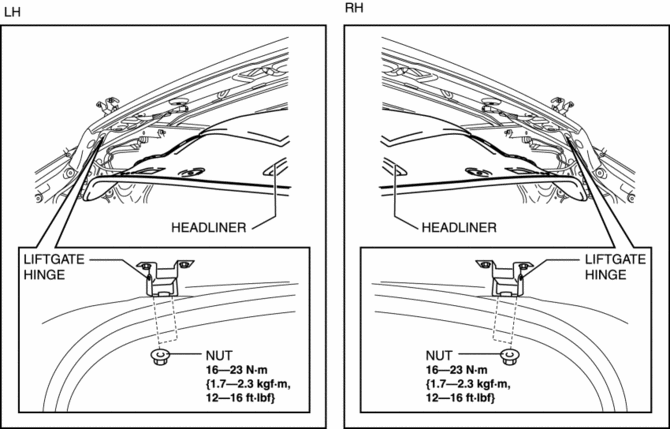
4. While partially peeling back the rear part of the headliner, remove nuts.
CAUTION:
-
Peeling back the headliner without supporting it may cause the headliner to bend excessively and create a fold seam. Peel back the headliner while supporting it.

5. Remove the liftgate hinges.
6. Install in the reverse order of removal.
 Liftgate Garnish Removal/Installation
1. Disconnect the negative battery cable..
2. Remove the following parts:
a. Liftgate upper trim.
b. Liftgate side trim.
c. Liftgate recess.
d. Liftgate lower trim.
3. Disconnect the conne ...
 Liftgate Latch And Lock Actuator Inspection
The following actuator and switch are integrated with the liftgate latch
and lock actuator.
From the actuator/switch name and operation in the following table, select
the actua ...
Other materials:
Starter Interlock Switch Inspection [Skyactiv G 2.0]
CAUTION:
Do not reuse the starter interlock switch if it is removed from the vehicle
even once. Replace with a new starter interlock switch when installing.
1. Disconnect the negative battery cable..
2. Disconnect the starter interlock switch connector.
3. Verify that the contin ...
Control System [Full Auto Air Conditioner]
Outline
Refrigerant pressure sensor adopted in which refrigerant pressure is changed
into a linear electric signal and precise information is transmitted.
MS-CAN for communication between the instrument cluster and climate control
unit adopted.
Climate control un ...
License Plate Light Bulb Removal/Installation
1. Disconnect the negative battery cable..
2. Insert a tape-wrapped flathead screwdriver into the clearance between the
lens and license plate light shown in the figure.
3. Move the flathead screwdriver in the direction of the arrow shown in the figure,
pull out the lens from the license ...
