Mazda CX-5 Service & Repair Manual: Ion Sensor
Purpose/Function
-
Detects ion generation in the combustion chamber for detecting pre-ignition.
-
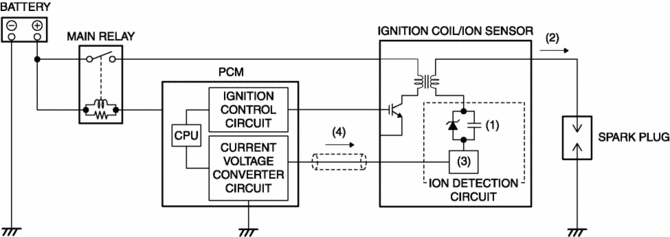
Detects ions which occur due to fuel combustion as current by applying bias voltage to the spark plug, which is amplified in the ignition coil internal circuit and input to the PCM.
Construction
-
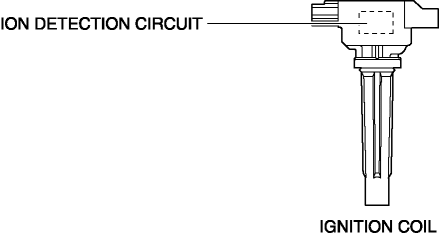
Built into the ignition coil.
Operation
-
Accumulates the secondary current of the ignition coil in bias condenser (1) and detects ion current (2) by applying the bias voltage to the spark plug.
-
Pulls in current (4) increased by current amplification circuit (3) to the ignition coil from the PCM.
-
The PCM measures/converts the current sent to the ignition coil and monitors.
Ion generation mechanism
-
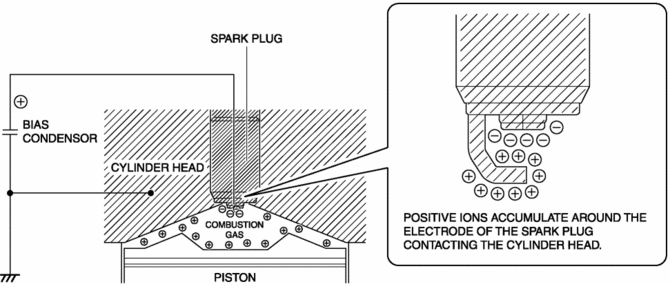
Ions are generated based on: fuel combustion = chemical reaction / disassociation. The generated negative ions move to the center electrode of the spark plug to which bias voltage is applied, positive ions move to the grounded engine wall surface, and then current flows from the spark plug to the ignition coil.
Fail-safe
-
Function not equipped.
 Ion Sensor Inspection
DTC Inspection
1. Connect the M-MDS to the DLC?2.
2. Perform the DTC inspection using the M-MDS..
If any DTC related to the ignition coil/ion sensor is present, repair the
malfunctioning ...
 Lap Pre Tensioner Seat Belt [Two Step Deployment Control System]
Purpose
The lap pre-tensioner seat belts retract and tighten the seat belt webbing
to protect the front passengers during a collision.
Function
The lap pre-tensioner seat belts ...
Other materials:
Lights On Reminder Warning Alarm
Purpose
The lights-on reminder warning alarm notifies the driver that the TNS and
headlights are not turned off.
Function
The instrument cluster receives the following vehicle condition signals via
the CAN signal from the start stop unit and rear body control module (RBCM). ...
Power Window System
Outline
A power window system that enables automatic opening/closing of the door
glass has been adopted.
The driver's side door glass can be opened/closed automatically or manually
by operating the power window main switch.
All the door glass can be opened/closed man ...
Blind Spot Monitoring (Bsm) Warning Alarm
Purpose
The Blind Spot Monitoring (BSM) warning alarm warns the driver of a possible
accident.
Function
If the instrument cluster receives a warning sound request signal from the
BSM control module (RH), it sounds the BSM warning alarm using the buzzer in
the instrument ...
