Mazda CX-5 Service & Repair Manual: Instrument Cluster Removal/Installation
CAUTION:
-
If configuration is not performed when the instrument cluster is replaced with a new one, the vehicle specification information is not stored in the instrument cluster and the system will not operate normally.
-
When performing configuration, it is necessary to read the vehicle specification information from the instrument cluster before replacing it. Connect the M-MDS to the vehicle and perform vehicle identification before removing the instrument cluster. The vehicle specification information is temporarily stored in the M-MDS.
NOTE:
-
The instrument cluster prior to replacement stores the vehicle specification information.
-
A new instrument cluster does not store any vehicle specification information.
-
If the vehicle specification information from the instrument cluster prior to replacement cannot be read, perform the configuration using As-Built data.
1. When replacing the instrument cluster, perform the configuration..
2. Disconnect the negative battery cable..
3. Remove the upper column cover..
4. Remove the meter hood..
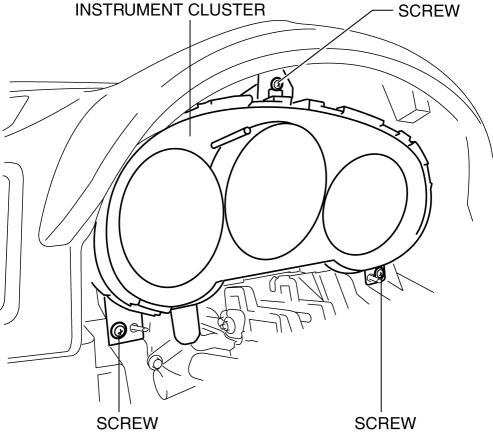
5. Remove the screws.
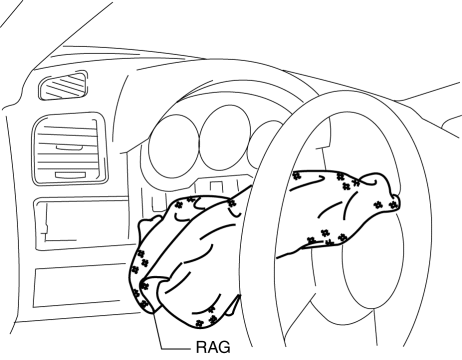
6. Cover the light switch, wiper switch, and start stop unit using a rag to prevent scratches.
CAUTION:
-
When removing the instrument cluster, the instrument cluster may contact the light switch, wiper switch, or the start stop unit and the instrument cluster may be scratched. When removing the instrument cluster, cover the light switch, wiper switch, and start stop unit using a rag.
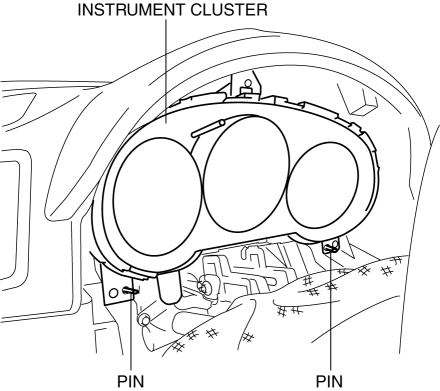
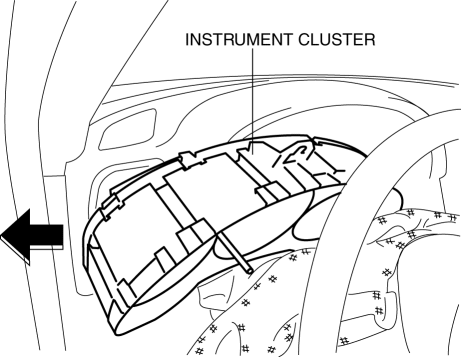
7. Pull the instrument cluster outward to detach it from the instrument panel pins.
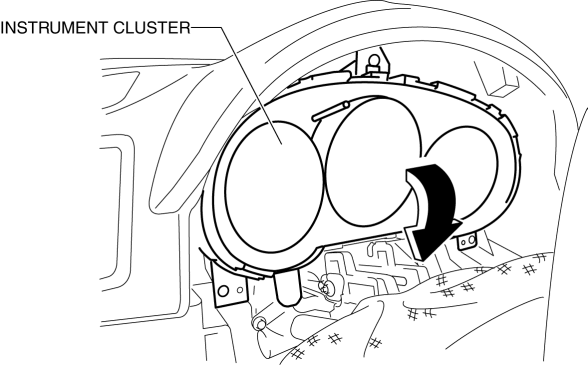
8. Rotate the instrument cluster in the direction of the arrow shown in the figure.
9. Disconnect the connector.
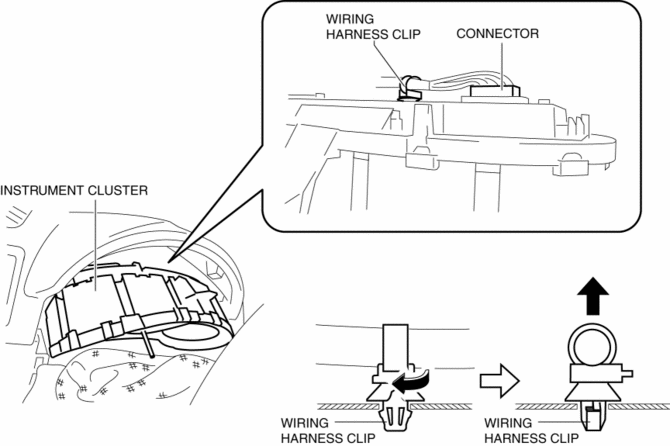
10. Rotate the wiring harness clip approx. 90 degrees, pull it in the direction shown by the arrow in the figure, and disengage the wiring harness clip tab from the instrument cluster.
11. Remove the instrument cluster by sliding it between the instrument panel and the steering.
12. Install in the reverse order of removal.
CAUTION:
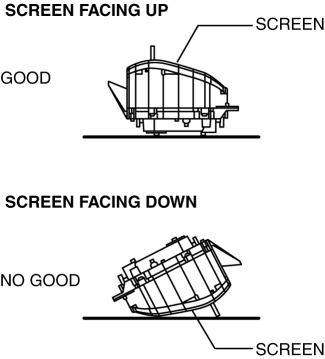
-
If the instrument cluster is left for a long time with its screen facing down, grease applied to the needles may spill and the needles may not operate smoothly. When storing the instrument cluster, store it with its screen facing upward.
NOTE:
-
If configuration cannot be performed by reading/writing of the vehicle specification information, perform the configuration using As-Built information after replacing the instrument cluster..
 Instrument Cluster Operation Record
1. Connect the M-MDS to the DLC-2.
2. After vehicle identification, select the following from the M-MDS initial
screen.
“Operational Record”
3. Then, select the following from th ...
 Instrumentation/Driver Info.
Outline
An LCD has been adopted to the instrument cluster which displays the ambient
temperature, trip computer, and odometer/tripmeter.
A blind spot monitoring (BSM) system has been ...
Other materials:
Eps Control Module Inspection
1. Remove the driver-side front scuff plate..
2. Remove the driver-side front side trim..
3. Remove the car-navigation unit (with car-navigation system)..
4. Remove the switch panel..
5. Remove the decoration panel..
6. Remove the shift lever knob (MTX vehicles)..
7. Remove the selector ...
Power Window Main Switch
Purpose
Remote control of door glass open/close and power outer mirror adjustment
are possible with occupant seated in the cabin.
Function
Power window main switch
Manual
When the power window main switch is operated for manual open/close operation,
it sends ...
Rear Crossmember Removal/Installation [Awd]
WARNING:
Verify that the crossmember is securely supported by a jack. If the rear
crossmember falls off, it can cause serious injury or death, and damage to the
vehicle.
CAUTION:
Performing the following procedures without first removing the rear ABS wheel-speed
sensor ...
