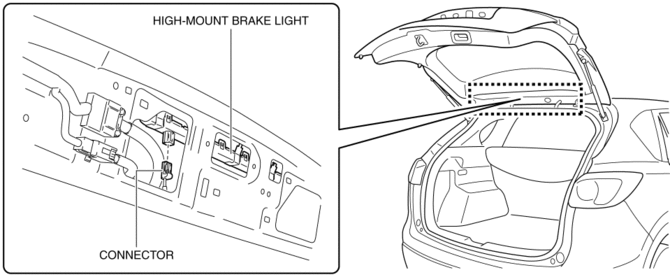
Mazda CX-5 Service & Repair Manual: High Mount Brake Light Removal/Installation
1. Disconnect the negative battery cable..
2. Remove the liftgate upper trim..
3. Remove the rear spoiler..
4. Disconnect the connector.
5. While pressing the high-mount brake light tab in the direction of arrow (1) shown in the figure, press the high-mount brake light in the direction of arrow (2) to detach the high-mount brake light and liftgate.
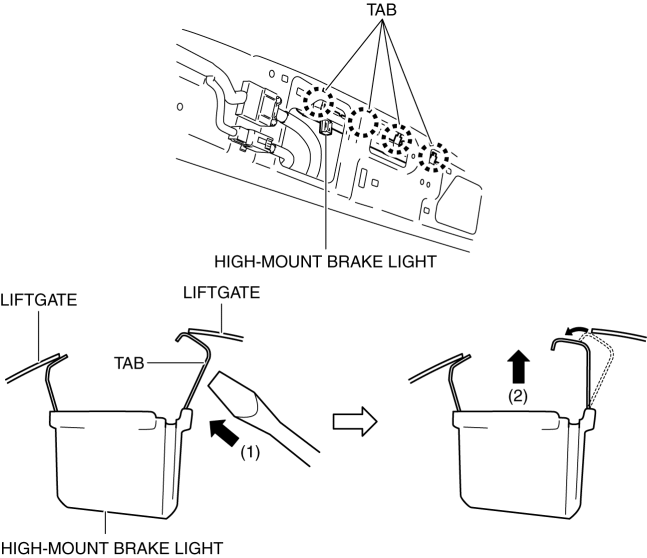
6. Detach all the high-mount brake light tabs and liftgate and remove the high-mount brake light from the liftgate.
CAUTION:
-
If the high-mount brake light is removed from the liftgate, the high-mount brake light may fall off and be damaged. When removing the high-mount brake light from the liftgate, hold the high-mount brake light on the lens side with a hand during servicing.
7. Install in the reverse order of removal.
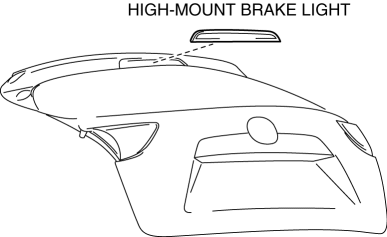
 High Mount Brake Light
Purpose
The high-mount brake light signals vehicles to the rear that the vehicle
is stopped.
Function
The high-mount brake light illuminates in conjunction with the operation
...
 License Plate Light
Purpose
The license plate lights shine light on the license plate during nighttime
driving.
Function
The license plate lights illuminate in conjunction with the operation of
...
Other materials:
Keyless Antenna [Advanced Keyless Entry System]
Purpose
Outputs a request signal and specifies the remote transmitter location.
Function
The keyless antenna outputs request signals to the inside and outside of
the vehicle based on the signals from the LF control unit.
Construction, Operation
The antennas for re ...
Control System [Manual Air Conditioner]
Outline
Refrigerant pressure sensor adopted in which refrigerant pressure is changed
into a linear electric signal and precise information is transmitted.
Climate control unit with enlarged operation dials and switches adopted
Structural View
System Wiring Diagram
...
Front Drive Shaft
Purpose, Function
A bell joint has been adopted for the wheel-side constant velocity joint,
reducing vibration and noise.
A tripod joint have been adopted for the differential side constant velocity
joint to reduce booming noise during high-speed driving and vibration when idlin ...
