Mazda CX-5 Service & Repair Manual: Front Under Cover No.1 Removal/Installation
1. Remove bolts A.
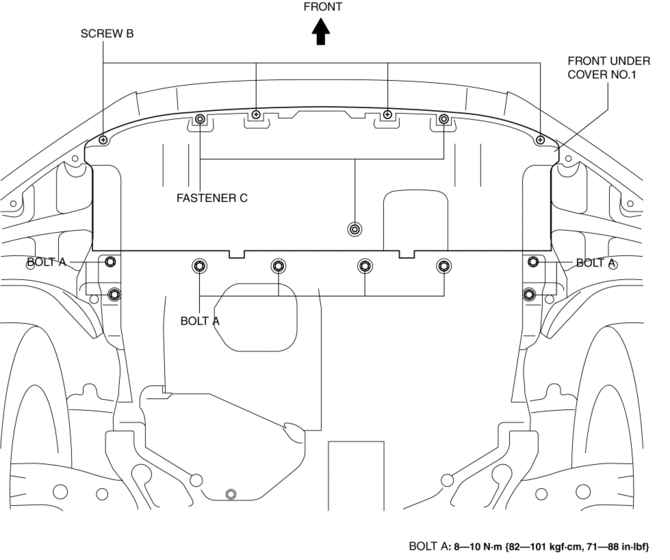
2. Remove screws B.
3. Remove fasteners C.
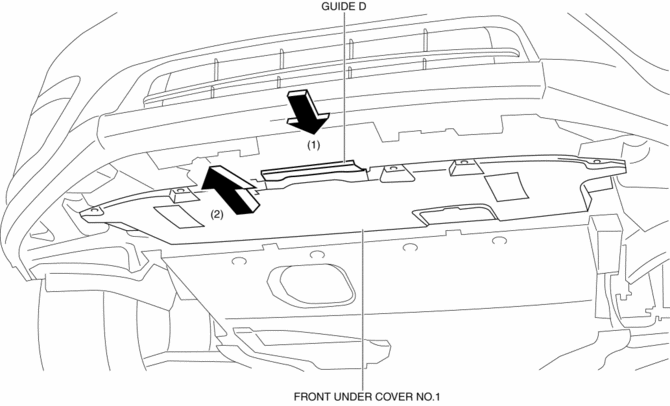
4. Remove the front under cover No.1 in the direction of the arrow in the order of (1), (2) shown in the figure while detaching the guide D.
5. Install in the reverse order of removal.
 Front Over Fender Removal/Installation
1. Remove fastener A.
2. Pull the front over fender lower in the direction of the arrow (1) while removing
hook B and pin C.
3. Remove fasteners D.
4. Pull the front over fender upper ...
 Front Under Cover No.2 Removal/Installation
1. Lift up the vehicle.
2. Remove the front under cover No.1..
3. Remove bolts A.
4. Remove fasteners B.
5. Remove the front under cover No.2.
6. Install in the reverse order of removal. ...
Other materials:
Front Fog Light Switch Inspection
1. Disconnect the negative battery cable..
2. Remove the column cover..
3. Remove the light switch..
4. Verify that the continuity between the light switch terminals is as indicated
in the table.
If not as indicated in the table, replace the light switch.
...
Fuel Gauge Sender Unit Inspection [Awd]
Fuel gauge sender unit (main)
NOTE:
For the fuel gauge sender unit removal/installation, refer to the fuel pump
removal/installation because the fuel gauge sender unit is integrated with the
fuel pump..
1. Verify that the resistance at fuel gauge sender unit (main) terminals D a ...
Engine SST
1: Mazda SST number
2: Global SST number
Example
1:49 UN20 5072
2:205–072
Holder
1:–
2:AKS042808
Adapter
1: 49 UN20 5072
2: 205–072
Holder
1: 49 B011 105
2: –
...
