Mazda CX-5 Service & Repair Manual: Front Fog Light Removal/Installation
1. Disconnect the negative battery cable..
2. Remove the screws and bolt.
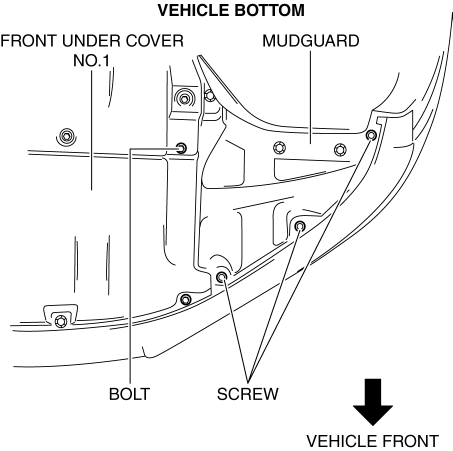
3. Pull up the front under cover No.1 and remove the mudguard screw shown in the figure.
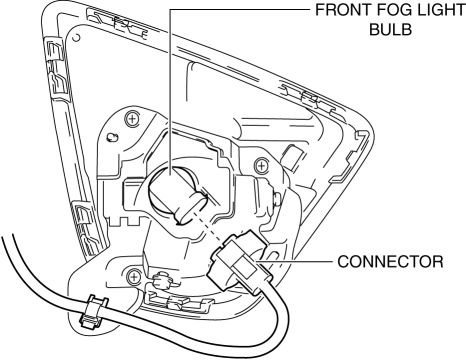
4. Disconnect the connector.
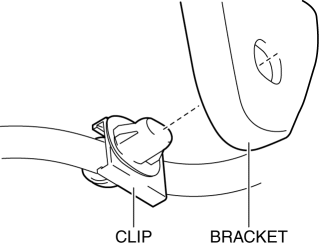
5. While pressing the clip tab in the direction of the arrow (1) shown in the figure, press the clip in the direction of the arrow (2) shown in the figure to detach the clip tab and bracket.
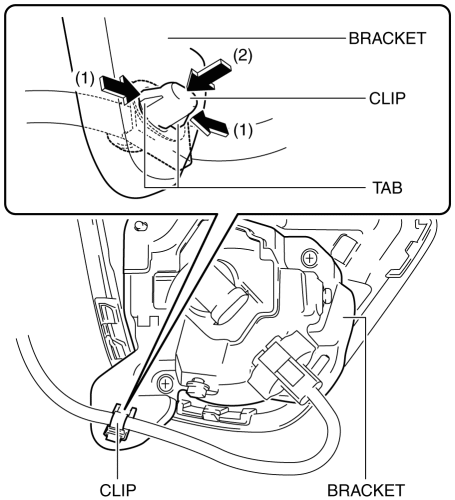
6. Remove the clip.
7. Remove the screws.
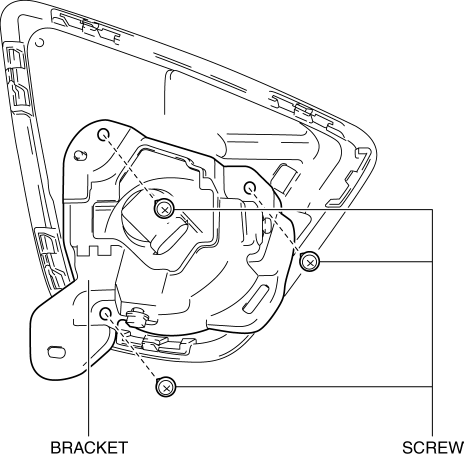
8. Remove the front fog light and bracket.
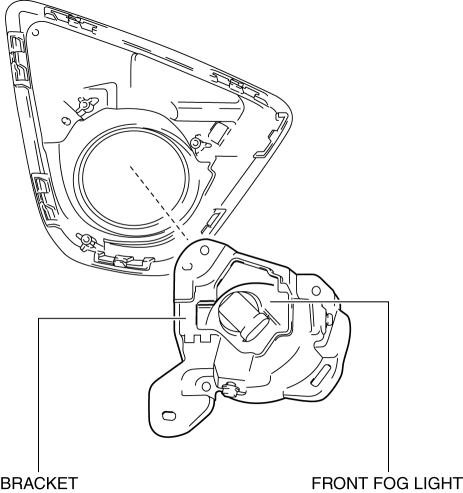
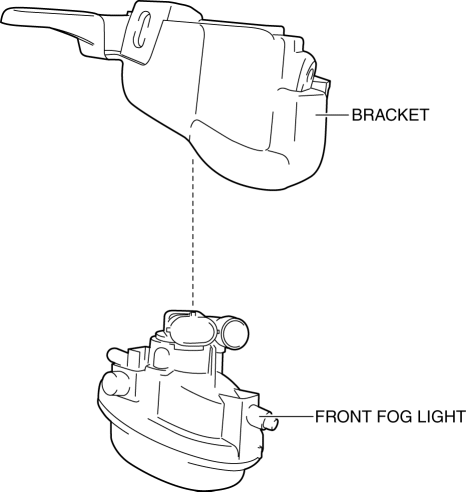
9. Remove the bolt and screw.

10. Remove the front fog light.
11. Install in the reverse order of removal.
12. Adjust the front fog light aiming..
 Front Fog Light Bulb Removal/Installation
1. Disconnect the negative battery cable..
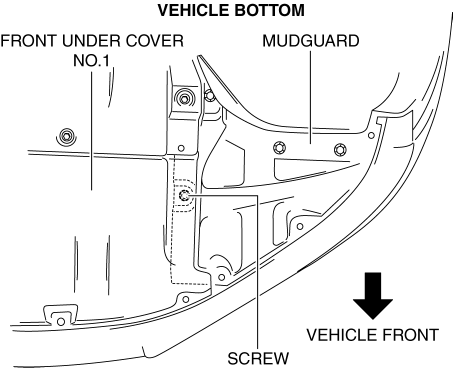
2. Remove the mudguard screws.
3. Disconnect the connector.
4. Rotate the front fog light bulb in the direction of the arrow (1) shown in
the ...
 Front Fog Lights Indicator Light
Purpose
Notifies the user that the front fog lights are illuminated.
Function
Illuminates when the front fog light illumination conditions are met.
Construction
Displa ...
Other materials:
Differential Oil Temperature Sensor Removal/Installation
WARNING:
Hot differential oil may cause severe burns. Do not perform maintenance while
differential oil is hot.
1. Disconnect the negative battery cable.
2. Disconnect the differential oil temperature sensor connector.
3. Remove the differential oil temperature sensor.
4. ...
Outer Mirror Garnish Removal/Installation
1. Disconnect the negative battery cable..
2. Remove the outer mirror glass..
3. Insert a tape-wrapped flathead screwdriver into the upper outer mirror garnish
and remove tab A, B, C, D in the direction of arrow (1).
4. Insert a tape-wrapped flathead screwdriver into the upper outer mirr ...
Refrigerant Pressure Sensor Inspection [Manual Air Conditioner]
1. Install the manifold gauge.
2. Verify the high-pressure side reading of the manifold gauge.
3. Measure the terminal voltage at PCM terminals 2BB, 2AX and 2AJ
4. Using the graph below, measure and verify the terminal voltage at 2AX.
5. Follow the PCM inspection when measuring the other ter ...
