Mazda CX-5 Service & Repair Manual: Front Door Trim Removal/Installation
1. Disconnect the negative battery cable..
2. Remove the inner garnish..
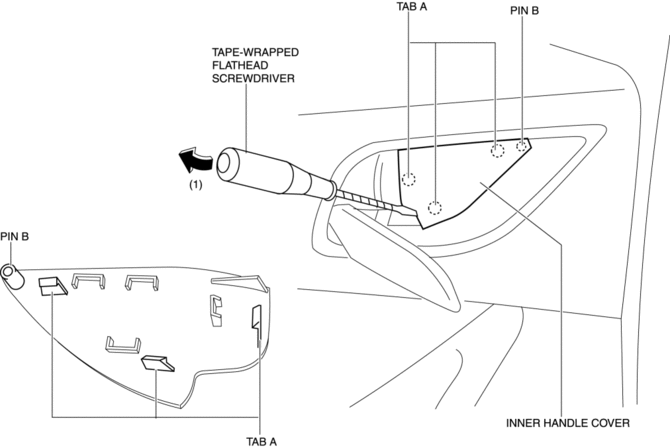
3. Insert a tape-wrapped flathead screwdriver in the position indicated by the arrow (1) in the figure and remove the inner handle cover while detach tabs A, pin B.
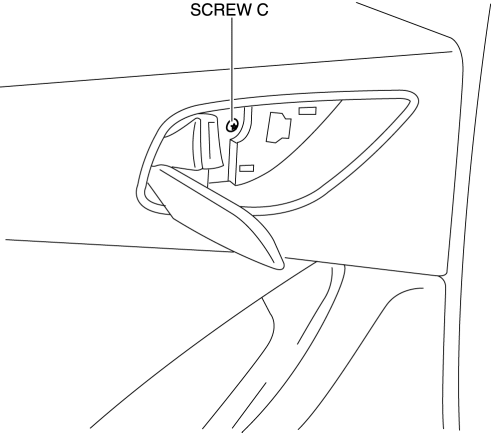
4. Remove the screw C.
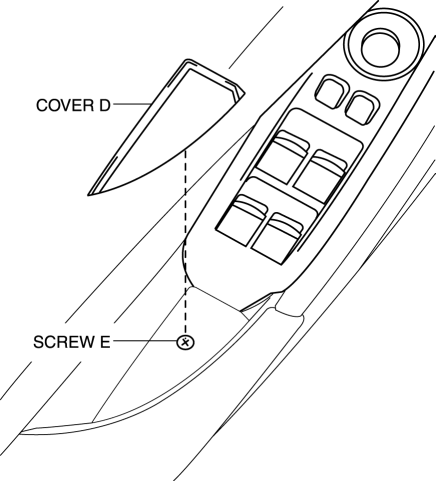
5. Remove the cover D, then remove the screw E.
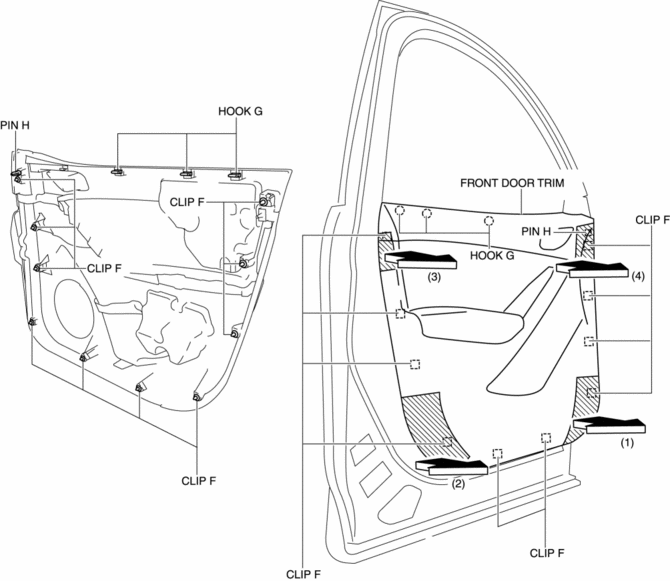
6. Take the shaded area shown in the figure, and pull the front door trim in the direction of the arrow in the order of (1), (2), (3), (4) while detaching clips F, hooks G and pin H.
CAUTION:
-
If the front door trim is removed in the same way as past vehicles by pulling it upward, it could damage clips F, hooks G and pin H. When removing the front door trim, always pull it in the direction of the arrow shown in the figure.
7. Remove the tab I in the direction of the arrow (5) shown in the figure.
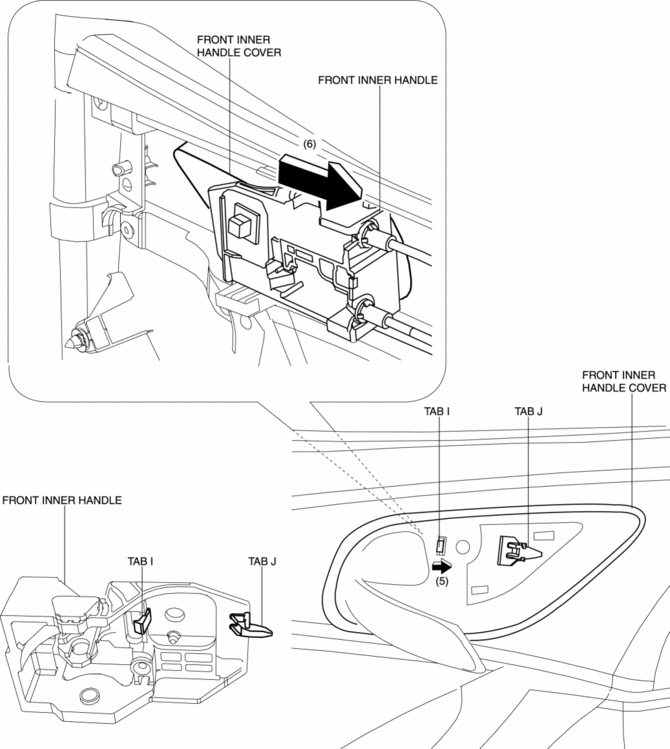
8. Remove the front inner handle in the direction of the arrow (6) shown in the figure while detaching the tab J.
9. Disconnect the power window main switch connector (driver-side) or power window subswitch connector (passenger-side).
10. Install in the reverse order of removal.
 Front Door Trim Disassembly/Assembly
Driver-side
1. Disassemble in the order shown in the figure.
1
Switch panel cover
2
Power window main switch
(See Power Window Main Switch ...
 Front Sash Molding Installation
WARNING:
Using a utility knife with bare hands can cause injury. Always wear gloves
when using a utility knife.
NOTE:
Double-sided adhesive tape has already been attached to t ...
Other materials:
Air Intake Actuator Inspection [Manual Air Conditioner]
1. Connect battery positive voltage to air intake actuator terminal B (or C),
connect terminal C (or B) to ground, and then verify that the air intake actuator
operates as shown in the table.
If the operation condition is not normal, replace the air intake actuator.
...
Odometer/Tripmeter
Purpose
The odometer/tripmeter notifies the user of the total travel distance or
the traveled distance over a specific interval.
Function
The instrument cluster calculates the traveled distance based on the traveled
distance signal from the PCM and displays it.
The ...
Exterior Lighting Systems
Outline
Projector type headlights have been adopted to the front combination lights.
Auto-light system has been adopted in which TNS and headlights automatically
and optimally illuminate and turn off. (with auto light system)
An AFS system has been adopted which changes the ...
