Mazda CX-5 Service & Repair Manual: Front Door Speaker Removal/Installation
Without Bose®
NOTE:
-
If the procedure is performed while holding the front door speaker cone, it could deform the cone causing a malfunction. Therefore, perform the procedure while holding any part other than the cone.
1. Disconnect the negative battery cable..
2. Remove the following parts:
a. Inner garnish.
b. Front door trim.
3. Disconnect the connector.
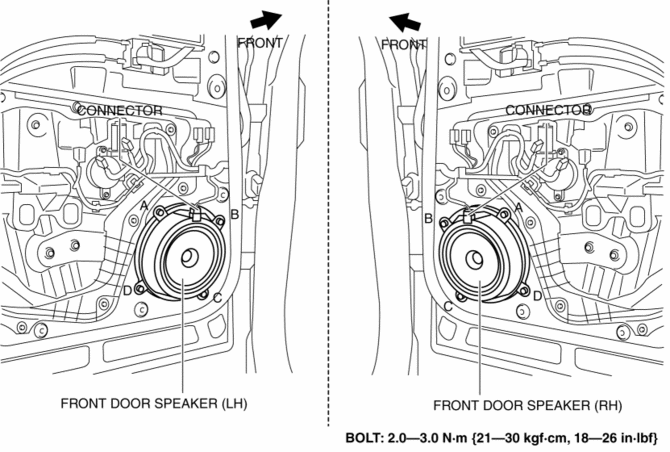
4. Remove the bolts in alphabetical order.
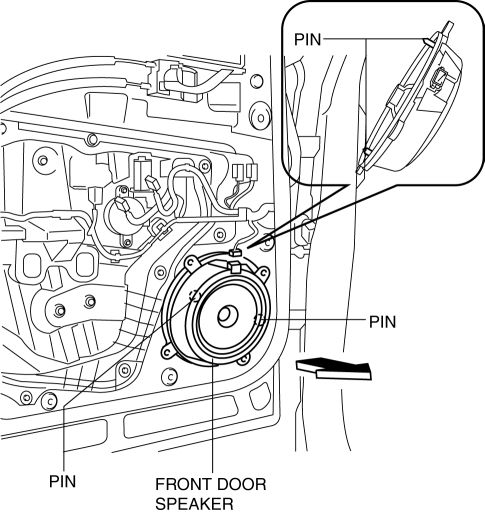
5. Pull the front door speaker in the direction of the arrow shown in the figure and remove it while detaching the pins.
6. Install in the reverse order of removal.
With Bose®
1. Disconnect the negative battery cable..
2. Remove the following parts:
a. Inner garnish.
b. Front door trim.
3. Disconnect the connector.
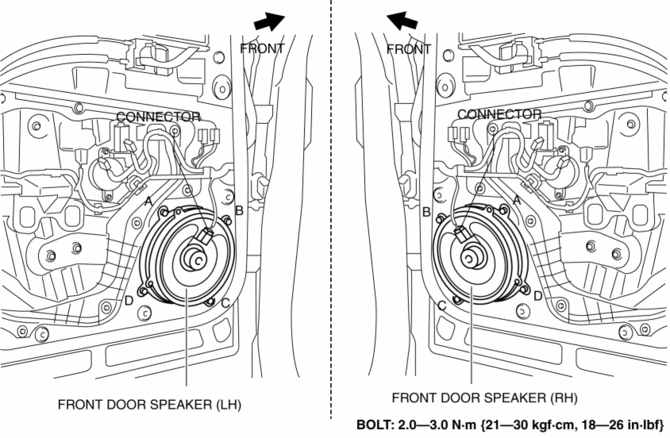
4. Remove the bolts in alphabetical order.
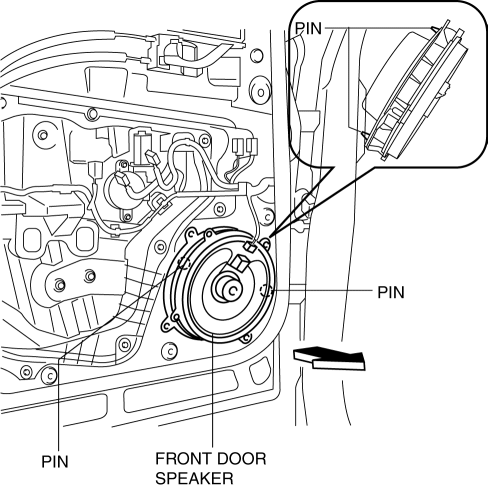
5. Pull the front door speaker in the direction of the arrow shown in the figure and remove it while detaching the pins.
6. Remove the screws.
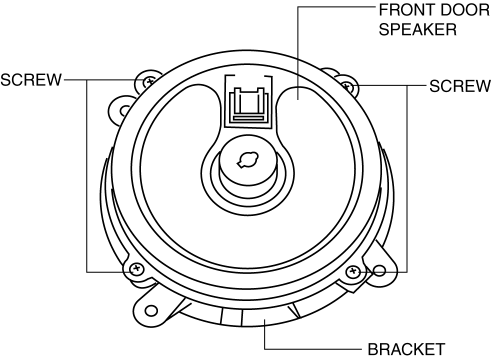
7. Remove the front door speaker from the bracket.
8. Install in the reverse order of removal.
 Front Door Speaker Inspection
1. Disconnect the negative battery cable..
2. Remove the following parts:
a. Inner garnish.
b. Front door trim.
3. Disconnect the front door speaker connector..
4. Verify that the resistance ...
 Glass Antenna
Purpose, Function
The RDS (Radio Data System) converts radio broadcast waves to electric signals
and sends the signals to the audio unit.
Construction
An antenna with excellent ...
Other materials:
Front Body Control Module (Fbcm) Inspection
1. Remove the fuse box cover..
2. Remove the front body control module (FBCM) from the fuse box..
3. Verify that the voltages of each of the terminals are as indicated in the
Terminal Voltage Table (Reference).
If the voltage is not as indicated in the table, inspect the parts under
...
Liftgate Lower Trim Removal/Installation
1. Remove the following parts:
a. Liftgate upper trim.
b. Liftgate side trim.
c. Liftgate recess.
2. Remove fasteners A.
3. Take the shaded area shown in the figure, and pull the liftgate lower trim
in the direction of the arrow in the order of (1), (2), (3), (4) and remove it while ...
Audio Pilot®2 Microphone Removal/Installation
NOTE:
AudioPilot®2 is a registered trademark of Bose® Corporation.
1. Disconnect the negative battery cable..
2. Remove the following parts:
a. Driver-side front scuff plate.
b. Driver-side front side trim.
c. Switch panel.
d. Decoration panel.
e. Shift lever knob (MTX). ...
