Mazda CX-5 Service & Repair Manual: Front Door Key Cylinder Removal/Installation
1. Disconnect the negative battery cable..
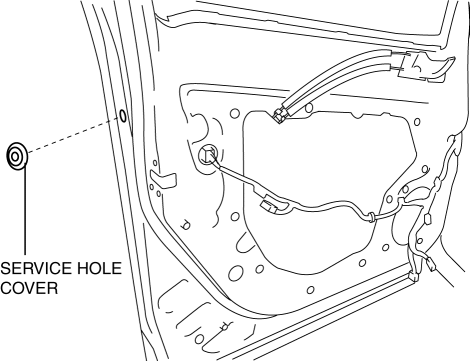
2. Remove the service hole cover.
3. Detach the screw from the front door key cylinder.
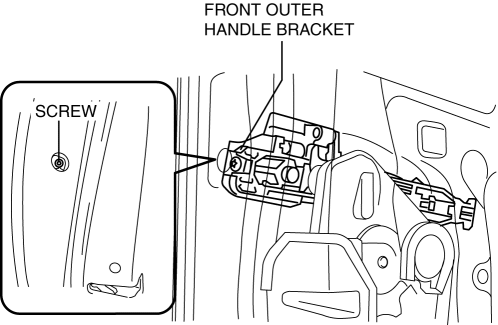
NOTE:
-
The screw cannot be removed because the front outer handle bracket has a stopper which prevents the screw from falling.
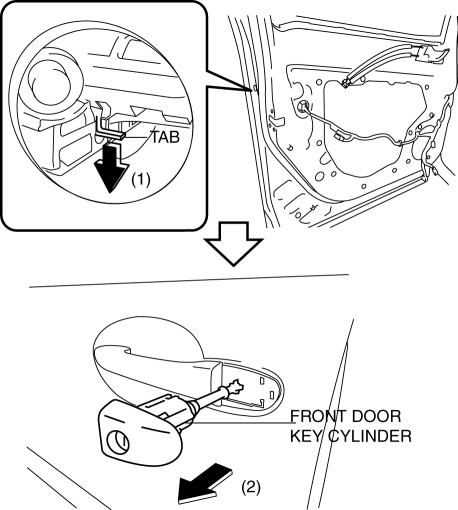
4. While pressing the outer handle bracket tab in the direction of arrow (1) shown in the figure, pull the front door key cylinder in the direction of arrow (2) to detach the outer handle bracket and the front door key cylinder.
5. Remove the front door key cylinder from the outer handle bracket.
6. Insert a tape-wrapped flathead screwdriver into the position shown in the figure.

7. Move the tape-wrapped flathead screwdriver in the direction of the arrow shown in the figure to lift up the collar cap, and detach the collar cap from the front door key cylinder tab.
8. Remove the collar cap from the front door key cylinder.
9. Install in the reverse order of removal.
 Front Door Hinge Removal/Installation
1. Disconnect the negative battery cable..
2. Remove the following parts:
a. Front bumper.
b. Front combination light.
c. Front bumper slider.
d. Front over fender.
e. Front fender panel. ...
 Front Door Key Cylinder Switch Inspection
1. Perform the front door glass preparation..
2. Disconnect the negative battery cable..
3. Remove the following parts:
a. Inner garnish.
b. Front door trim.
c. Front door key cylinder.
d. ...
Other materials:
Clutch Pipe And Hose Removal/Installation [C66 M R]
CAUTION:
Do not allow clutch fluid to get on a painted surface. Clutch fluid contains
properties which can dissolve the paint. If clutch fluid gets on a painted surface,
wash it off with water immediately and wipe the area off completely.
1. Disconnect the negative battery cable. ...
Rear Drive Shaft Inspection
1. Inspect each connecting part for looseness.
Tighten or replace parts if necessary.
2. Inspect the dust boot on the drive shaft for cracks, damage, leaking grease,
and looseness in the boot band.
3. Inspect the drive shaft for bends, cracks, and wear in the joints or ...
Climate Control Unit Inspection [Manual Air Conditioner]
1. Remove the climate control unit with the connector connected..
2. Switch the ignition ON (engine off or on).
3. Connect the negative (-) lead of the tester to the body ground.
4. By inserting the positive (+) lead of the tester into the climate control
unit connector, measure the voltage ...
