Mazda CX-5 Service & Repair Manual: Front Console Removal/Installation
CAUTION:
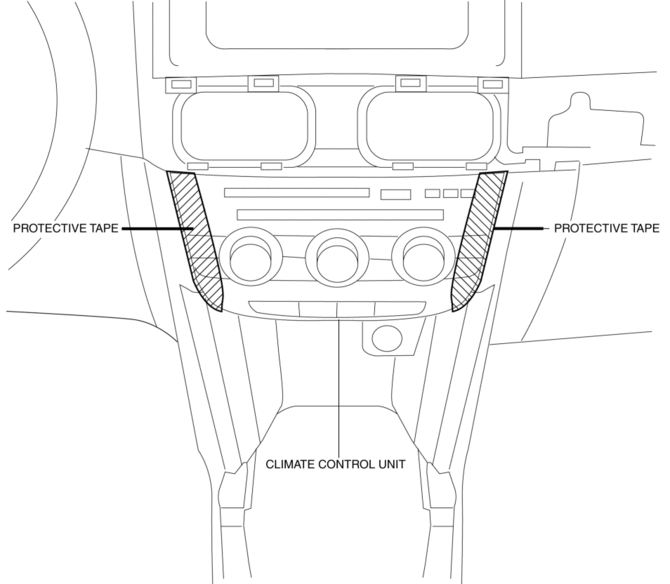
-
Affix protective tape to the position shown in the figure.
1. Disconnect the negative battery cable..
2. Remove the following parts:
a. Decoration panel.
b. Shift lever knob (MTX).
c. Front console box.
d. Shift panel.
e. Upper panel.
f. Rear console.
g. Side wall.
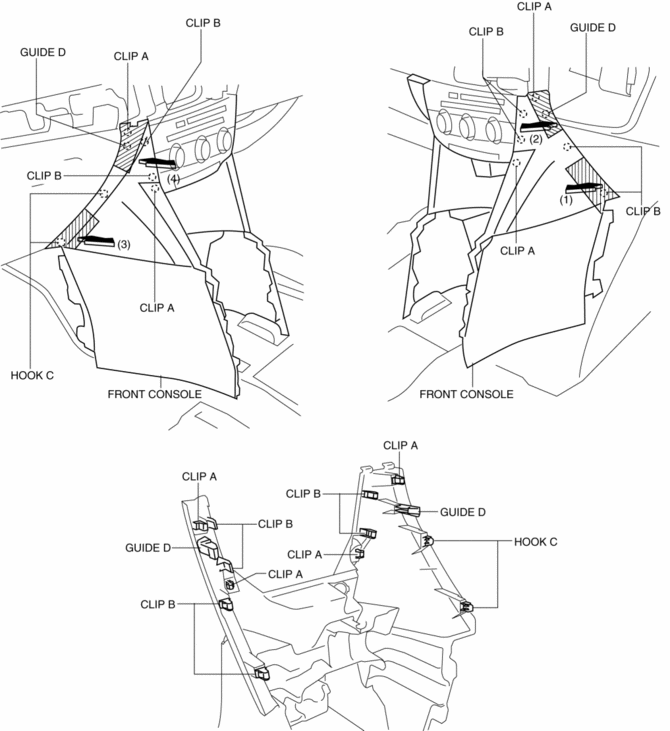
3. Take the shaded area shown in the figure, and remove the front console in the direction of the arrow in the order of (1), (2), (3), (4) while detaching clips A, clips B, hooks C, guides D.
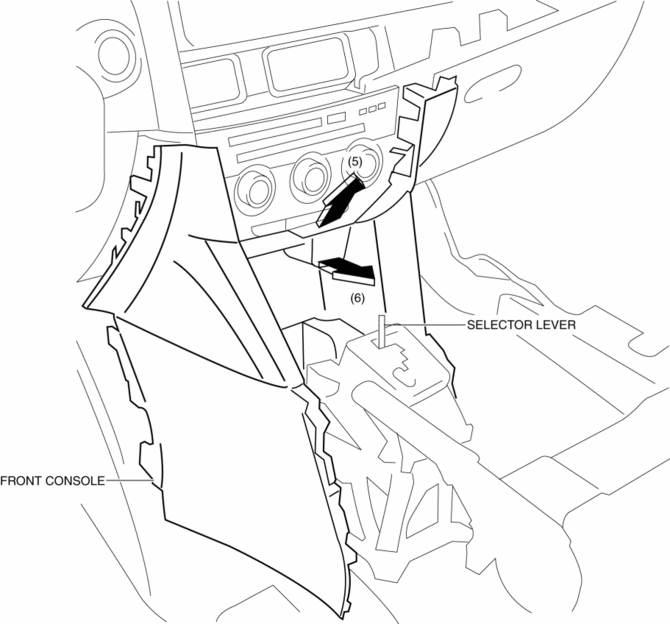
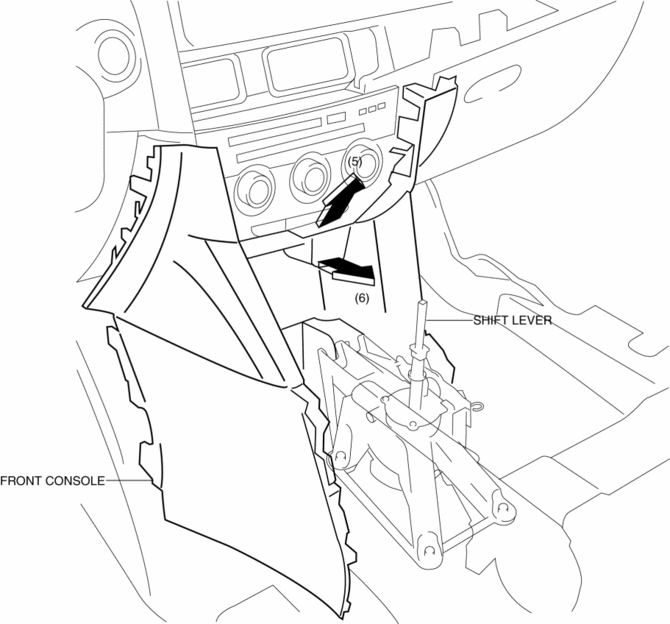
4. Disconnect the front accessory socket connector.
5. Pull the front console in the direction of the arrow in the order of (5), (6) and remove the front console while detaching the selector lever (ATX) or shift lever (MTX).
ATX
MTX
6. Install in the reverse order of removal.
 Front Console Box Removal/Installation
NOTE:
Affix protective tape to the position shown in the figure.
1. Insert a tape-wrapped flathead screwdriver in the position indicated by the
arrow in the figure and detach cl ...
 Glove Compartment Removal/Installation
1. Push the glove compartment in the direction of the arrow (1) and remove hooks
A.
2. Pull the stay damper in the direction of the arrow (2) shown in the figure
and remove the hook B.
CAU ...
Other materials:
High Clutch [Fw6 A EL, Fw6 Ax EL]
Purpose/Function
The high clutch operates in 4GR, 5GR, and 6GR and intermittently operates
the rear carrier by drive force from the turbine shaft.
For the high clutch, a centrifugal balance clutch has been adopted to prevent
clutch drag and to assure stabilized piston thrust in ...
Map Light Inspection
Front Map Light
1. Disconnect the negative battery cable..
2. Remove the front map light..
3. Verify that the continuity between the front map light terminals is as indicated
in the table.
If not as indicated in the table, replace the front map light or front map
light bulb ...
Cylinder Block
Purpose, Function
The cylinder block forms the cylinder and crankcase.
Construction
The cylinder block consists of the upper cylinder block and lower cylinder
block.
The cylinder block is an open deck type with excellent cooling performance.
The lightweight cyl ...
