Mazda CX-5 Service & Repair Manual: Front Combination Light Removal/Installation
WARNING:
-
Incorrect servicing of the discharge headlights could result in electrical shock. Before servicing the discharge headlights, always refer to the service warnings..
NOTE:
-
Fogging or condensation on the inside of the front combination lights may occur due to a natural phenomenon occurring as a result of a temperature difference between the interior and exterior of the combination lights. However, it has no effect on the light performance because the temperature inside the front combination lights rises after illuminating the headlights or a period of time has elapsed.
1. Disconnect the negative battery cable..
2. Remove the front bumper..
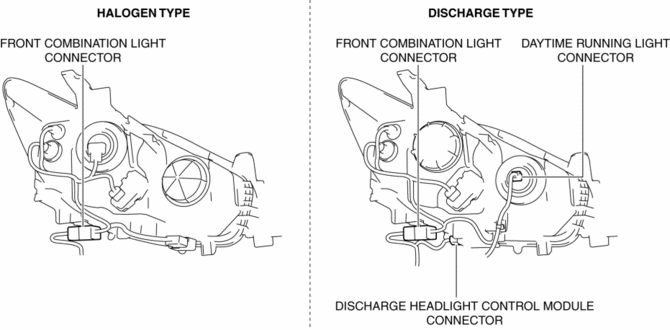
3. Disconnect the connector.
4. While pressing the clip tab in the direction of the arrows (1) shown in the figure, press the clip in the direction of the arrow (2) shown in the figure to detach the clip tab and front combination light (LH of discharge type).
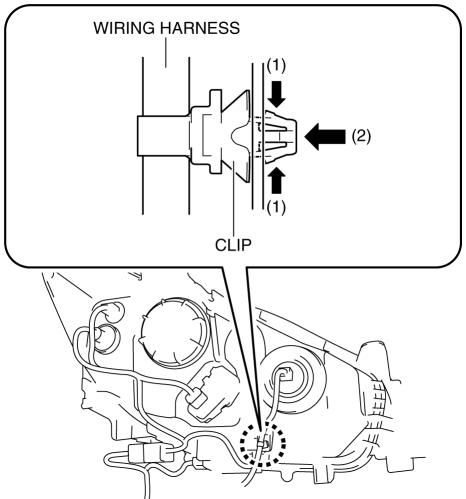
5. Remove the clip (LH of discharge type).
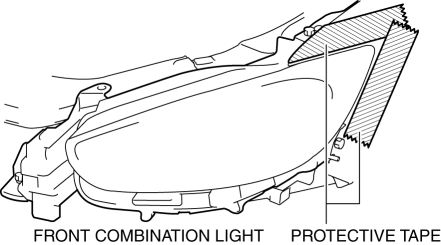
6. To prevent scratches or damage, affix protective tape to the position shown in the figure.
CAUTION:
-
When the front combination light is removed from the body, perform the procedure after affixing protective tape to the body. Otherwise, the body could interfere with the front combination light and cause scratching or damage to the body.
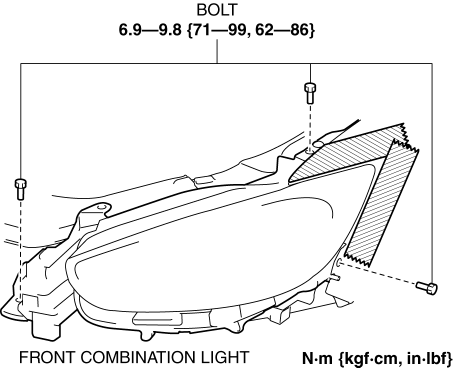
7. Remove the bolts.
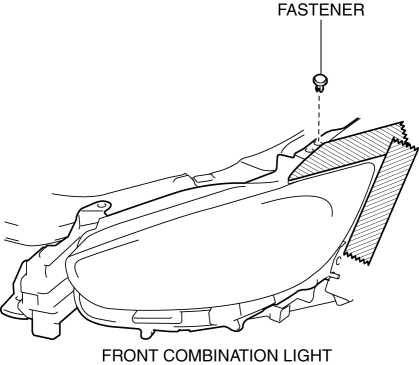
8. Remove the fastener.
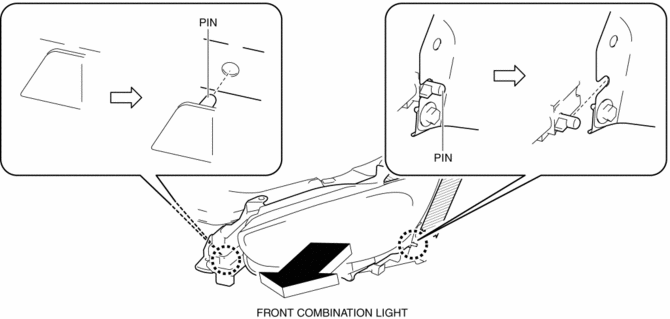
9. Pull the front combination light in the direction of the arrow shown in the figure and pull out the front combination light pin from the body.
10. Remove the front combination light.
11. Install in the reverse order of removal.
12. Adjust the headlight aiming..
 Front Combination Light Disassembly/Assembly
1. Disassemble in the order shown in the figure.
Halogen type
1
Short cord
(See Short Cord Removal Note.)
2
Parking/Front turn light bulb
...
 Front Fog Light
Purpose
By shining light in a wider area in front of the vehicle than the light from
the headlights, visibility during poor weather conditions, such as rain and
fog, has been improved. In ...
Other materials:
Key Warning Light (Red)/Key Indicator Light (Green)
Purpose
KEY warning light (red)
The KEY warning indicator light (red) notifies the user that the engine cannot
be started, the remote transmitter is outside of the vehicle, or that there
is a malfunction in the system.
KEY indicator light (green)
The KEY indicator light (g ...
Wiper/Washer System
Outline
The following wiper/washer system has been adopted.
Windshield wiper system
Rear wiper system
Auto wiper system (with auto wiper system)
Washer fluid-level sensor (with washer fluid-level sensor)
Specification
Windshiel ...
Liftgate Lower Trim Removal/Installation
1. Remove the following parts:
a. Liftgate upper trim.
b. Liftgate side trim.
c. Liftgate recess.
2. Remove fasteners A.
3. Take the shaded area shown in the figure, and pull the liftgate lower trim
in the direction of the arrow in the order of (1), (2), (3), (4) and remove it while ...
